In this guide, you will find out how to configure cameras in the Ampio UNI application, on the example of HIKVISION cameras.
The first step is logging into your camera by entering its IP address into the browser. If you do not know the camera’s IP address, you can use the tool that helps with searching for devices linked to the same network. The cameras' manufacturer recommends the SADP tool that is available on the manufacturer’s website.
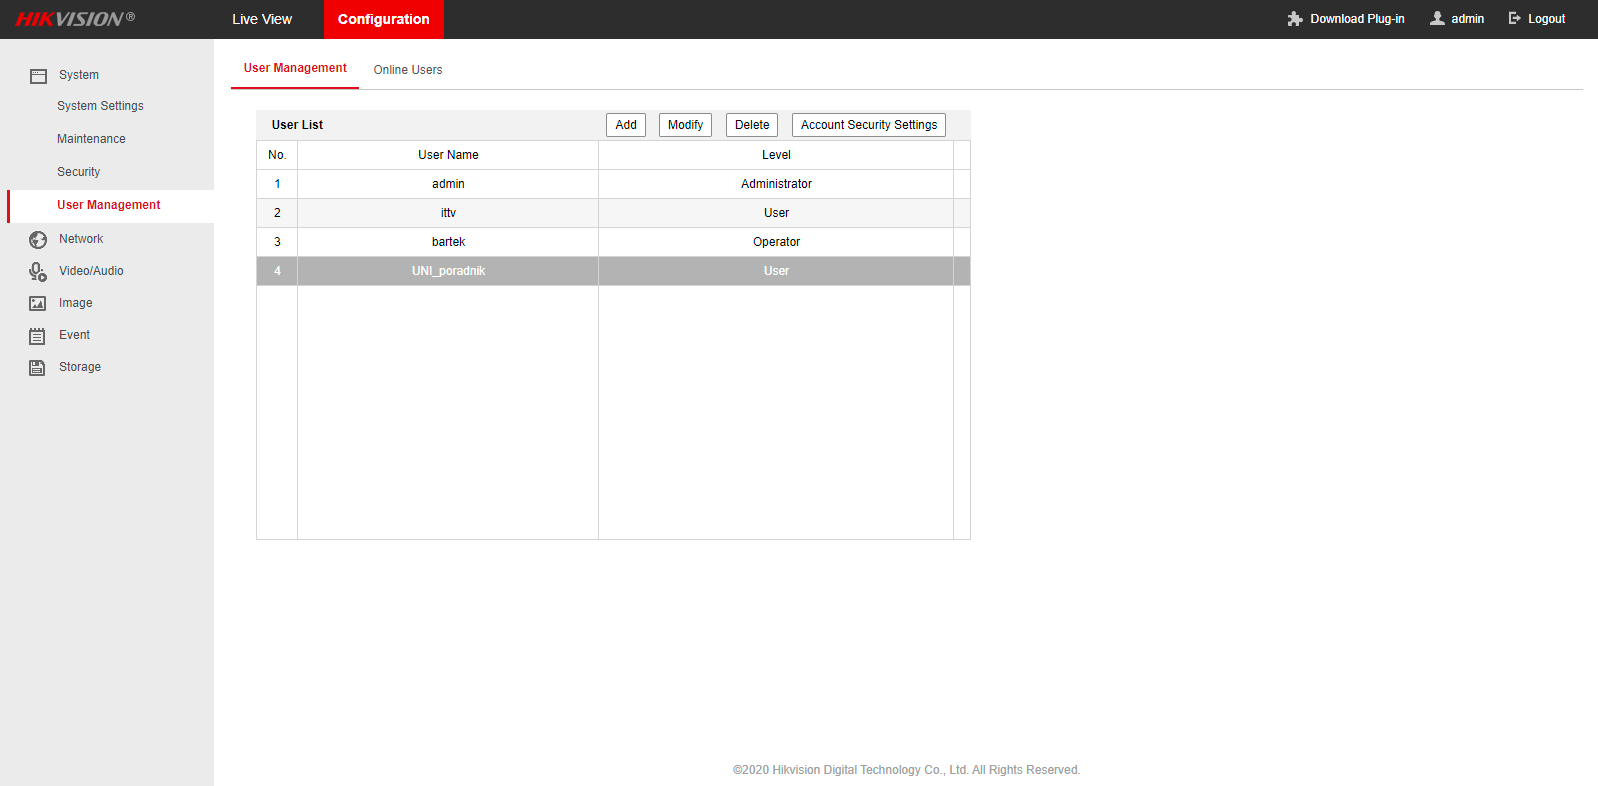
Once you enter the camera’s IP address, you will be taken to a sign-in screen. After logging in, open the Configuration tab and then go to User Management.
Depending on the specifications of the used camera, only one/a couple of users may simultaneously use the image transmission. Therefore, if the camera’s specs allow more than one substreams at the same time, you should create a separate HIKVISION user for each Ampio UNI user. It should be borne in mind that in such a case the same Ampio UNI user may not be logged into a couple of different devices at the same time, because image from the camera will be visible only on one of them.
In a nutshell:
For the purpose of this manual, a new user has been created, as presented below.
 Click to enlarge and open in a new tab.
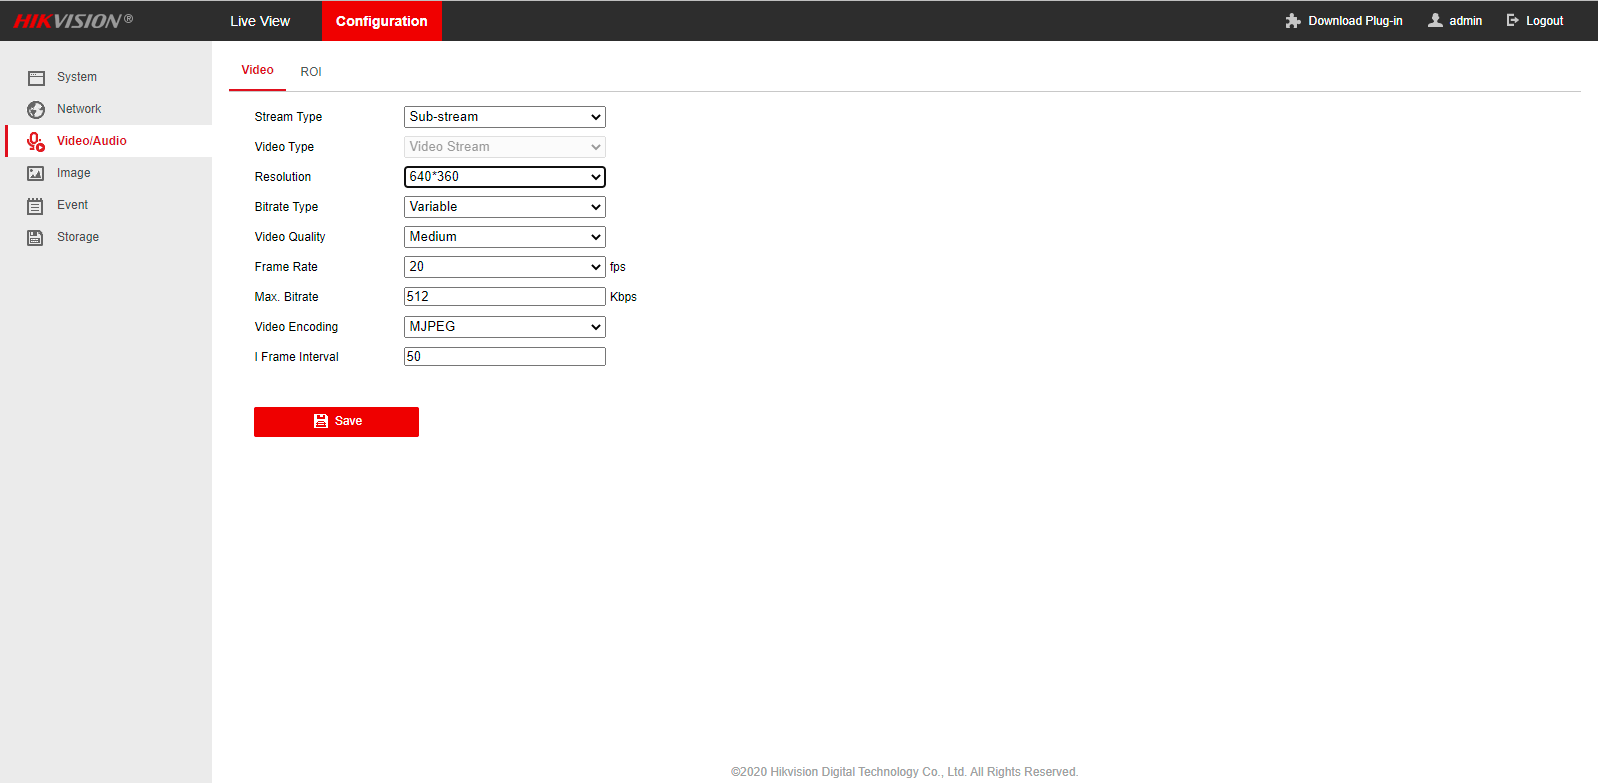
The next step is to go to the Video/Audio tab. For the image to be smooth in the Ampio UNI app, you should apply the sub-stream configuration shown below:
 Click to enlarge and open in a new tab.
Now, save and close the browser.
Your IP address will be available under the following address:
http://[login]:[password]@[camera’s IP address]/ISAPI/streaming/channels/102/httpPreview
To check if the link is working, complete the relevant details and open it in a browser.
For example:
http://UNI_poradnik:trudnehaslo123@111.222.33.444/ISAPI/streaming/channels/102/httpPreview
where:
[login] - UNI_poradnik
[password] - trudnehaslo123
[camera’s IP address] - 111.222.33.444
Open the Smart Home Manager and create a new object by clicking on Add in the Objects tab. Set the server as a default Device, add a name to the object and open Settings. As a type, select Camera from the list.
 Click to enlarge and open in a new tab.
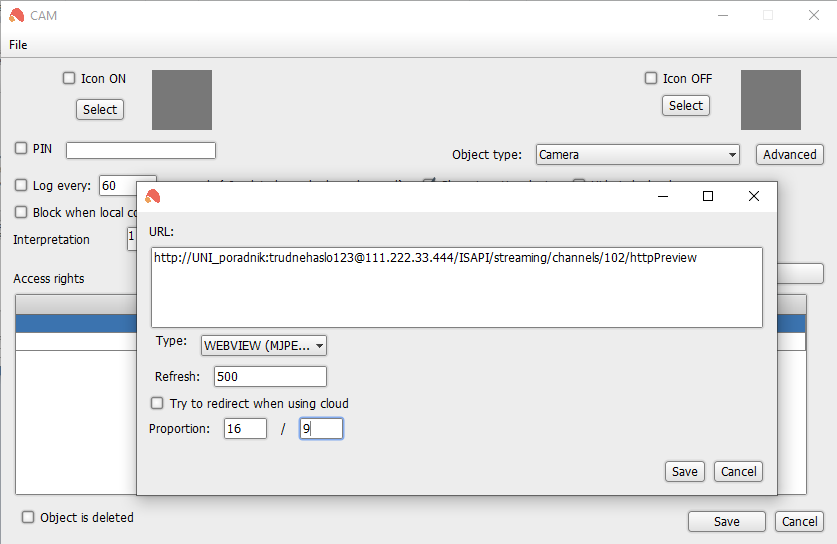
Go to Advanced and paste the link from your image source, and then select the WEBVIEW(MJPEG) type from the list. If you want the image from the camera to attempt transmitting also when connecting via the cloud, tick “Try to redirect when using cloud” (WEBVIEW). Lastly, set the ratio to adjust the object size to your camera’s image. In order to see the ratio changes you have to restart the application after each modification.
 Click to enlarge and open in a new tab.
Save and select which Ampio UNI users will have access to your object. Only one substream can be accessed at the same time in the camera, regardless of the user connected. If, however, you do have the option to view multiple streams at the same time, remember to grant access to the object only to one user, and them repeat the process of recreating an object in the Smart Home Manager for every other user by pasting different http links with the specific user’s camera login details.
Lastly, add the created object to any of your groups and save the settings on the server. Observe the end result:
