An MR-T-s module is used to regulate the temperature in rooms, it allows one to control multiple heating zones (from 1 to 32) and it makes it possible to create schedules and automate the heating system.
Use the Ampio Designer application for the configuration process.
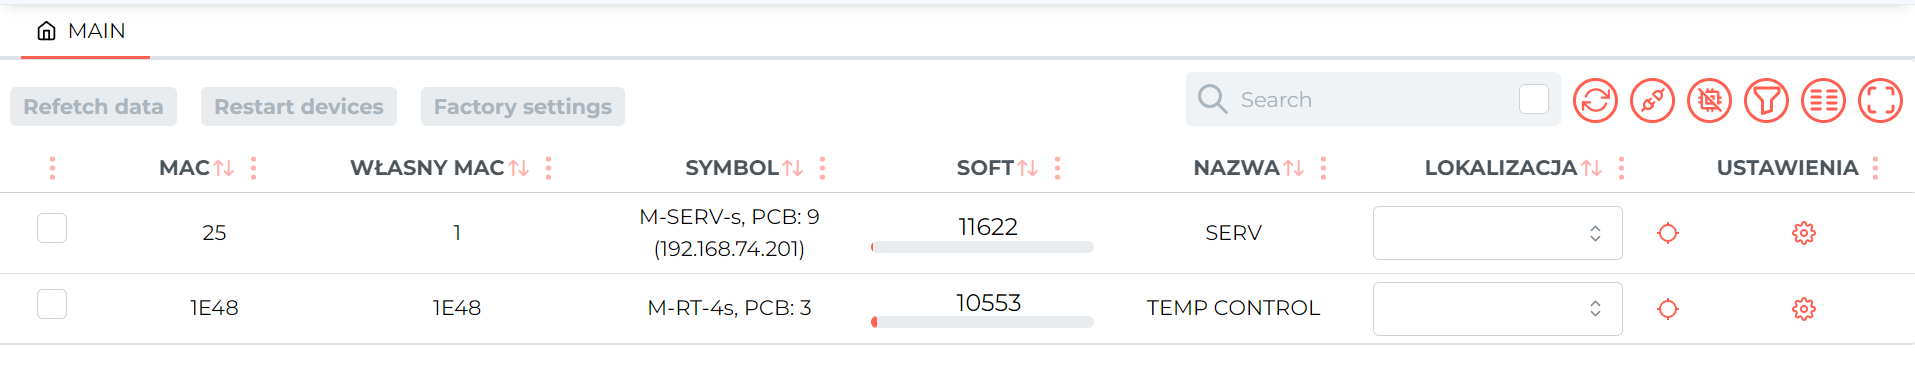
In the list of modules, select a module from the M-RT family and navigate to the options (gear icon).
 Click to enlarge and open in a new tab.
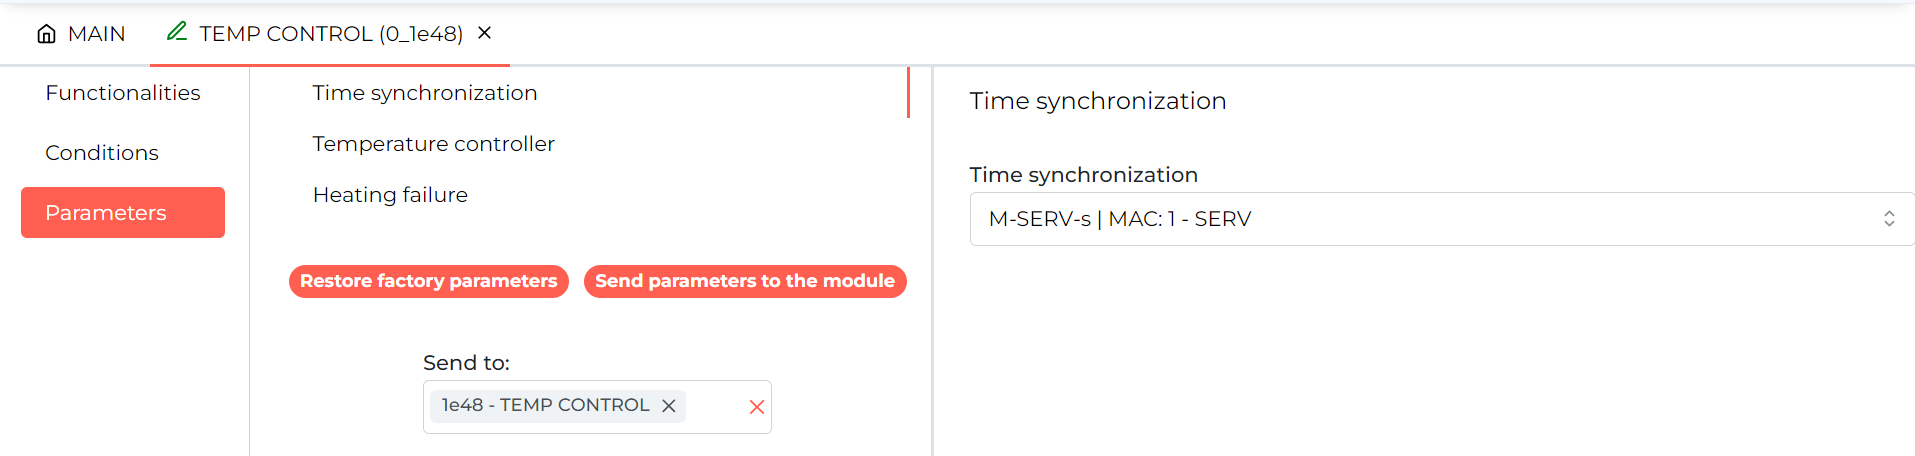
After accessing the Parameters tab, you can, among other things, synchronise the time with another module (e.g. from the M-SERV family).
 Click to enlarge and open in a new tab.
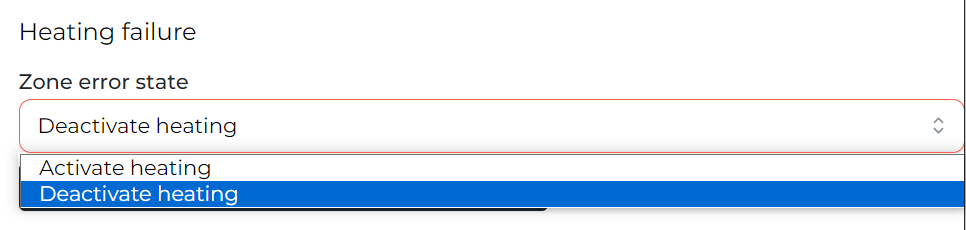
It is also possible to set the controller’s response behaviour in the event of a faulty temperature sensor in the Heating Failure sub-tab.
 Click to enlarge and open in a new tab.
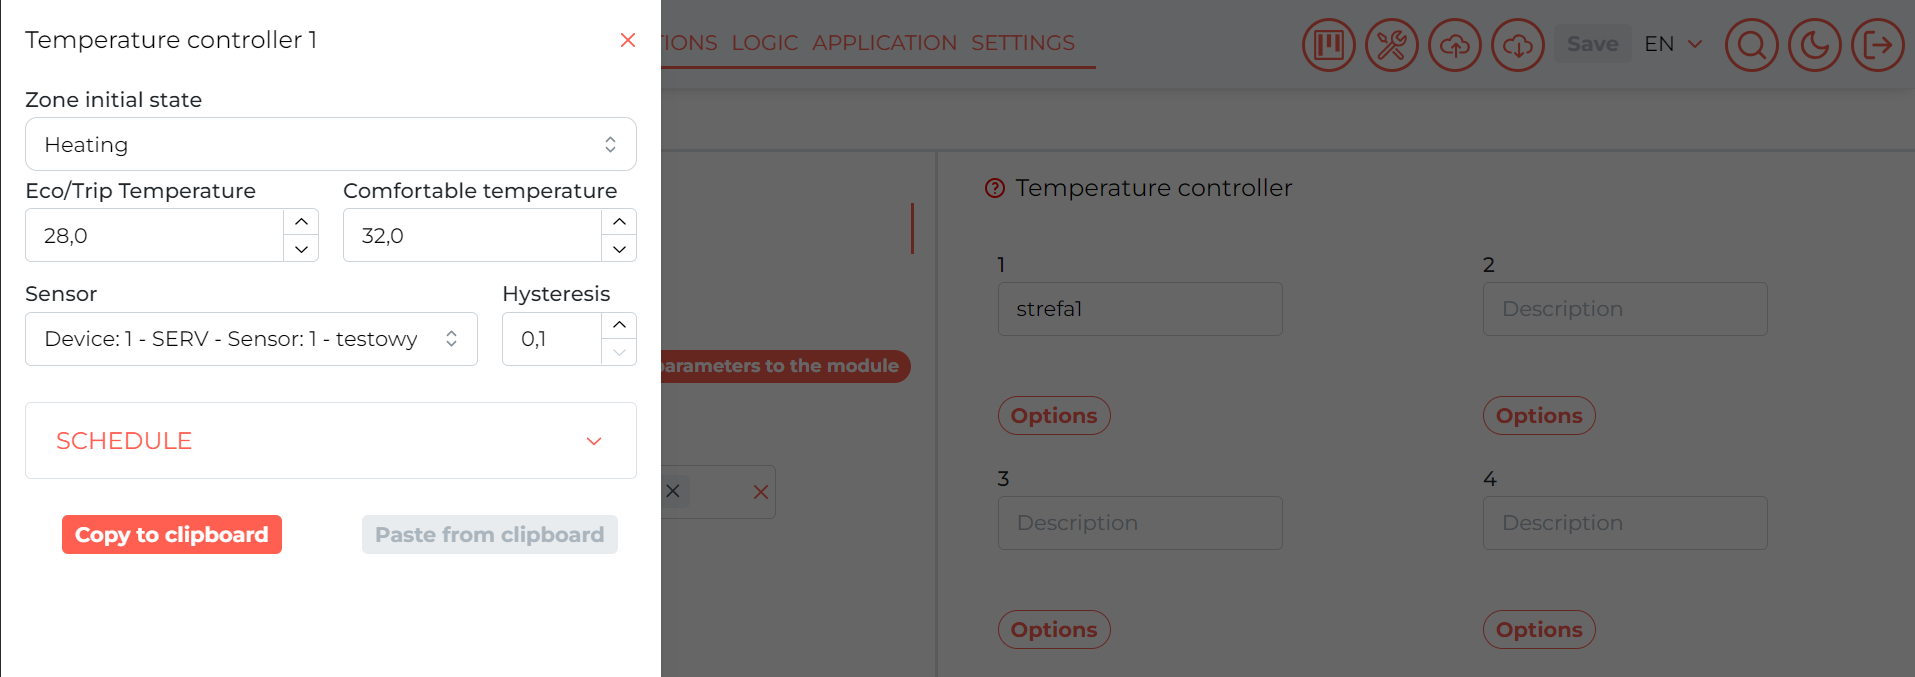
In the sub-tab Temperature controller you can see, among other things, all available zones, you can give them a name, select the type of controller for the zone, and select the module from the CAN network from which the current temperature will be read. Next, you select the number of the temperature sensor for this module. Based on the data from the sensor, the controller manages the heating in the zone. You can enter the desired temperature for day and night (Comfort and Economic). Then, modify the hysteresis affecting the rate of switching the heating on/off.
 Click to enlarge and open in a new tab.
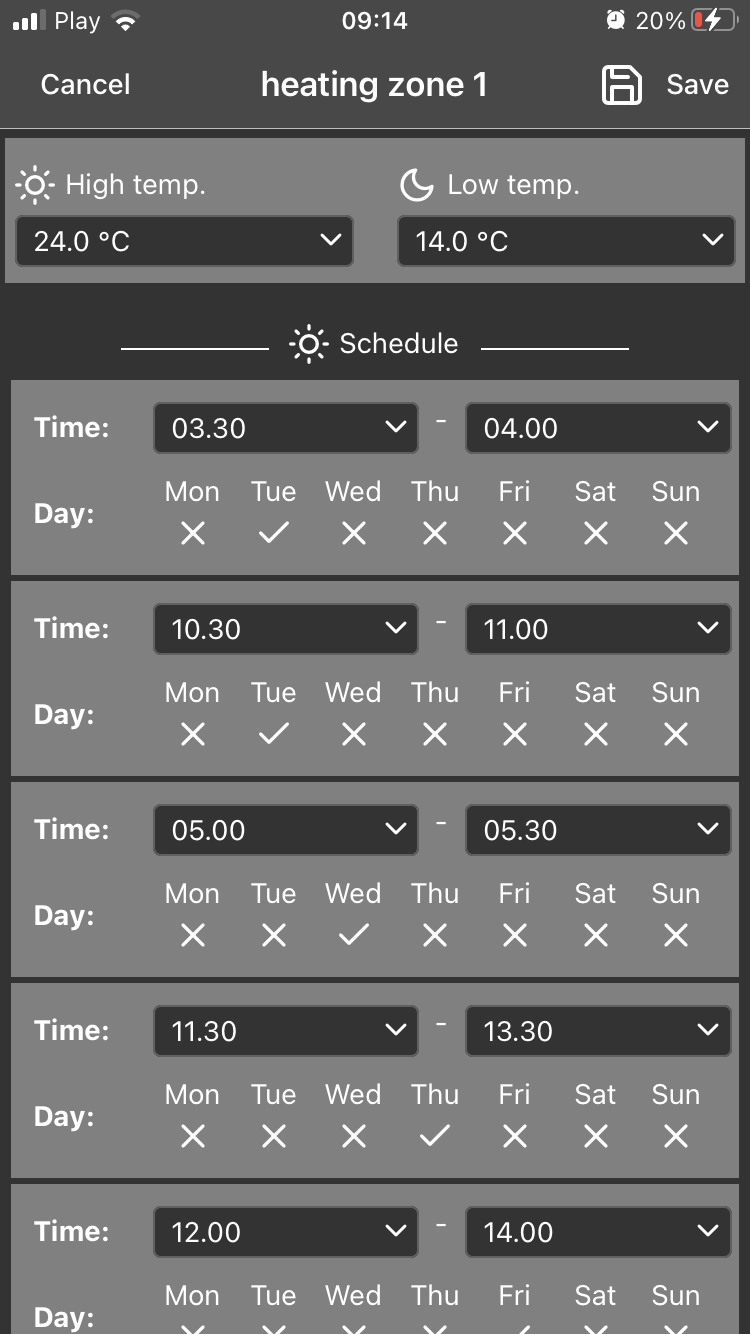
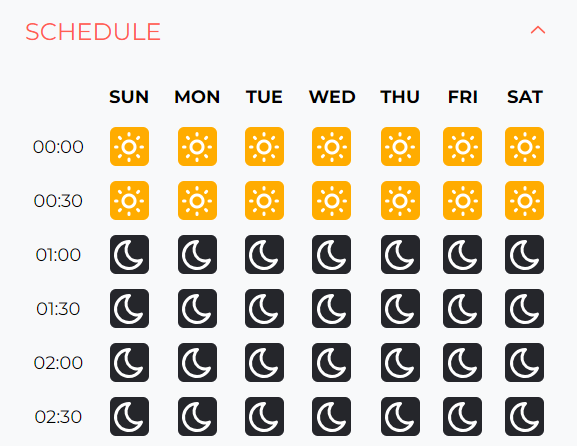
In addition, by entering the schedule, it is possible to manually determine which hours are considered day and which are considered night for each day of the week.
 Click to enlarge and open in a new tab.
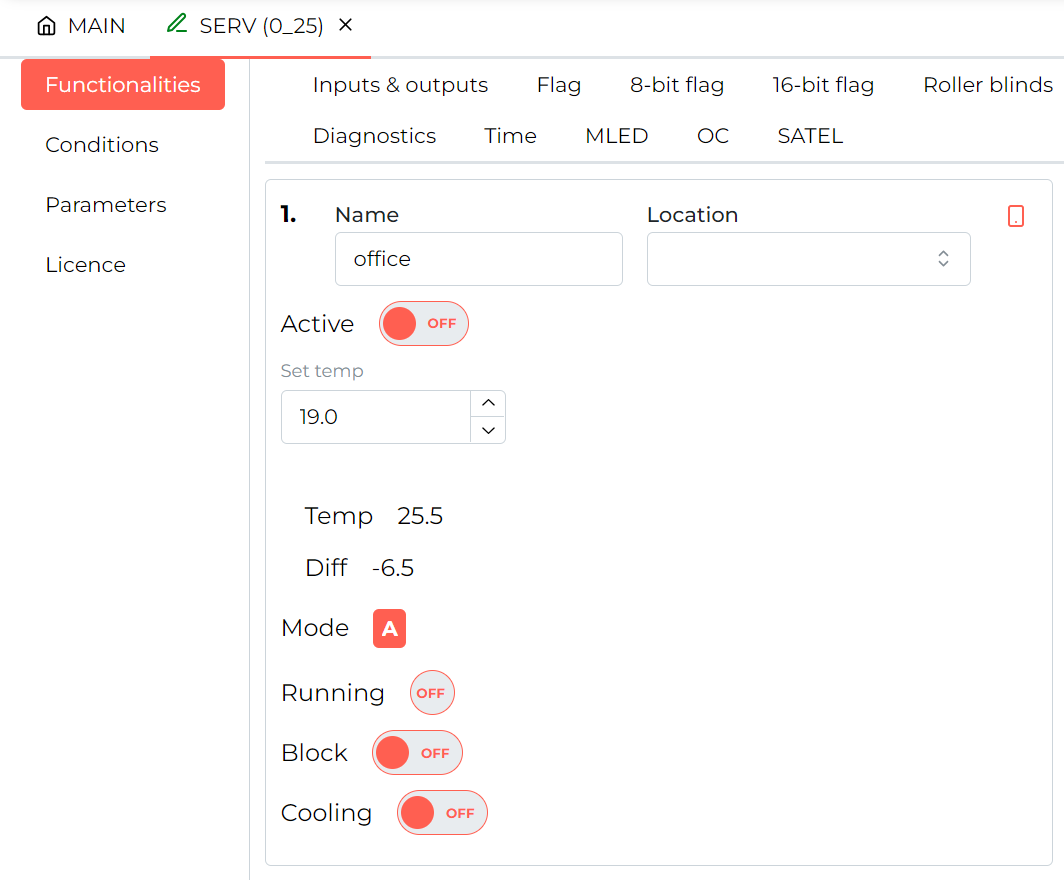
In the Functionalities tab, after navigating to Regulator, we can preview the current status of the heating zones.
 Click to enlarge and open in a new tab.
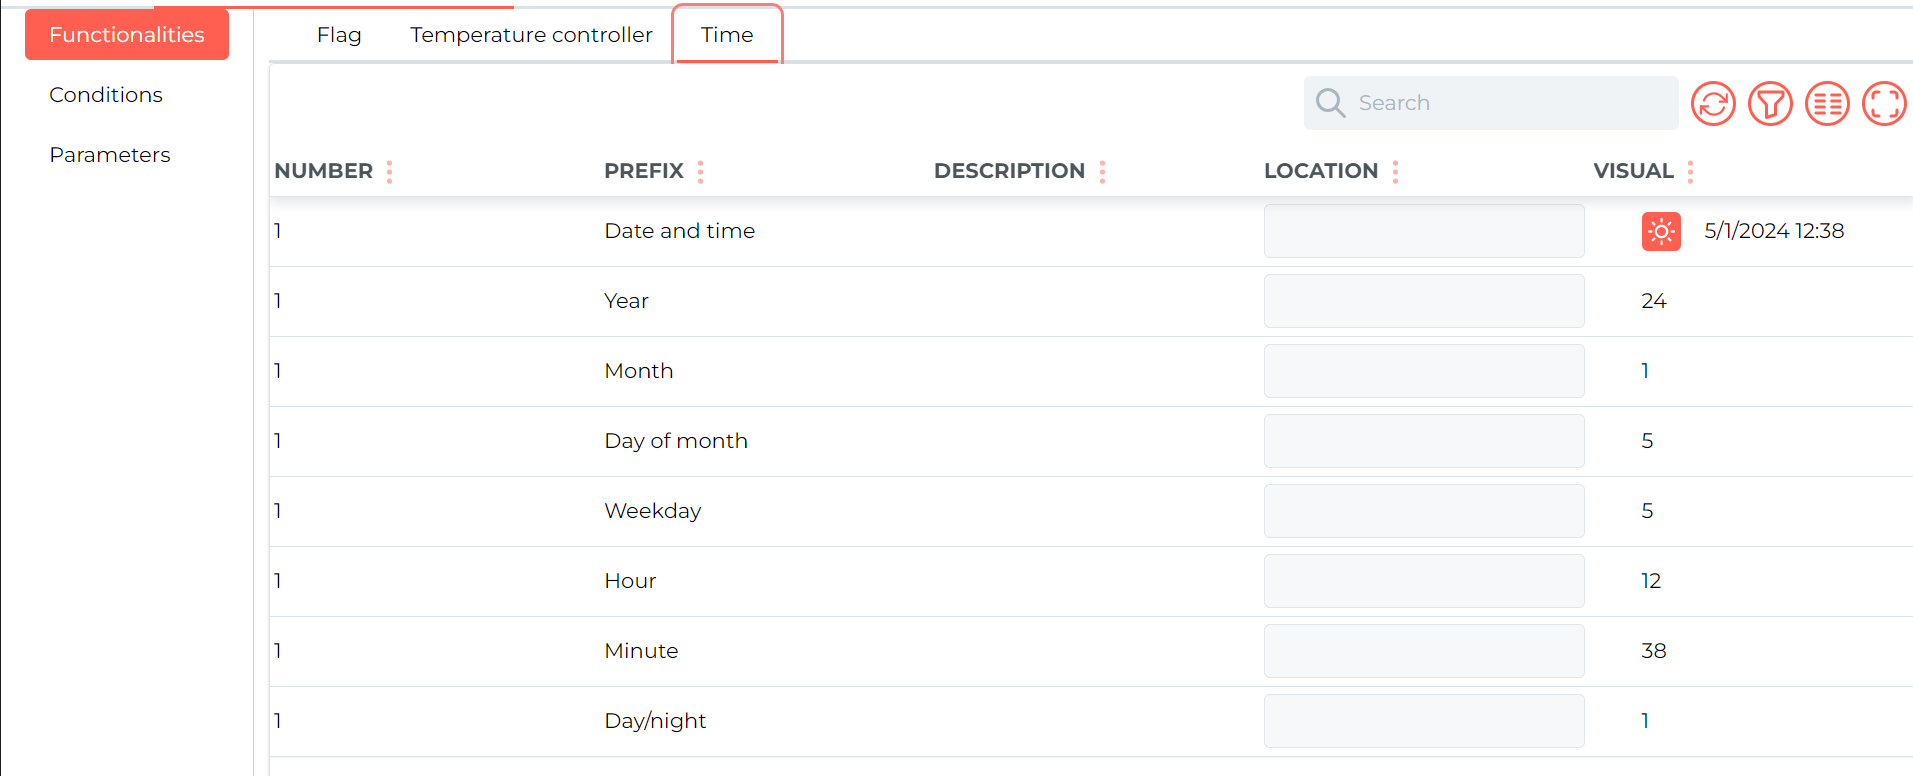
Whereas in the Time sub-tab, you will see the currently set time.
 Click to enlarge and open in a new tab.
The M-RT-s module additionally offers the possibility of creating time-dependent conditions or based on heating zone control in the configurator.
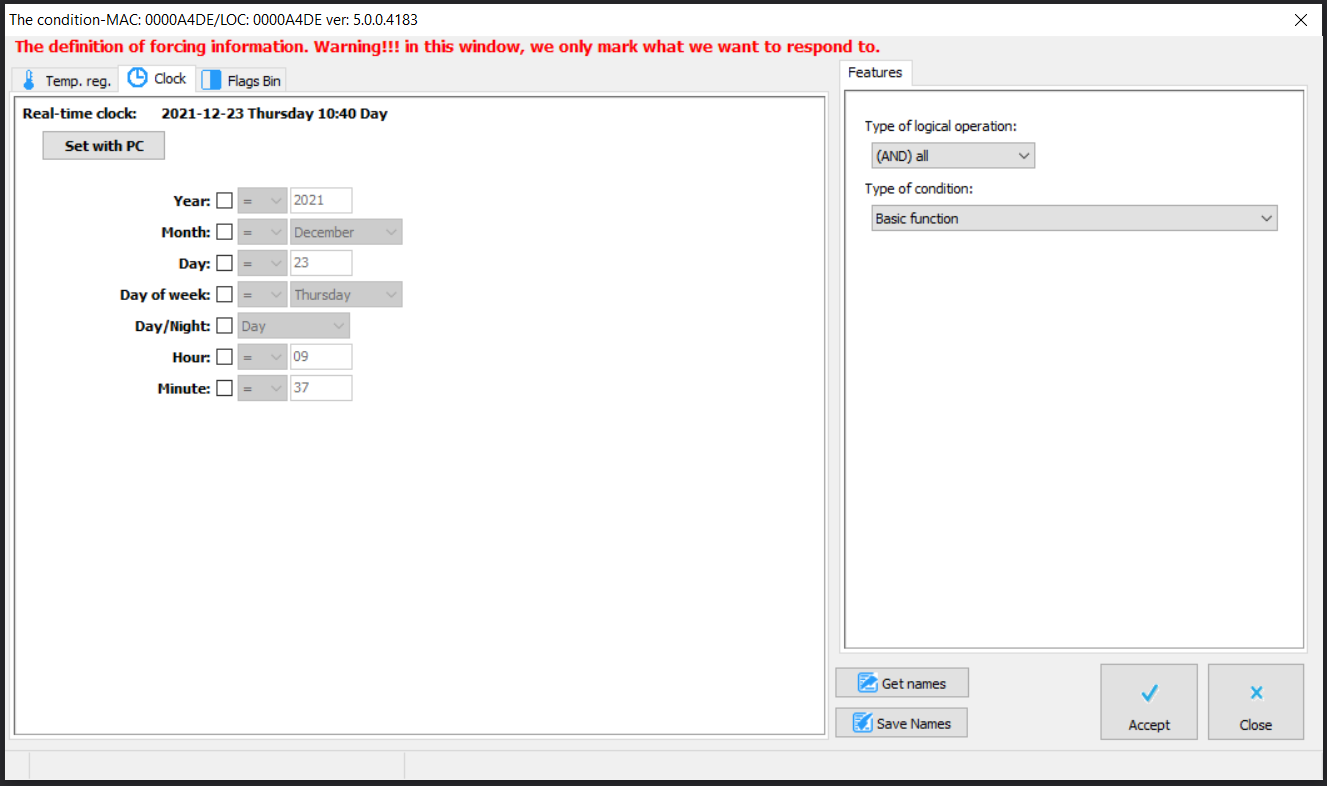
The conditions can be activated, for example, at night, during a specific month or at a specified time.
 Click to enlarge and open in a new tab.
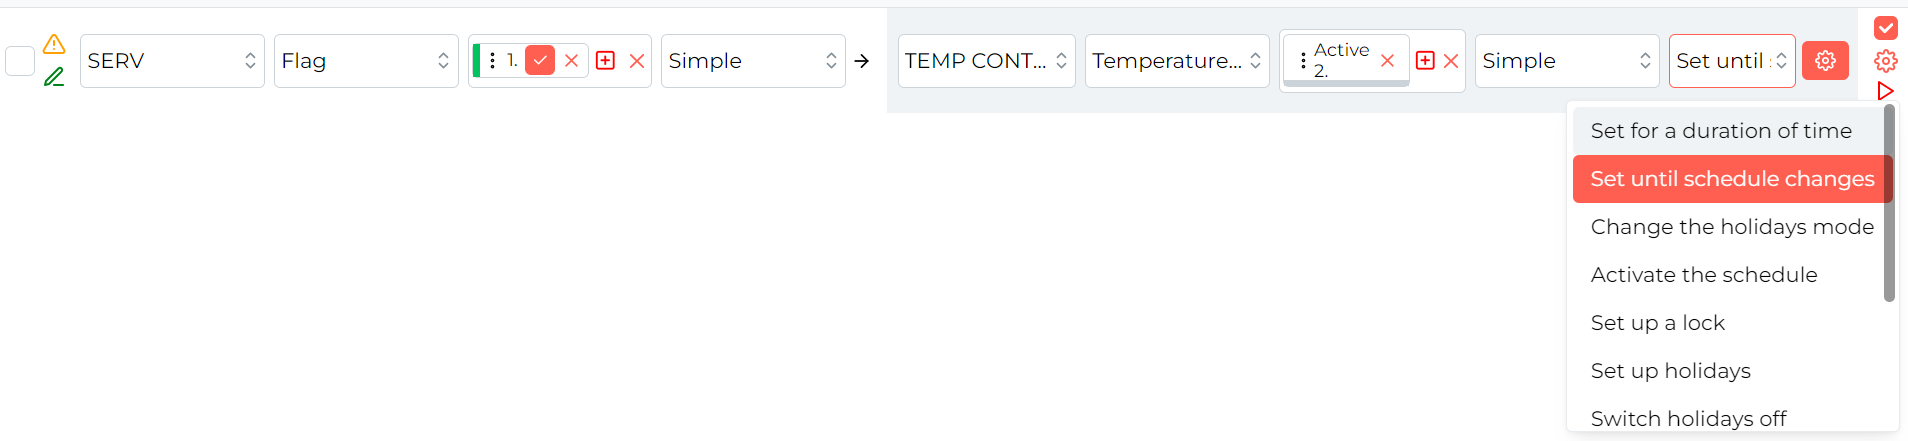
Using conditions, we can also trigger certain functions for the M-RT-s controller, e.g. a change in the setpoint until the next change in the schedule.
 Click to enlarge and open in a new tab.
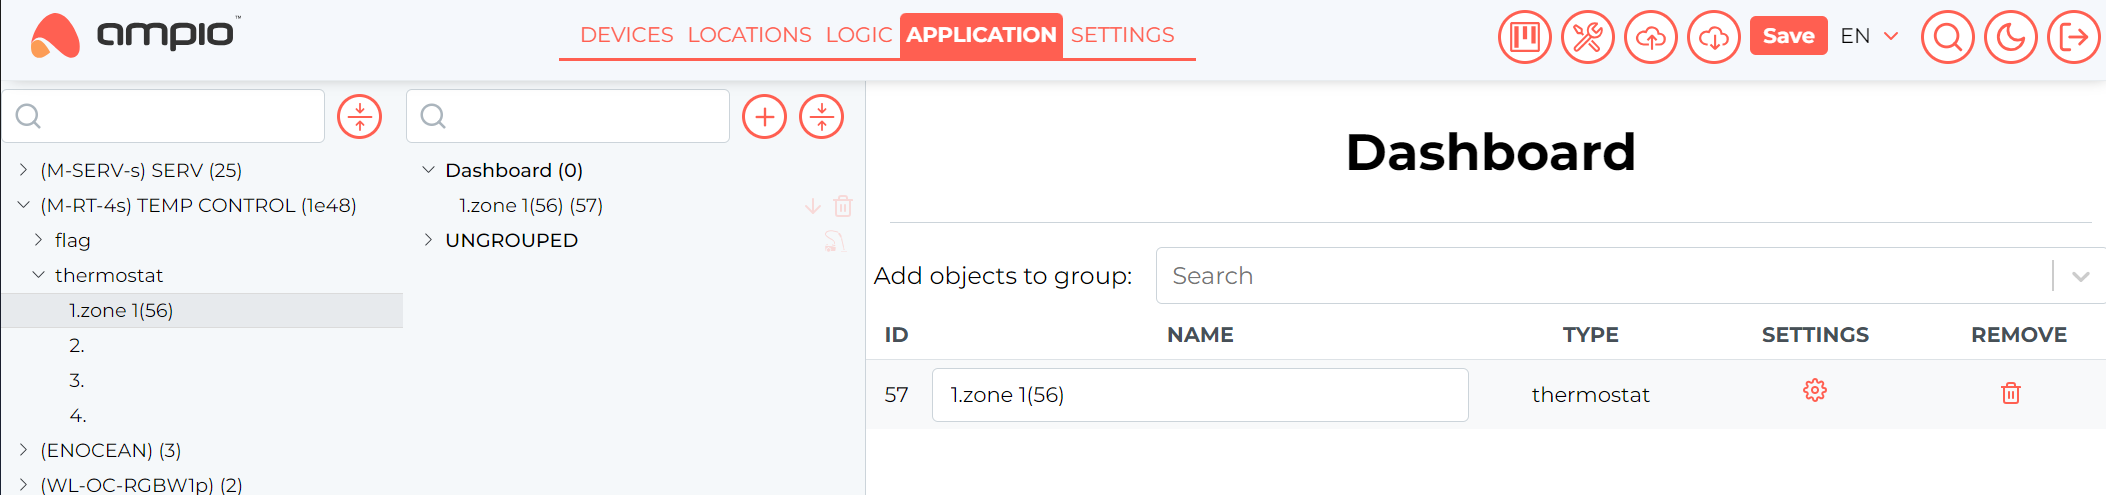
In order to control the heating of the M-RT-s module from the Ampio UNI mobile application, add the corresponding object to the group.
From the left-hand side of the screen, expand the list for the M-RT-s device and drag the relevant zone to the selected group in the second column, then select Save in the top right-hand side of the screen.
 Click to enlarge and open in a new tab.
*from January 2024, the Smart Home Configurator and Smart Home Manager softwares are no longer being developed. It is recommended to use them only in substantiated instances.
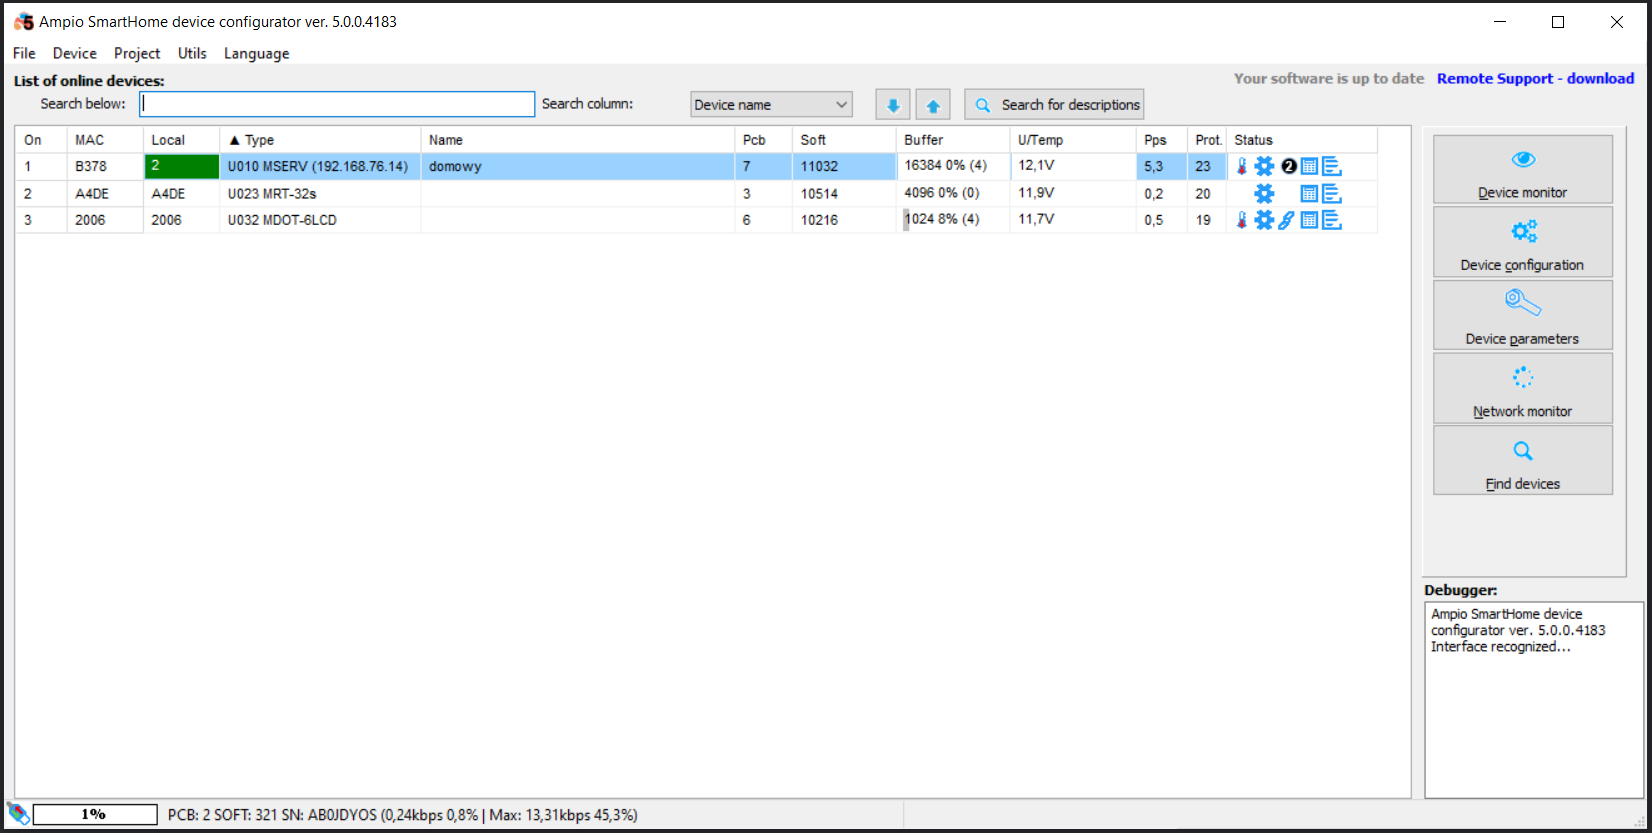
On the list of modules, select the M-RT-s module and open Device parameters.
 Click to enlarge and open in a new tab.
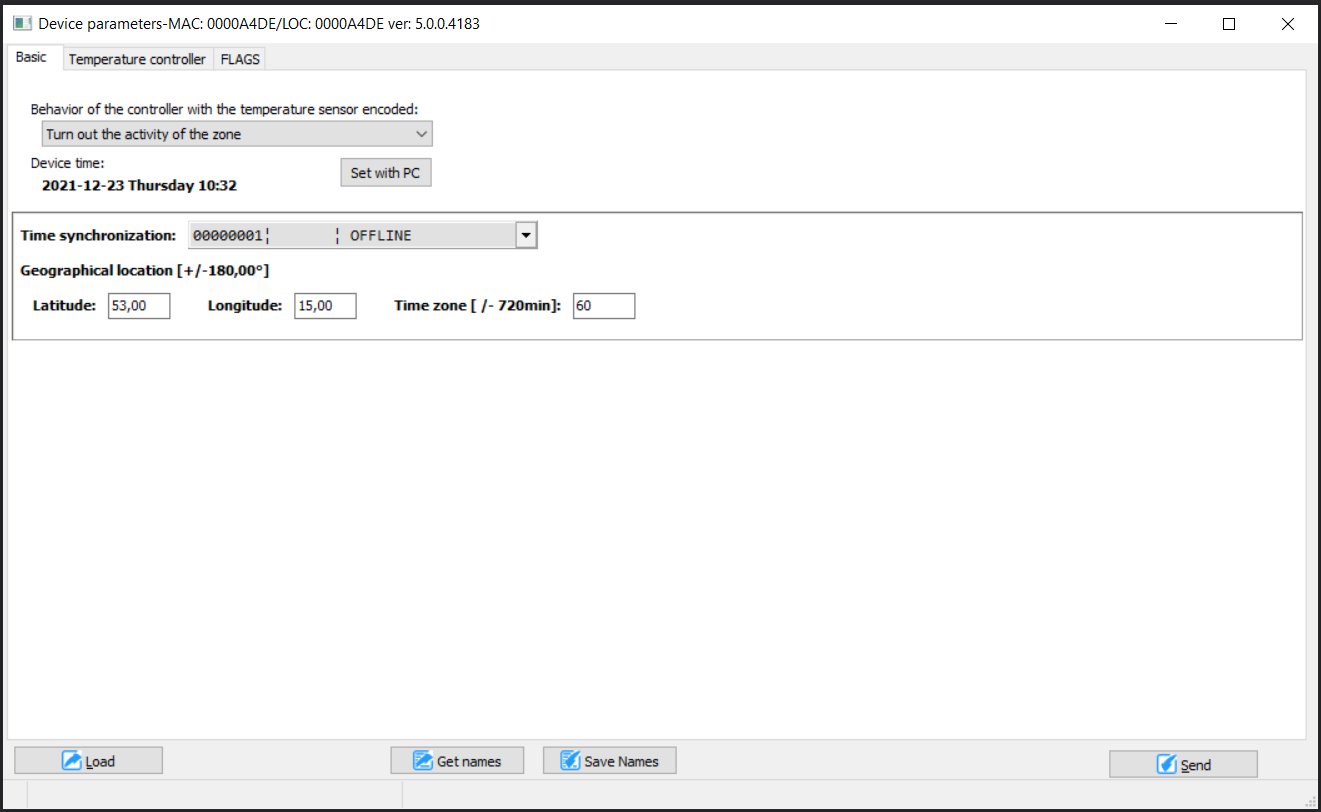
In the Basic tab, you can, for example, download the current time from a computer to the module, or enter the geographical location of an object, which helps in setting the right time for sunrise and sunset. There is also an option to set the controller’s behaviour in case the temperature sensor breaks, as well as an option to sync time with another module.
 Click to enlarge and open in a new tab.
In the Temperature controller tab, you will find, for example, all available zones, which can be given names, you can select the regulator type for a specific zone, and select a module from the CAN network, from which the current temperature will be obtained. You will need to select the number of temperature sensor for that module next. On the basis of the obtained data, the controller regulates heating in a given zone. You will then also set the day and night temperatures. Histeresis, which manages the speed of activation/de-activation can also be modified. On top of that, it can also be manually determined, what hours constitute day, and which night.
 Click to enlarge and open in a new tab.
Schedule settings can be copied to other zones, or each zone can be set up individually.
The Flags tab provides the capability of managing flags, just as it is the case with every other module of the Ampio system.
The M-RT-s module enables the function of creating conditions in the configurator that are dependent on time or on the heating zone controls.
Such conditions can, for example, be activated at night, in a given month, or at a certain hour.
 Click to enlarge and open in a new tab.
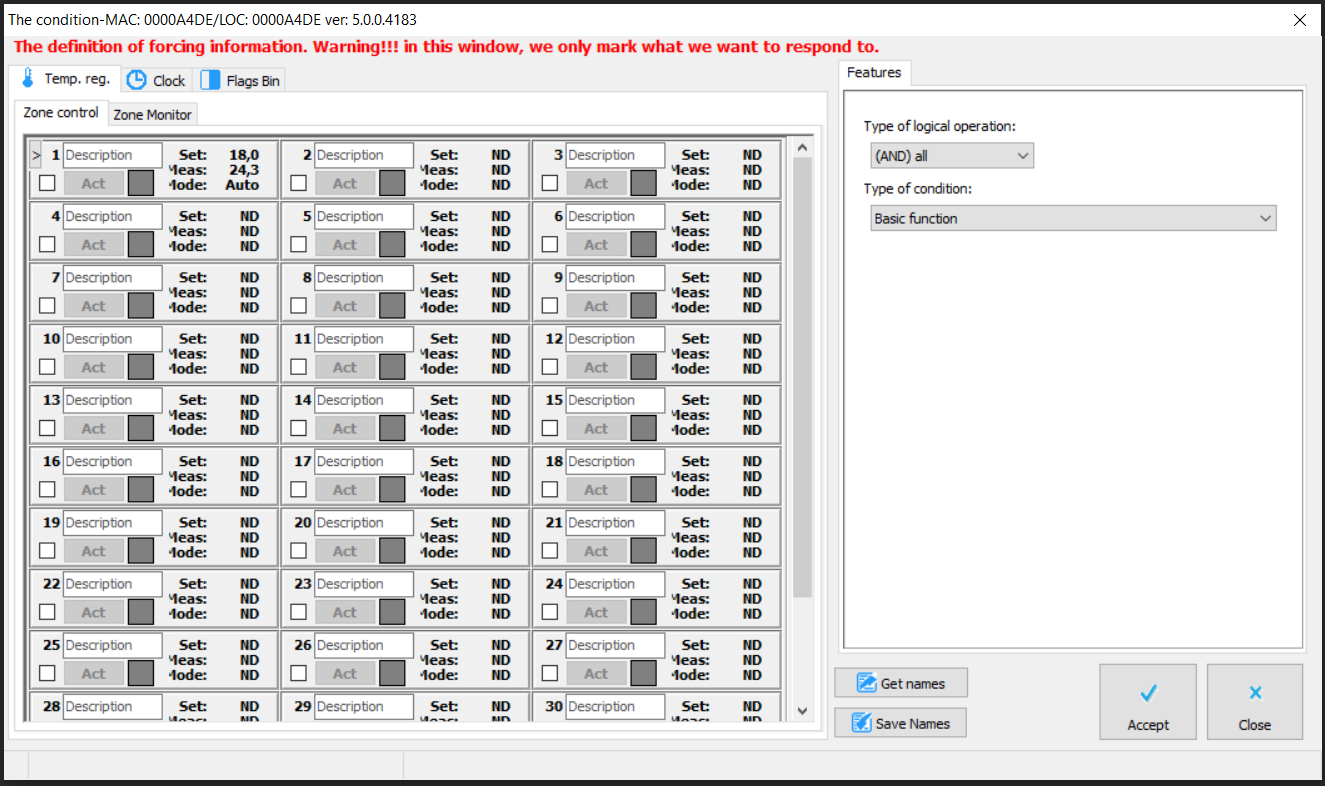
The image below shows how a condition is created from an active zone, checking whether heating for the zone is active, or not.
 Click to enlarge and open in a new tab.
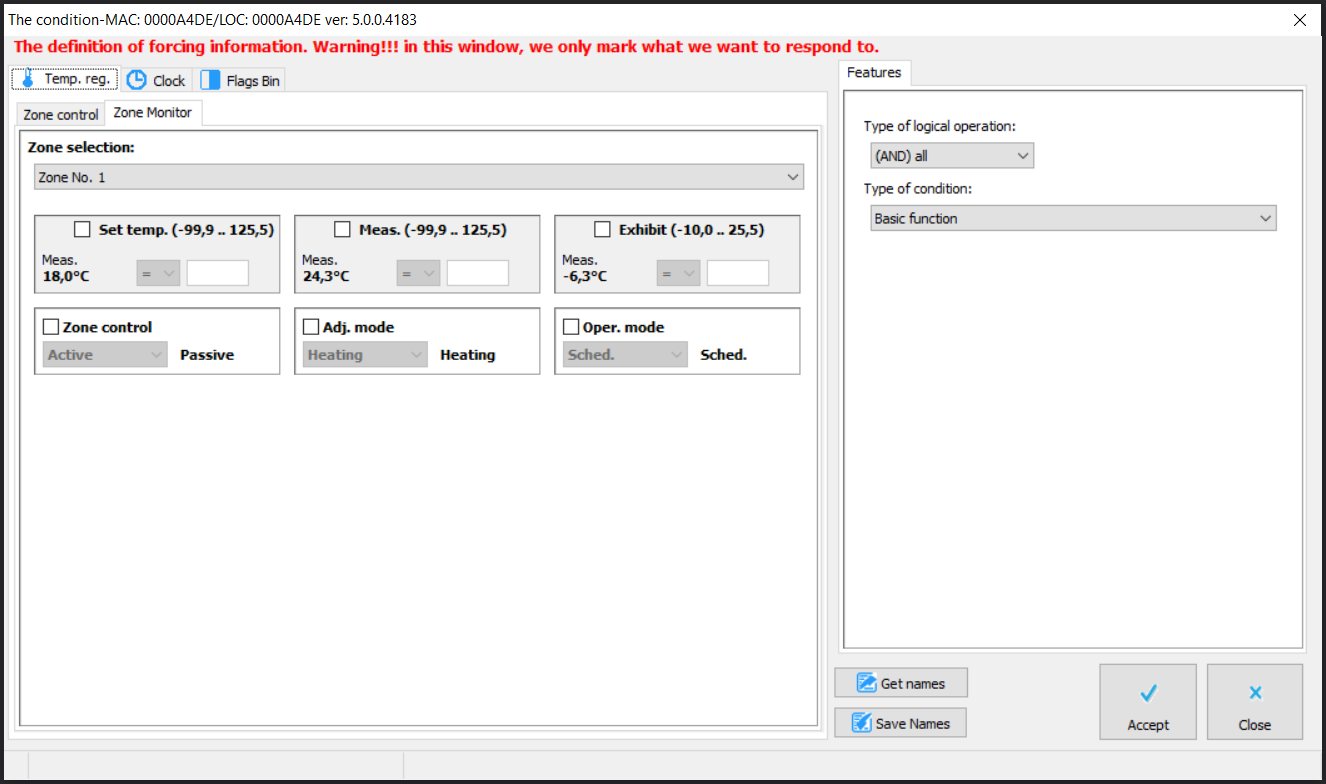
Another capability of creating such conditions is comparing temperatures (the set temperature, or the measured temperature) to assumed values.
 Click to enlarge and open in a new tab.
With the use of conditions, you can also trigger some functions for the M-RT-s' driver, e.g. an alteration of the value set for the next rescheduling.
 Click to enlarge and open in a new tab.
Other functions include, among others, changing the heating/cooling state, or setting a Departure mode.
 Click to enlarge and open in a new tab.
In order to control heating in the M-RT-s module via the Ampio UNI mobile app, you have to add an appropriate object to the group.
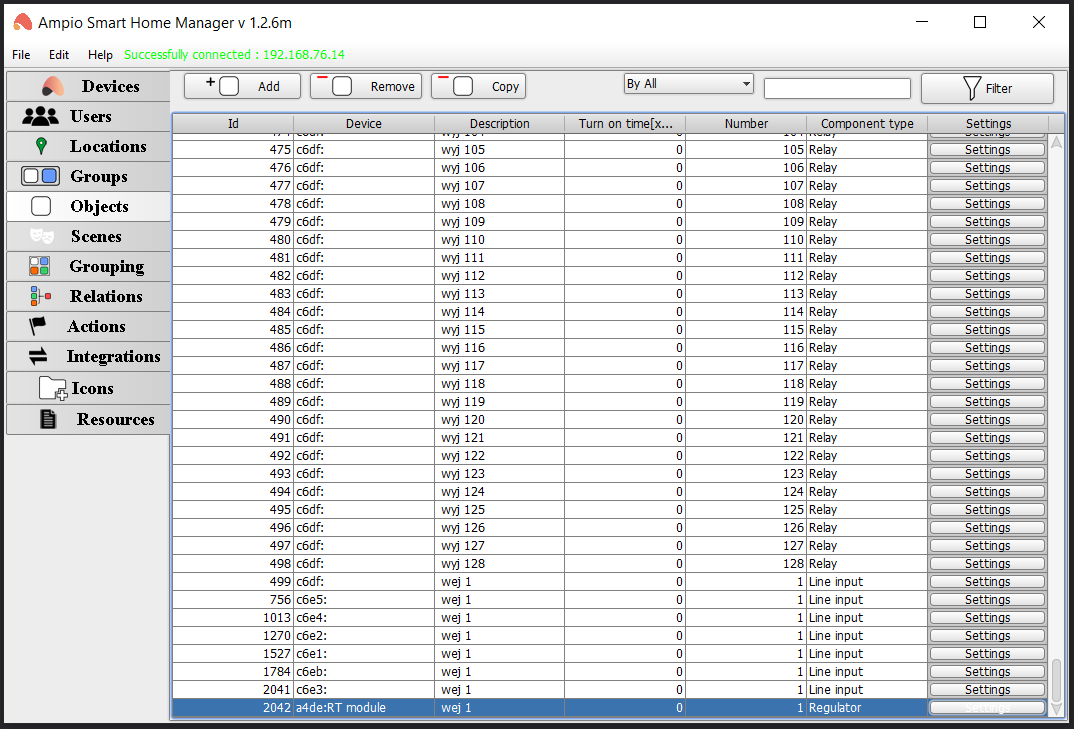
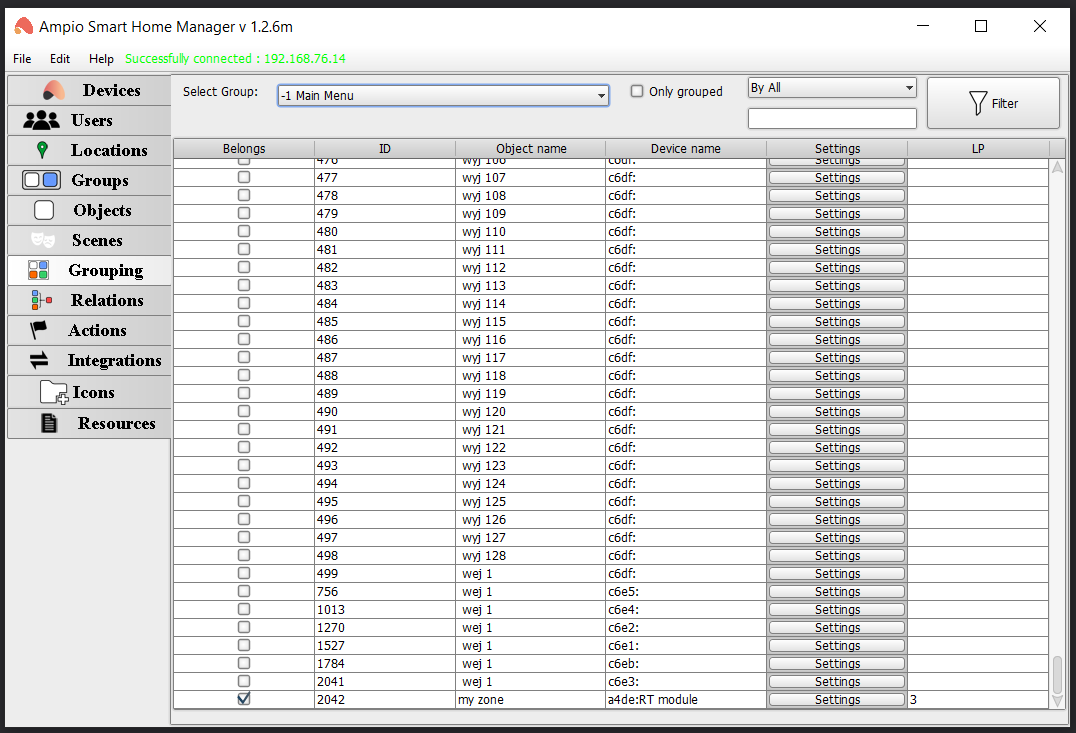
Create a new object in the ASH Manager and assign it to the M-RT-s device. In the Number column you can also select the number of the zone that you wish to control.
 Click to enlarge and open in a new tab.
Open the device’s Settings, set the object type to Regulator and, optionally, change the Advanced settings (min. and max. temperature, as well as the regulation step).
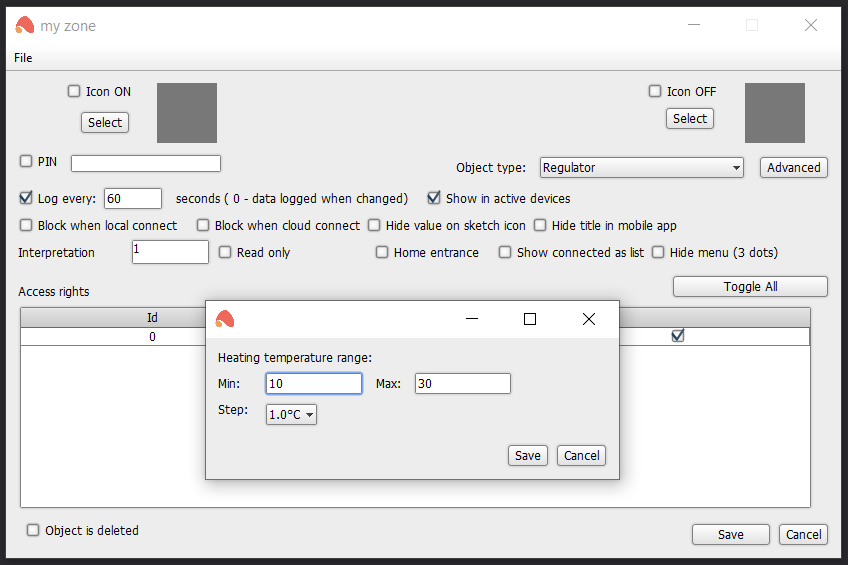 Click to enlarge and open in a new tab.
Save the object and add it to the correct group in the Grouping tab in order to display it in the application.
 Click to enlarge and open in a new tab.
At the end, save the configuration on the server, e.g. using the Ctrl+s shortcut.
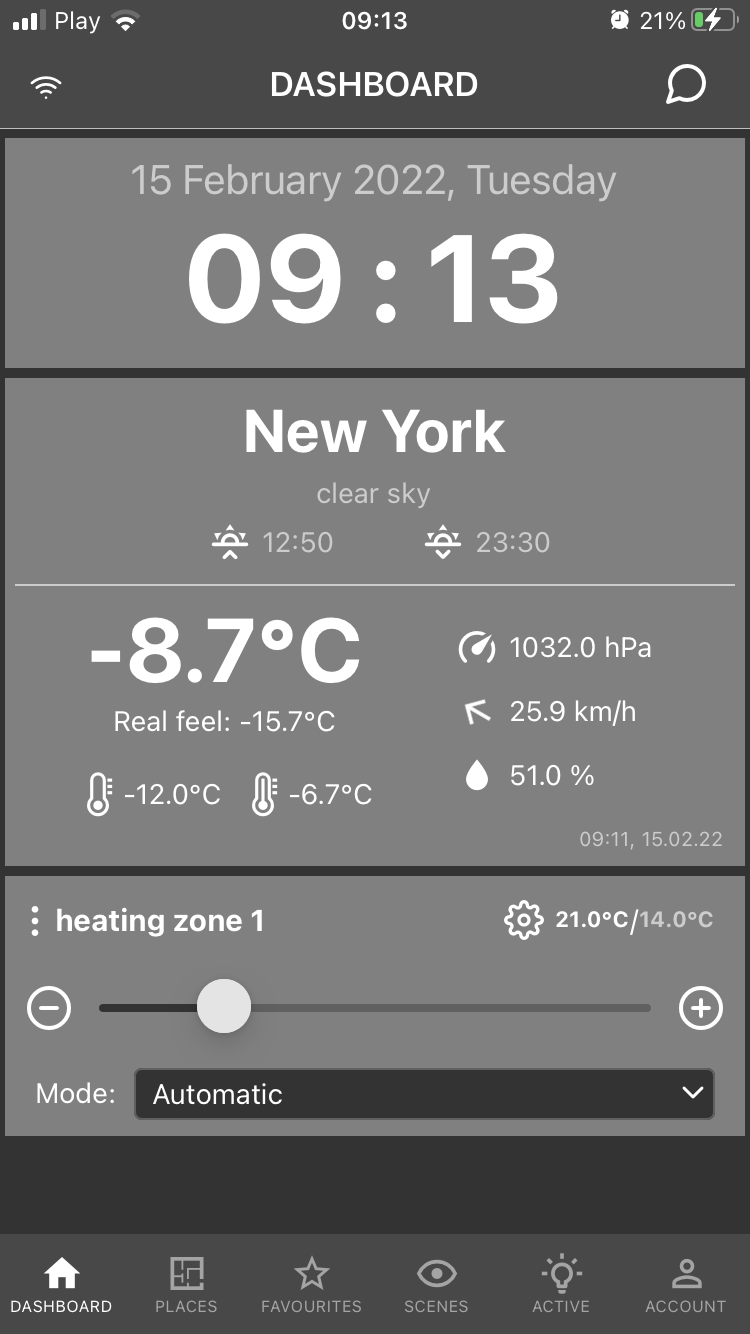
From this moment on, controlling zones will also be possible via the mobile application. You will have the option to change modes in the app. First, set the temperature and then choose the mode:
A detailed description of different modes can be found in the following document: Controlling the temperature in Ampio UNI.
 Click to enlarge and open in a new tab.
After clicking on the settings icon (gear icon), you can also set up schedules manually in the app. Clicking on the 3 dots, on the other hand, will let you add favourites, display charts, or change between heating/cooling.