Ampio Designer supports the configuration of modules with the following softwares:
The Ampio Designer software features interoperability with the CAN configurator and the Smart Home Manager application, which means that they are fully compatible with each other. The configuration of one installation can therefore be carried out in any of these applications and any changes made will be available simultaneously in all three applications.
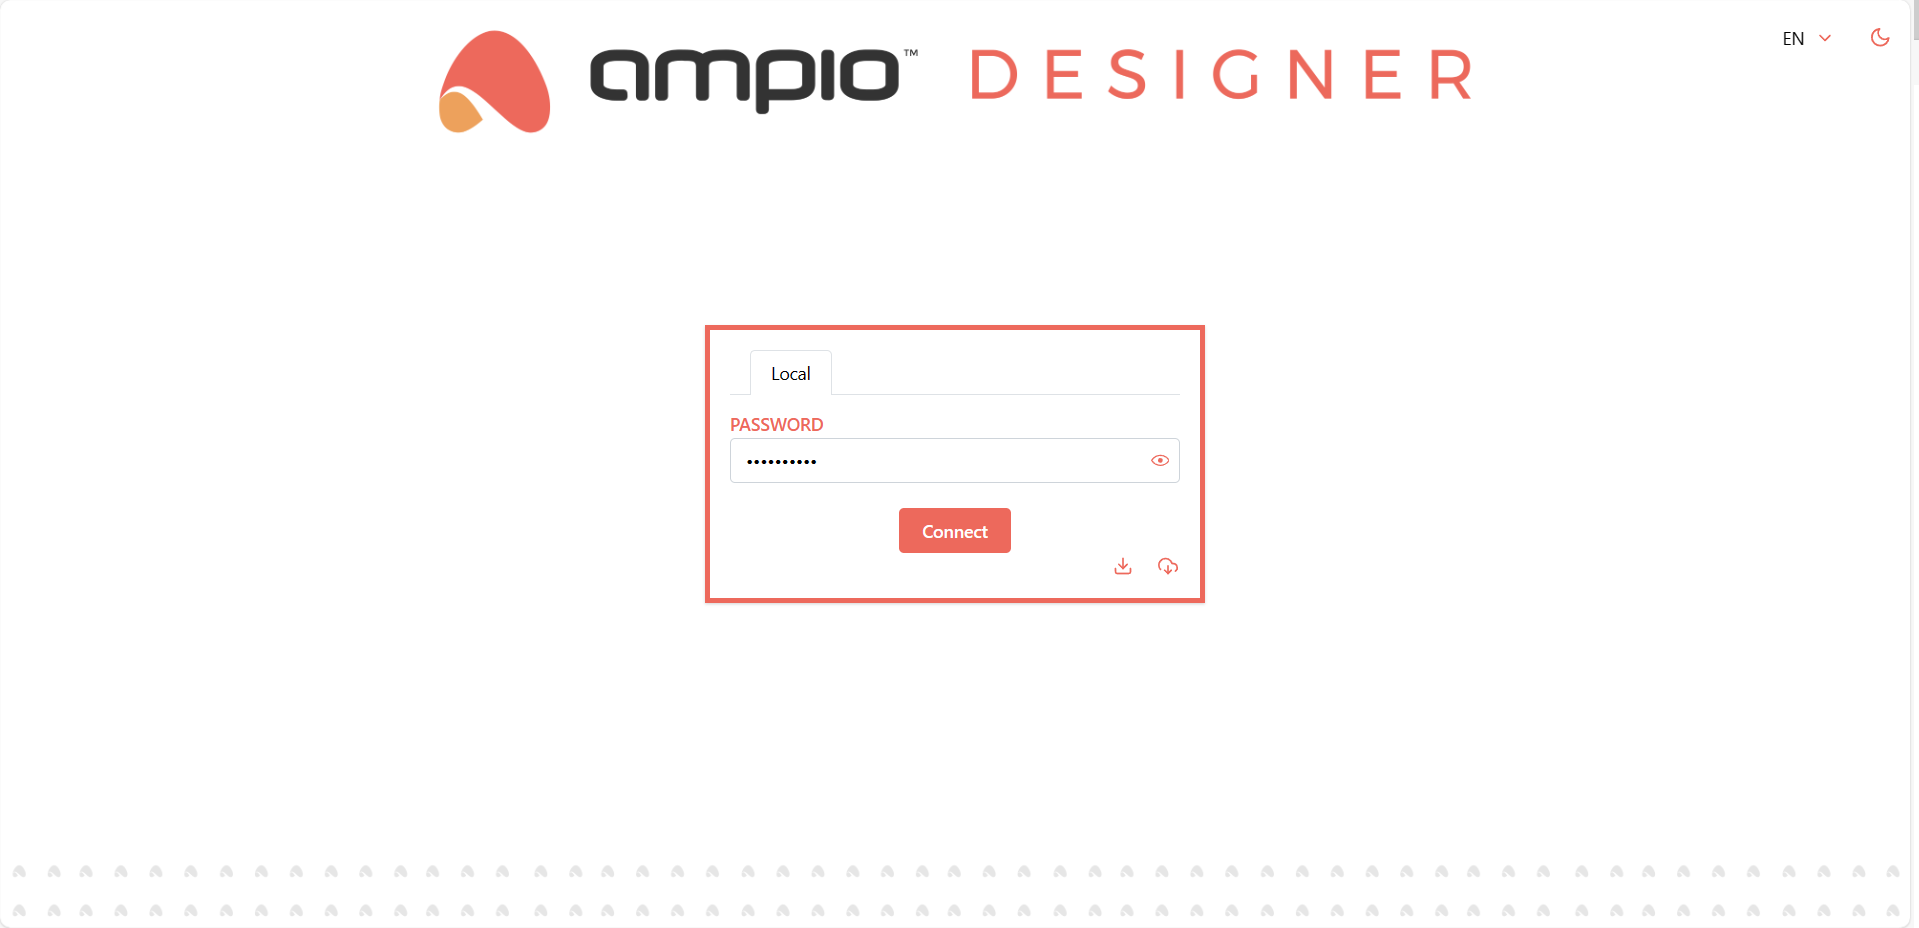
The display on the M-SERV-s module will show the IP address of the device, which must be entered into a web browser. After entering the IP, Ampio Designer will start.
A prerequisite for running Ampio Designer on an existing installation is to update the SD card image and configure the M-SERV-s module password. For a detailed description of this process, please refer to the M-SERV module’s SD card update guide.
If M-SERV-s already has a password configured, then you can access the installation in two ways:
As in the case of the first configuration, enter the IP address of the device in the search bar of your browser.
A login screen will appear from which you can:
 Click to enlarge and open in a new tab.
Ampio Designer can also be launched through the designer.ampio.com website. From the site, you can configure the system:
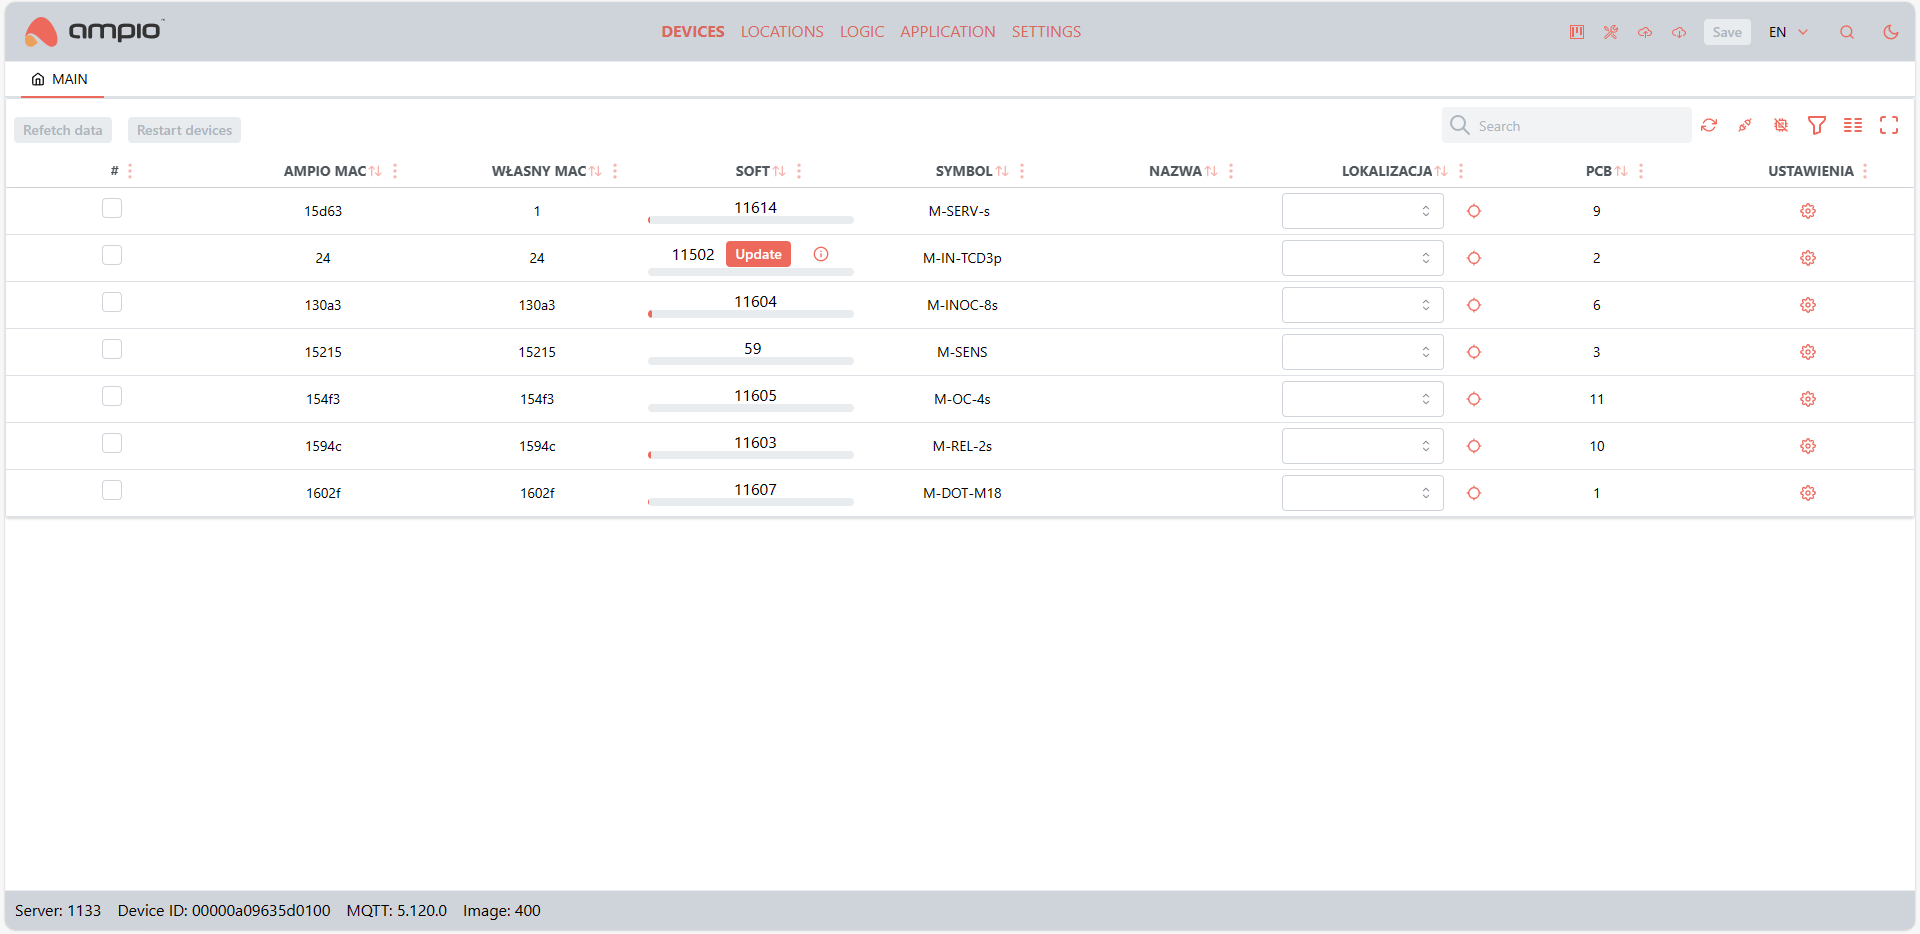
On the top bar of Ampio Designer, it is possible to access the following tabs:
On the right side of the top navigation bar, the following functions can also be accessed:
 Click to enlarge and open in a new tab.
The bottom bar of Ampio Designer provides developer information such as:
 Click to enlarge and open in a new tab.
On the right side above the list of devices, you will find:
 Click to enlarge and open in a new tab.
Clicking on the settings icon next to the selected device opens up a new window with tabs:
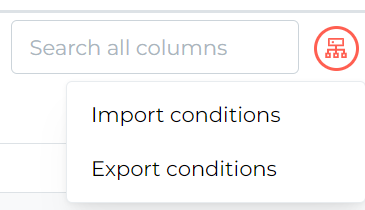
In the Conditions sub-tab it is possible to import and export logical conditions for a specific device. To perform an import/export, navigate to the icon in the top right corner of the interface.
 Click to enlarge and open in a new tab.
One of the most important things you can do at the beginning of system programming is to name the locations.
In this tab, by pressing the “plus” button, you can create places/locations to which you will assign specific devices or their flags, inputs/outputs, etc. The tab has two lists:
Both, before adding objects to a location and after, you can give them names.
Adding an object to a location can be done in two ways:
In this tab you can define all the logic of the devices in the CAN network. On the right side of the top bar you will find:
And on the left side of the top bar, there are two basic functions:
 Click to enlarge and open in a new tab.
 Click to enlarge and open in a new tab.
It is good practice to select a location from the search engine found in the top bar when creating a condition/event. This gives us a narrowed list of devices available at that location. By using the smart input/output search engine, you can significantly shorten the time spent on creating conditions.
In this tab, you can create the view of the mobile application for the end customer. Similarly to the Location tab, you can create the groups/rooms that will be visible in the app with the use of the plus button . By creating locations in advance, you can speed up the process significantly.
Each group can be independently managed, devices can be configured, floor plans can be uploaded and icons can be assigned to groups. For each device in the group, personalised settings are available, depending on the facility type.
This tab allows you to customise your system.
The list of Ampio system users is displayed here. On the right side is the “Add new user” button. By pressing it, you can create a login and password with which the specific user will log into the Ampio UNI application.
Each user can be granted the following rights:
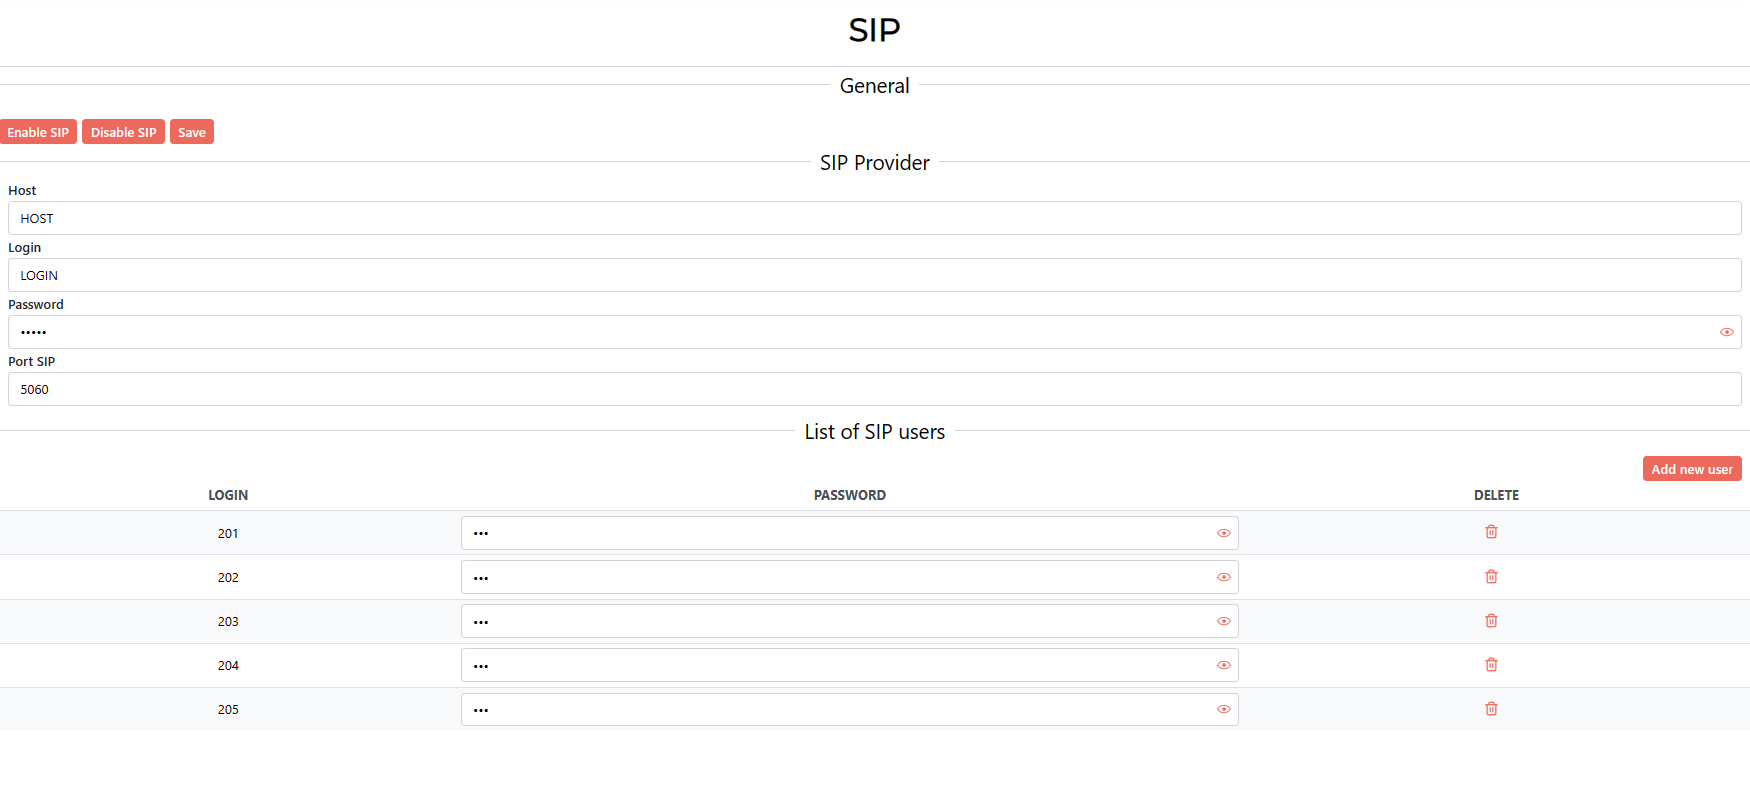
From this tab, you can enable or disable SIP service in M-SERV-s or connect to an external SIP provider and manage SIP users.
 Click to enlarge and open in a new tab.
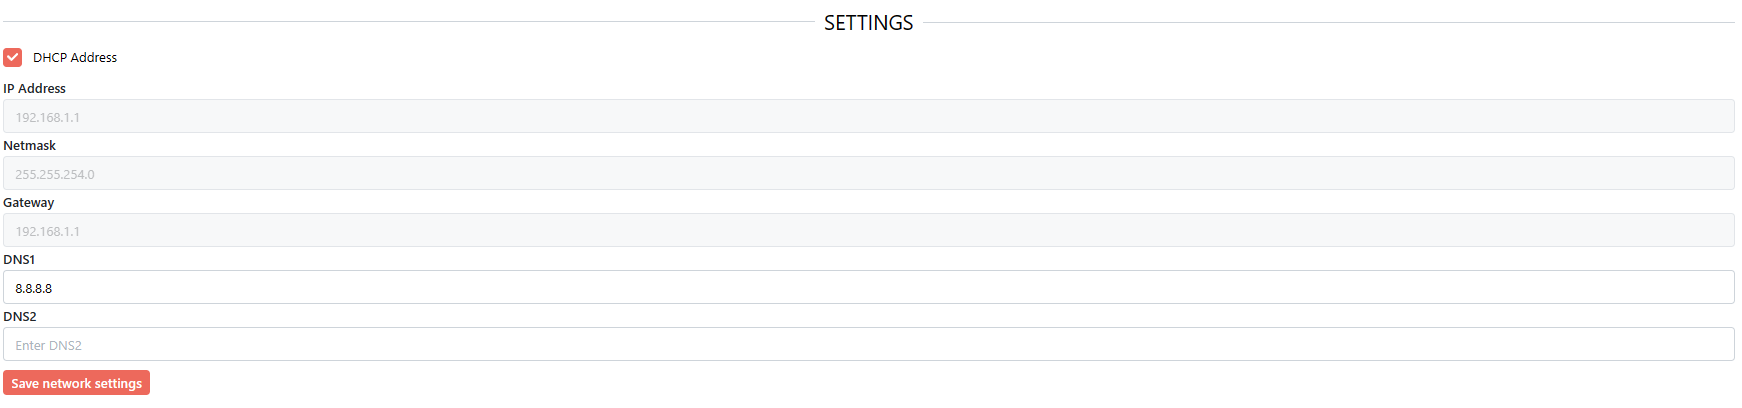
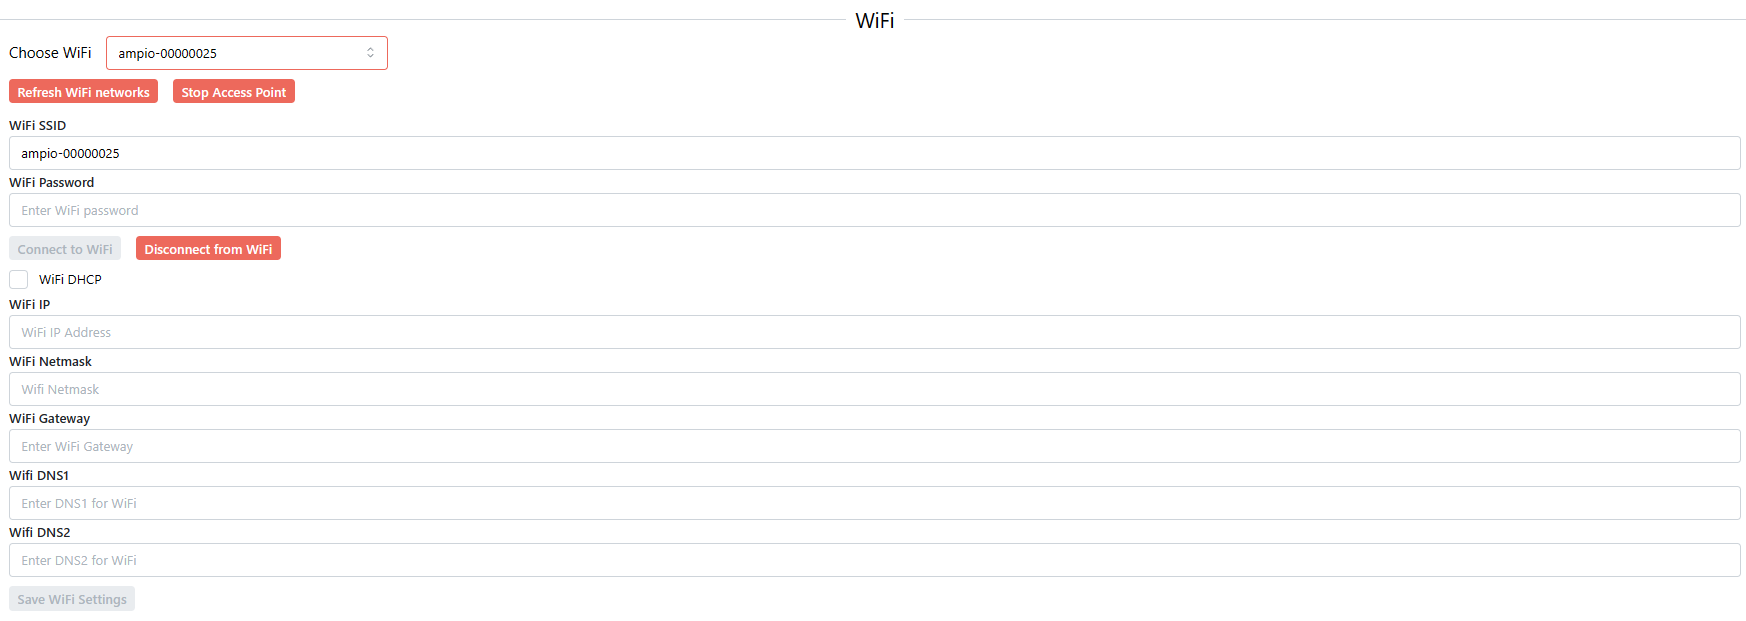
M-SERV-s' network settings can be managed here:
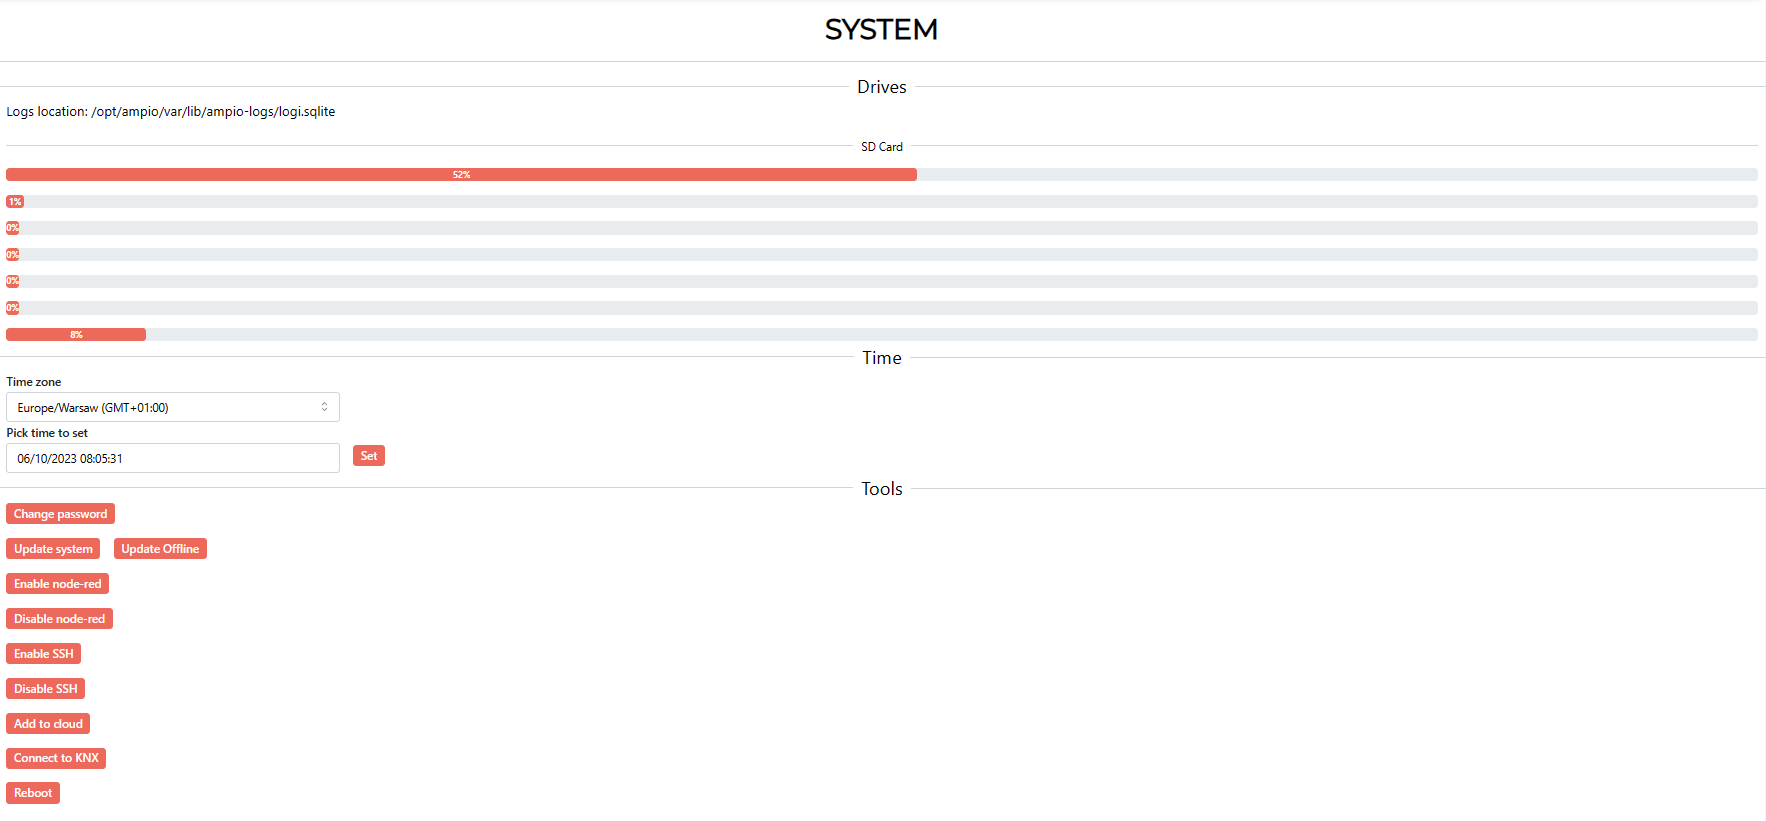
In this tab you have access to the information about M-SERV-s' memory. Here you can modify your time zone and change the time settings in M-SERV-s. The tab also includes tools such as:
 Click to enlarge and open in a new tab.
The ‘Update System’ option not only allows the system to be updated to the latest version, but also for it to be reverted to previously released versions of the software.
This tab shows the basic resources that the Ampio system contains. Also, you can create or delete events here. When you run the application for the first time, you will see 255 basic events. If you want to use extended events in the Ampio UNI application, you need to add them to the resources.
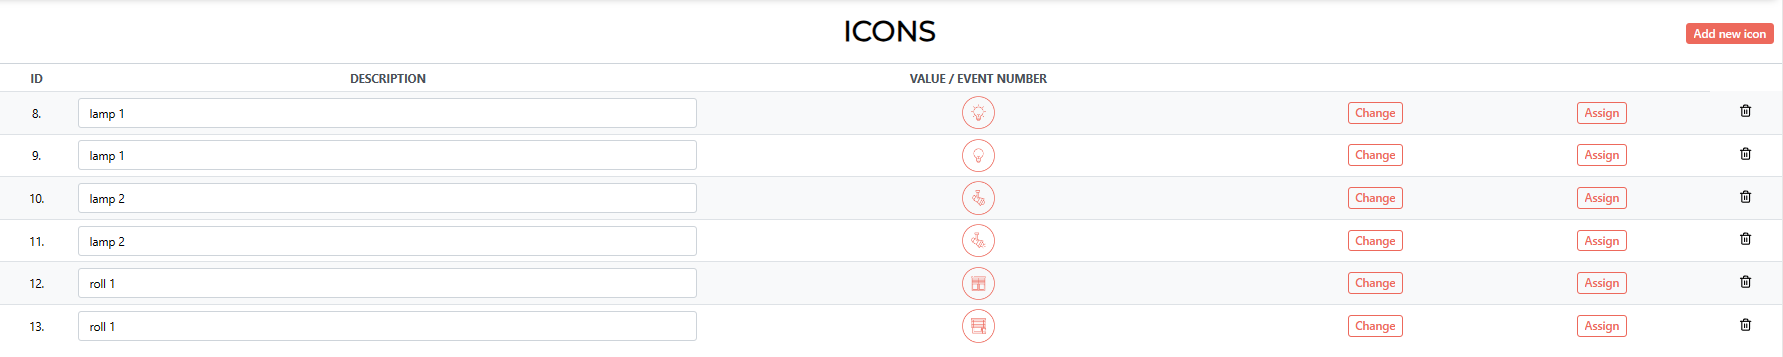
This tab includes an overview of all the icons that are used in the Ampio UNI application. You can change, add or delete them. You can also upload your own custom-designed icons.
 Click to enlarge and open in a new tab.
In this tab you can edit the default values that are uses in functions when creating conditions, which leads to speeding up your configuration process.
This tab was created with the idea of making Ampio Designer more personalised. Currently, there are limited functionalities available here (an option to display linear values as percentages), which will be expanded on in the next stages of planned software development works.
 Click to enlarge and open in a new tab.
In this tab you can add and edit integrations on your M-SERV-s. Integrations can be triggered in three ways:
In the “action” window, the following options are available:
Backups in Ampio Designer are created automatically when you log into the software. Backups can also be created manually or uploaded from a file. Each backup can be downloaded, restored or deleted.
 Click to enlarge and open in a new tab.
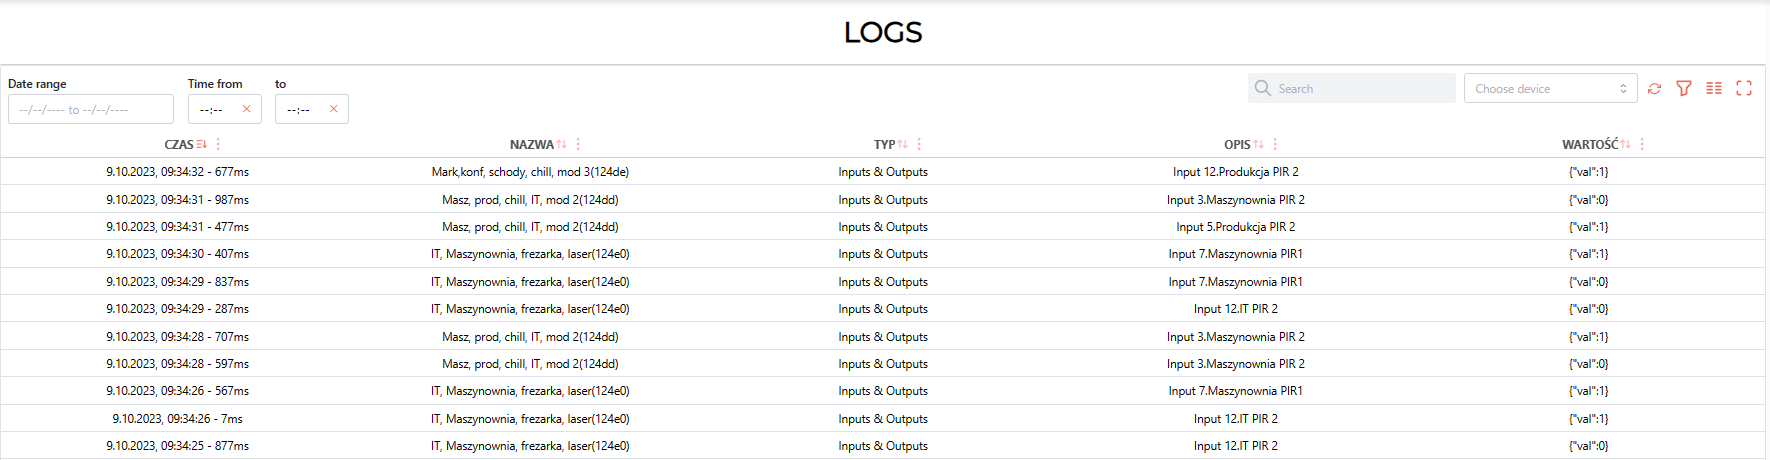
In this tab, it is possible to access changes in the status of devices and events existing in the Ampio UNI application. This is a diagnostic tab that allows you to observe changes occurring in the system. You can filter them by date and time or search for a specific device.
 Click to enlarge and open in a new tab.
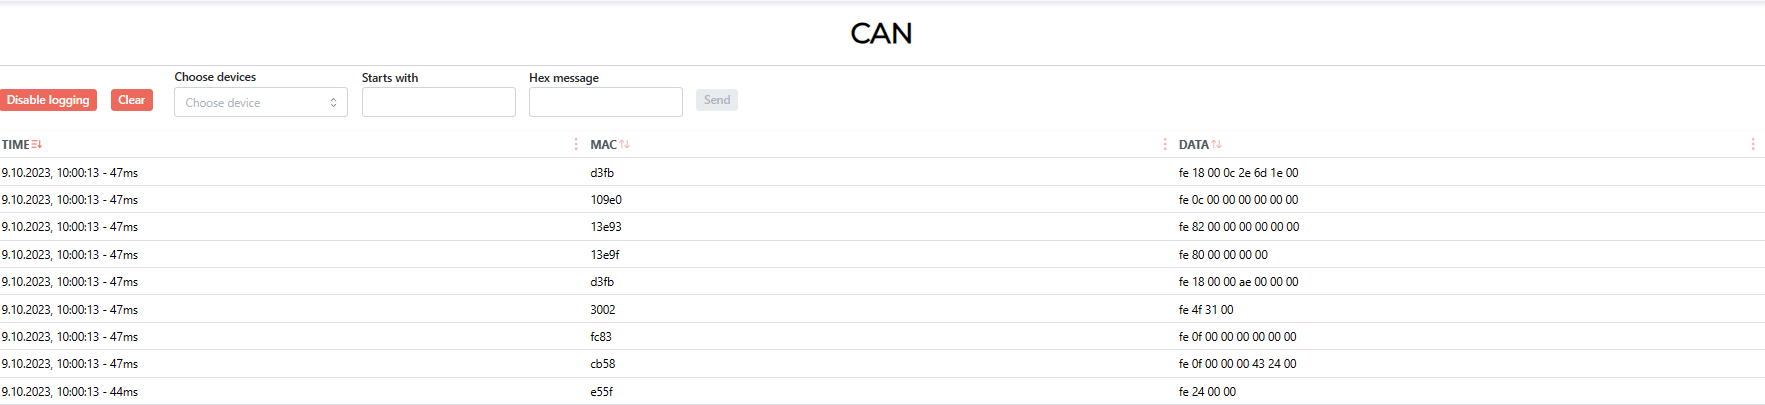
This is a diagnostic tab that records all traffic on the CAN network. In it you can filter traffic by device, as well as by specific values in hex format.
 Click to enlarge and open in a new tab.
In this tab, you can share API to your system.
The process of getting Node-RED up and running is discussed in the guide Integrating the Ampio system with Node-RED.