Since April 2023, servers are produced in two versions (named Green and Blue). To load proper SD card image check chapter Downloading and installing the SD card image.
In this installer guide, we will explain the procedure of updating an SD card image in the Ampio server module in two different methods:
Before commencing the update process, it is necessary to create a backup of the server’s database. During image update there is always a chance for malfunction that may be difficult to repair.
In case of the second method, if one doesn’t create a backup before the update, it will be impossible to restore M-SERV’s previously configured functionality.
To create a server’s database backup in:
Enter Ampio Designer and click cloud icon “Download backup”.
 Click to enlarge and open in a new tab.
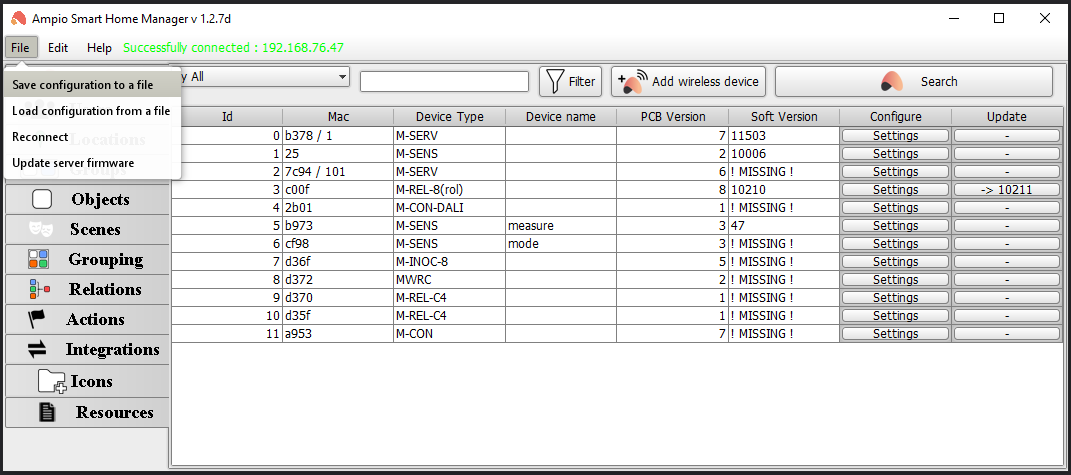
Launch Ampio Smart Home Manager application and connect to your M-SERV. When the connection is successful, choose the “Save configuration to a file” option from the File menu and save the file on your hard drive. Once that is completed, you can safely begin updating the M-SERV server.
 Click to enlarge and open in a new tab.
Use of this function is only possible if you have an image version from 400 upwards. These versions have a pre-programmed script that allows you to update the image without pulling out the SD card. If you have a version older than 400, please refer to method 2 in the guide.
In case of having image versions 400-406, it is advised to update system applications before updating the SD card image. In newer versions feel free to skip this step.
To achieve this, in Ampio Designer app go through:
Settings » System » Update system » Update
Update image button is right next to the update system button. To update the server image open Ampio Designer and go through:
Settings » System » Update image » Update
A ‘Details’ button is available to display detailed or limited logs of the update process. It is possible to change the settings of the logs before, during or after the update.
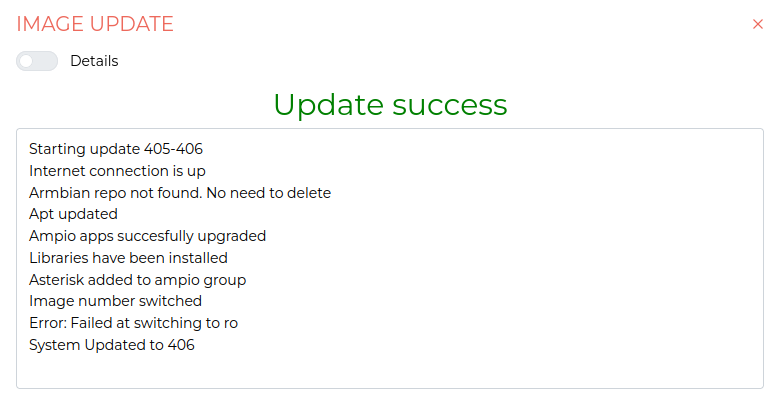
If Ampio Designer has performed the system update without errors, a green message “Update success” will appear in the window. This means that the update was successful and the latest version of the system is already installed and ready to use.
 Click to enlarge and open in a new tab.
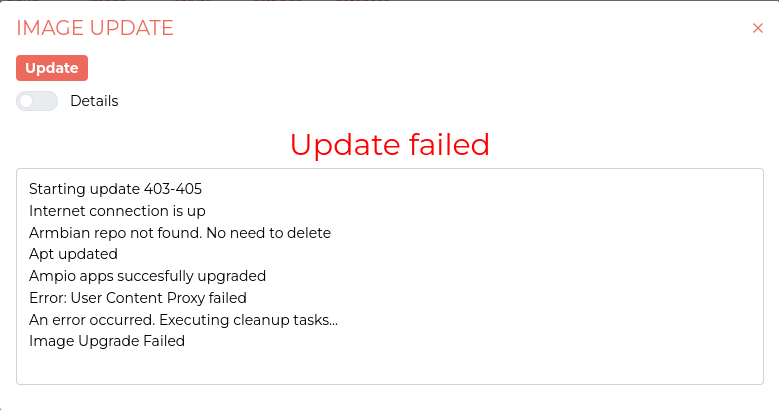
If an error has occurred during the update, a red message “Update failed” will appear in the window. In this situation, unfortunately, for some reason the system was unable to update and details of the error will be available in the update log window.
 Click to enlarge and open in a new tab.
This method is a better idea if you are planning to set up a new server from scratch. By updating the image in this way, we are guaranteed correct operation and the absence of any errors.
Updating the server requires you to open the module’s casing and to eject the micro SD card.
The following steps must be carried out after the M-SERV module has been disconnected from power supply!
After opening the casing, locate the microSD card and remove it from its port.
To properly choose which SD card image user needs, it is important to differ between Blue and Green versions.
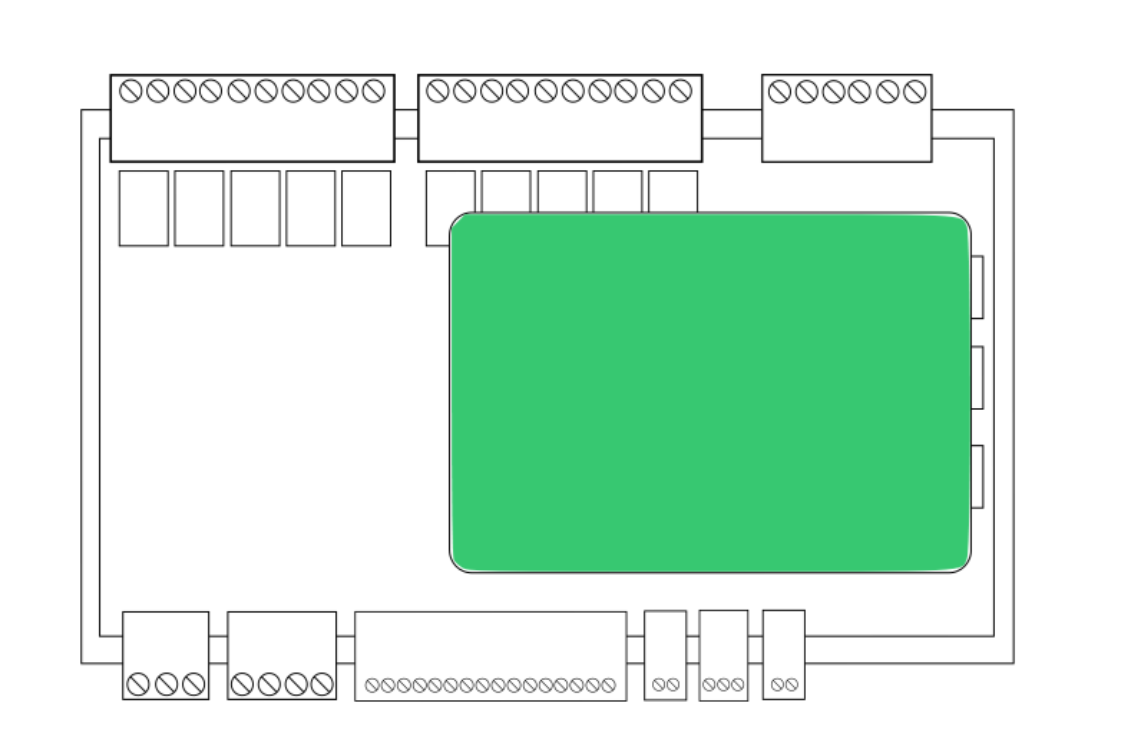
These versions have different top PCB color inside the module. After opening up, for Blue version a module looks similar to this:
 Click to enlarge and open in a new tab.
And for Green version:
 Click to enlarge and open in a new tab.
After choosing server version, next step is to download proper image. For Blue version SD card image has suffix blue in name.
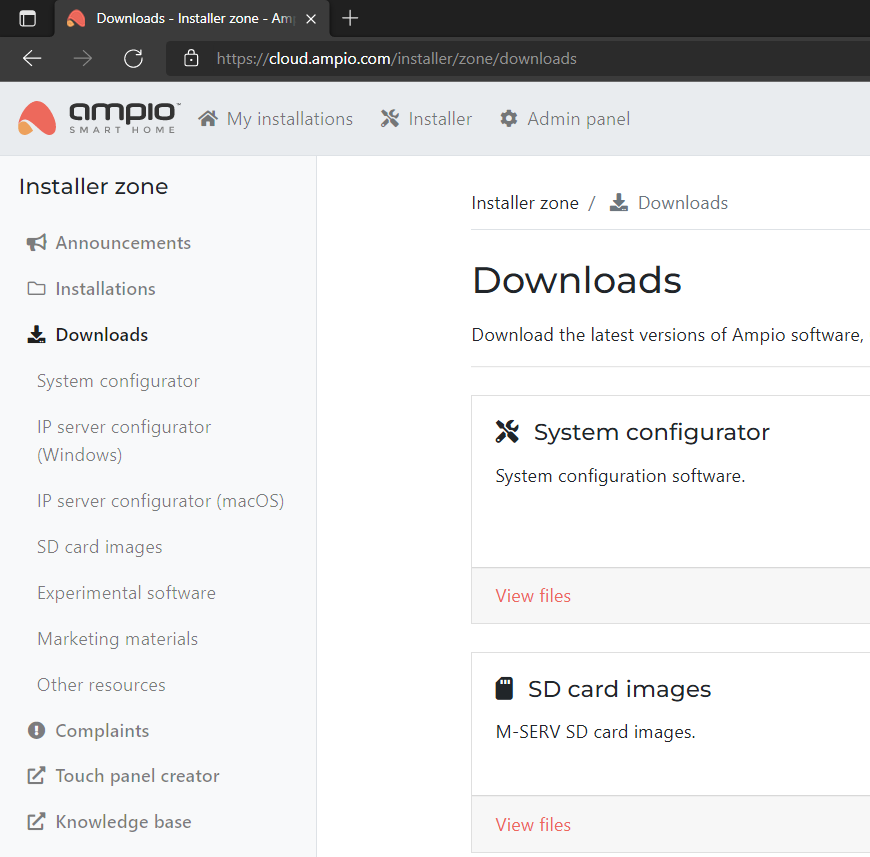
The next step is to download the newest version of the SD card image for the M-SERV server. Go to www.cloud.ampio.com, log in, select Installer from the top menu and then Downloads from the side menu. Then, open SD card images, select the latest version and save it on your local disk. The downloaded file will be zipped and needs to be unpacked to reveal the correct .img card image file.
Login » Installer » Downloads » SD card images
 Click to enlarge and open in a new tab.
Now what you need to do is “burn ’ the downloaded image onto our micro SD card. It’s not enough just to burn the file to the SD card - we need to use a suitable programme to do this, as the card is designed to be readable for Linux. We recommend using Rufus, which is available for download from the following website:
The ejected SD card should now be placed into a memory card reader. Connecting the reader to your computer’s USB slot will result in a new disk appearing on your computer (e.g. F:). You have to remember the letter, or check in “My computer” whether the letter really corresponds to the right disk/memory card.
If a problem occurs with the card and the system suggests formatting the card, please ignore it. It is caused by the fact that the card has Linux files saved on it, which are not visible to the Windows operating system.
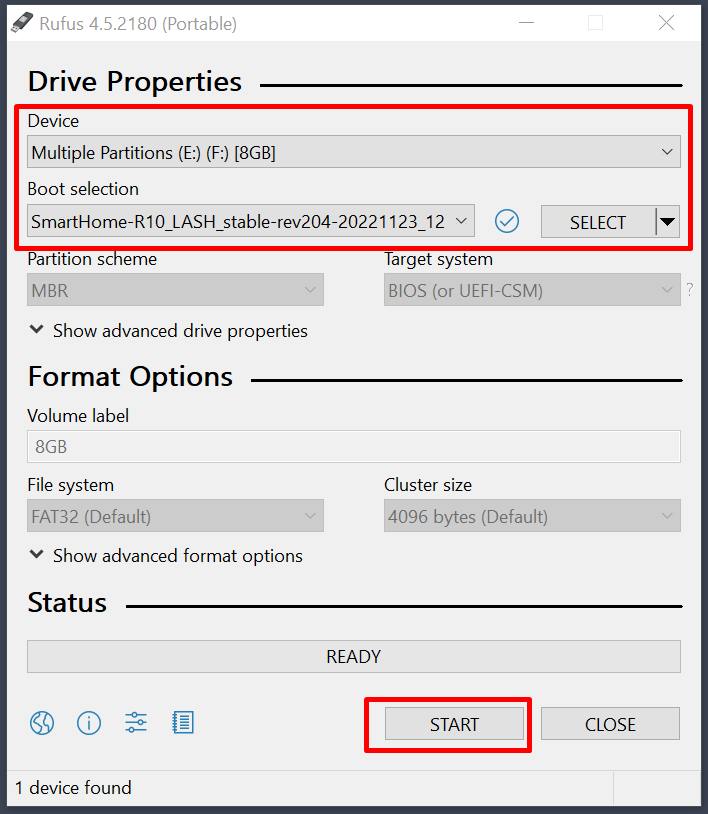
In Rufus, open the saved SD card image file and select the appropriate drive letter under which our microSD card is visible in the memory card reader. Only edit the marked lines Device and Boot selection.
Then press the START button and wait for the image to be copied to the microSD card. This operation may take a few minutes.
 Click to enlarge and open in a new tab.
As soon as copying is finished, remove the microSD card from the reader and put it back into the M-SERV module.
Close the module’s casing, reconnect all connectors and at the end, connect the module’s power supply. Wait for the server to start properly.
After completing a Method 2. restoring a backup is different for Ampio Smart Home Manager and Ampio Designer:
When the server is fully launched, set up its passwords in accordance with the M-SERV server configuration guide. Then open the Ampio Smart Home Manager and connect with the M-SERV module.
Restore the server’s database using the option File > Upload configuration from a file.
The updating process is now completed.
Choosing this option allows you also to transfer an existing installation from the Smart Home Manager and Smart Home Configurator software to the new configuration tool Ampio Designer.
When the server is fully launched, set up its passwords in accordance with the Ampio Designer guide.
Then, restore the server’s database using the option Restore backup > Database > select a file.
The update is completed and any further installation configuration works can be continued in the Ampio Designer software.
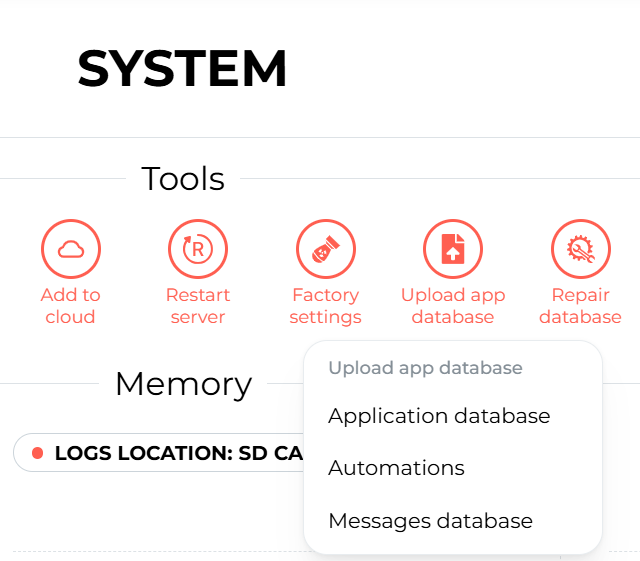
To restore the database from files created in Smart Home Manager, in Ampio Designer go to SETTINGS, then SYSTEM, and from the tools menu select Upload app database.
 Click to enlarge and open in a new tab.
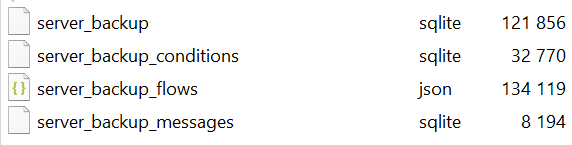
The Smart Home Manager application created up to 4 types of backup files (depending on the server application version):