The Ampio system allows integration with the DALI lighting bus, via the M-CON-DL-s module. Up to 64 lamps (controllers) can be connected and grouped according to the DALI standard.
In order to control the lamps on the DALI bus, the M-CON-DL-s module must be connected to the CAN network, the lamps must be powered and the DALI connector must be connected to the M-CON-DL-s module.
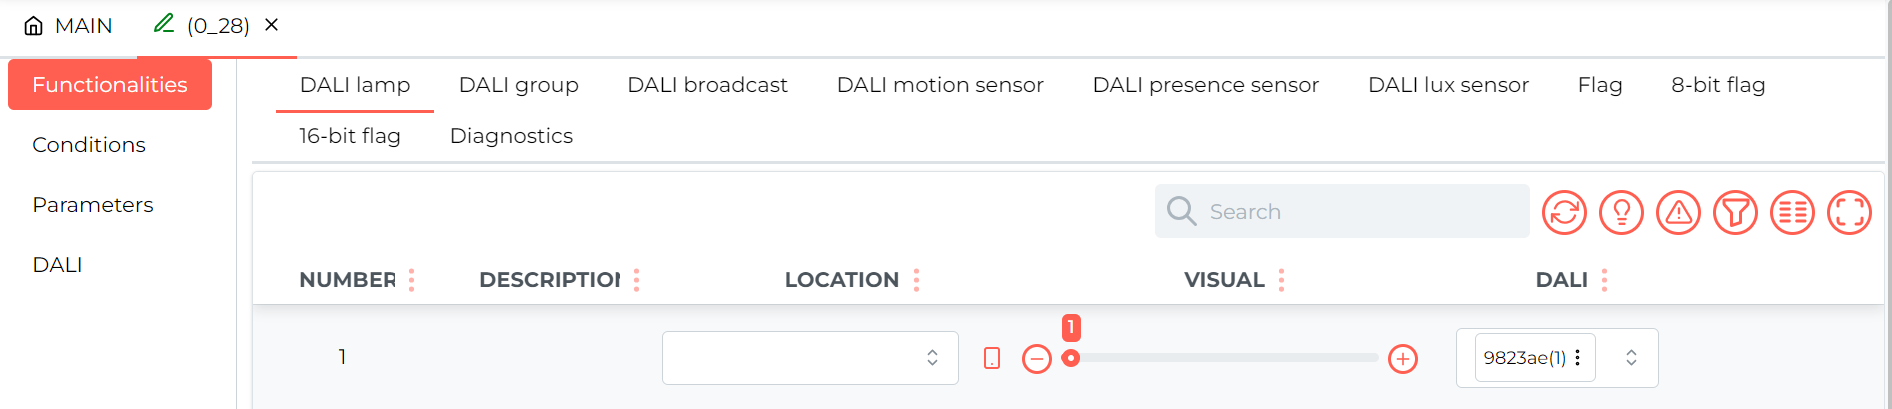
To search for and name individual luminaires, enter the settings of the M-CON-DL-s module ( cog icon). In the Functions tab, select the DALI lamp sub-tab. Search for lamps by clicking on the arrow icon in the upper right corner.
 Click to enlarge and open in a new tab.
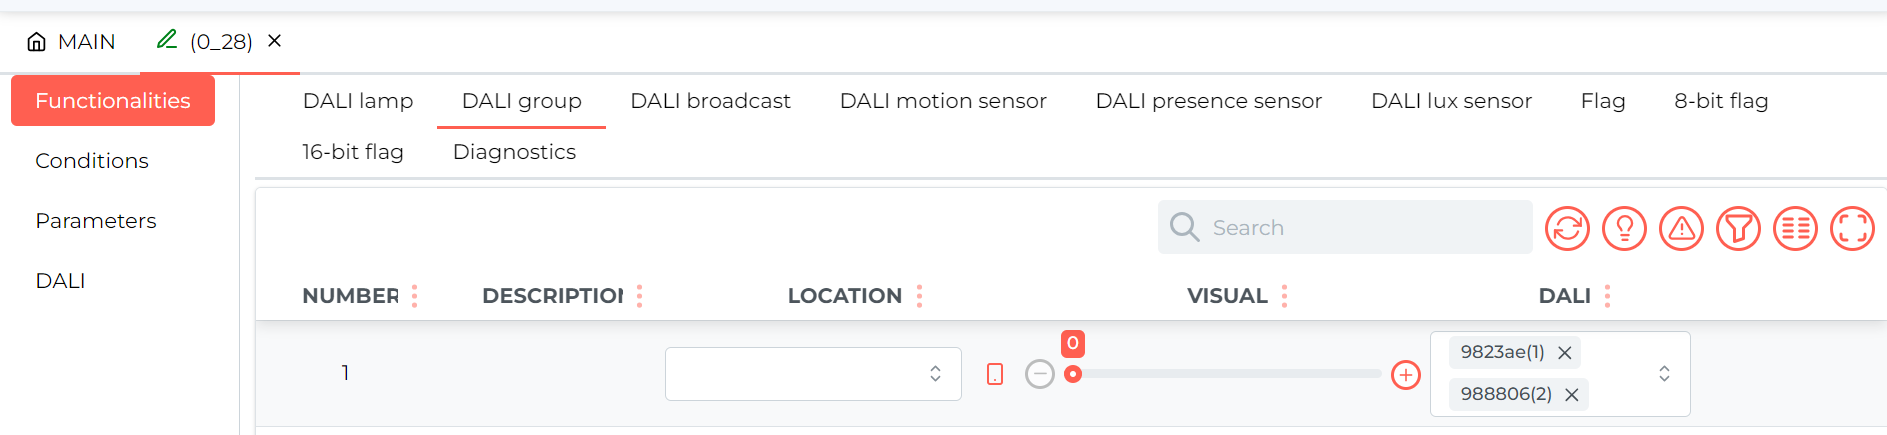
In the DALI Group sub-tab, several lamps can be assigned to one lighting group. In the DALI column, select the corresponding lamps by their addresses. The recording is done automatically.
 Click to enlarge and open in a new tab.
The settings of the luminaires together with their short addresses or groups are also available in the DALI tab.
 Click to enlarge and open in a new tab.
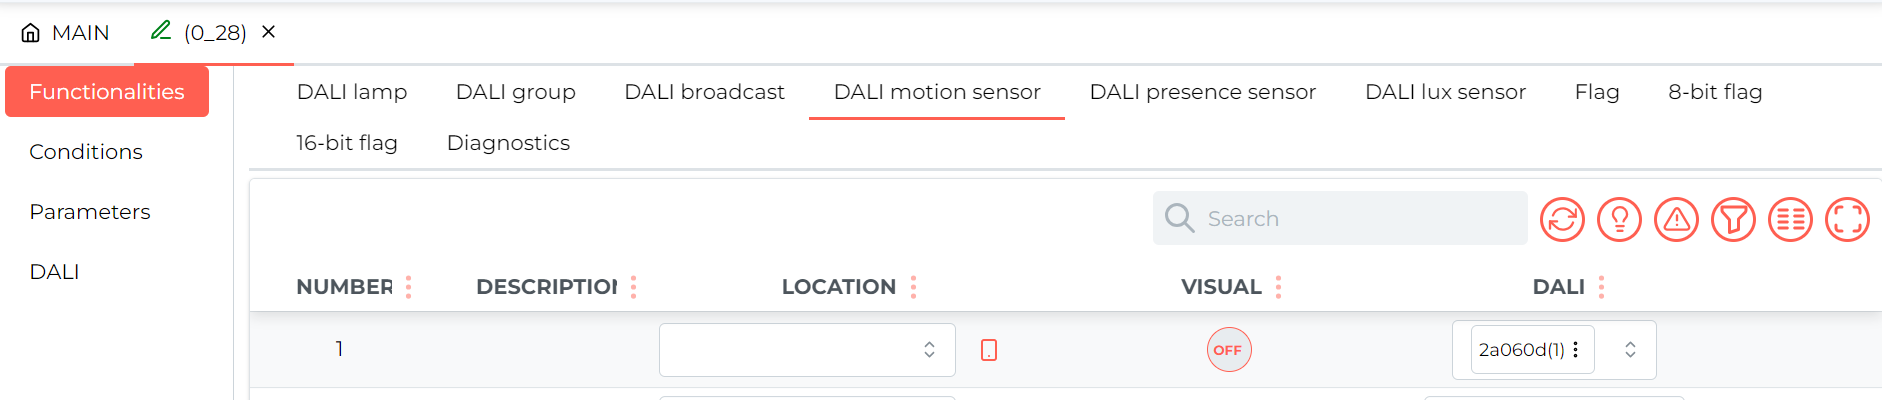
Motion sensors or LUX lighting sensors based on the DALI standard are searched for in a similar way to lamps in the corresponding tabs.
 Click to enlarge and open in a new tab.
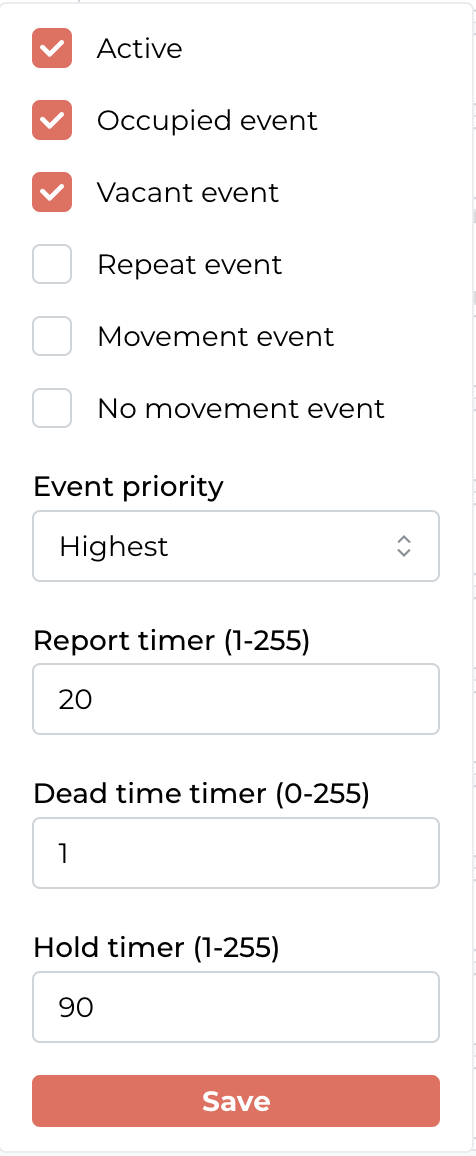
The sensors have parameters available that are compatible with the DALI standard. In order to find out what a particular parameter is used for, it is recommended to search online for a description of the DALI standard. In addition, the reporting time or dead time between consecutive motion detections can be freely set, among other things. Examples of sensor settings are shown below, the parameters should be selected individually according to your requirements.
 Click to enlarge and open in a new tab.
Conditions on the LOGIC tab can be created either from individual lamps, sensors or groups of luminaires.
 Click to enlarge and open in a new tab.
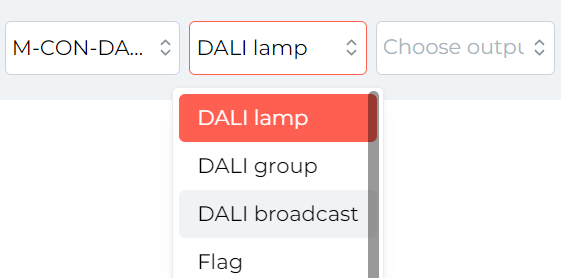
Single luminaires, groups of luminaires or all luminaires at once can be controlled via the Broadcast dali option.
 Click to enlarge and open in a new tab.
*from January 2024, the Smart Home Configurator software is no longer being developed. It is recommended to use it only in substantiated instances.
Available for the Ampio Smart Home configurator version 3.5
Ampio system is able to integrate with the DALI system through the M-CON-DL-s module.
A user can connect up to 64 lamps and link them in groups.
To control DALI lamps, an installer has to connect M-CON-DL-s to the CAN network, power on DALI lamps, and connect the DALI connector to M-CON-DL-s.
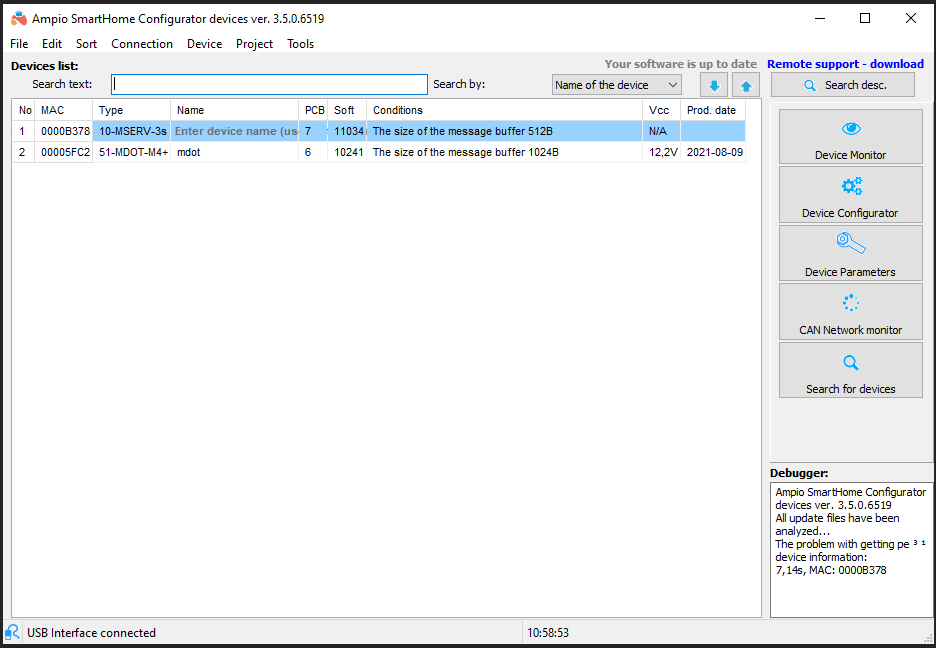
In the Ampio configurator, after opening the Device Monitor from the menu on the right, a user can enter device names for each of the lamps in the installation.
 Click to enlarge and open in a new tab.
 Click to enlarge and open in a new tab.
As it is the case with every module in the Ampio system, a user can create control conditions for the device in the Device configurator.
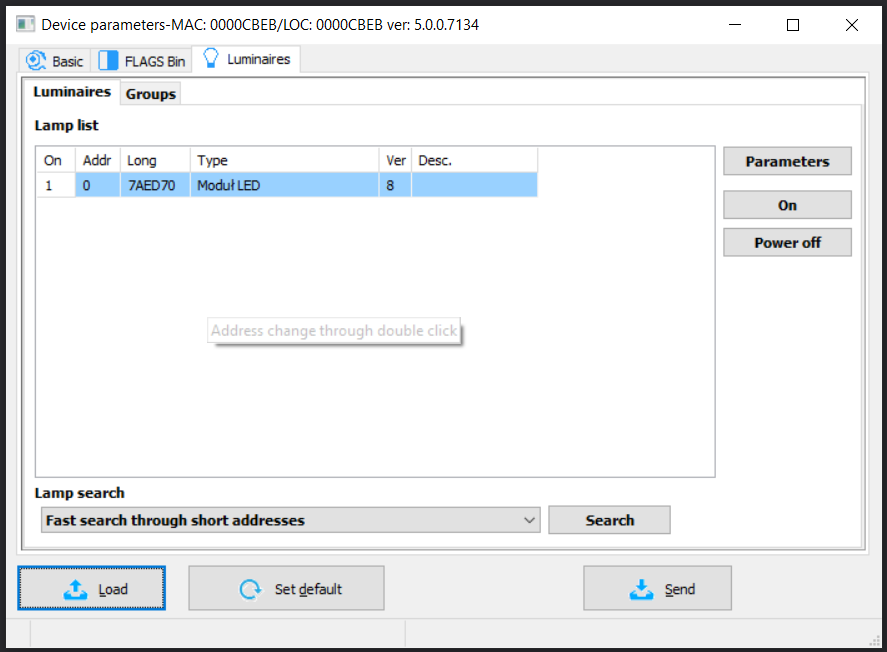
In the Device Parameters, a user can group lamps, check if they are working correctly, set group numbers, and search for new lamps.
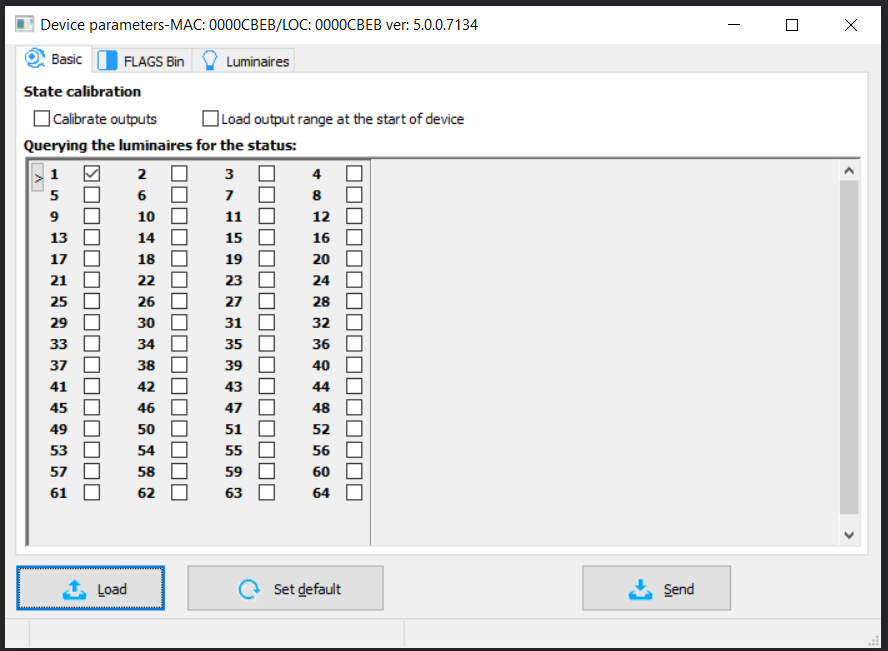
In the first tab – Basic – user can tick or untick the box to check the status of each lamp regularly, as shown below.
It is important that the module is not asked to check the status of lamps that are not present in the network.
 Click to enlarge and open in a new tab.
In the third tab, a user can search for new lamps with 3 methods as listed in the drop-down list under Luminaires Search, shown in the picture below.
A full search will delete all numbers that have been already set up.
 Click to enlarge and open in a new tab.
By accessing the Parameters in the configurator’s main menu, a user can check which functions are supported by the specific lamp. It is here, where you can set up parameters, such as fade time, or max/min level of brightness, etc. If a function is described as Err, it means that this function is not supported.
 Click to enlarge and open in a new tab.
The second tab of Luminaires part is used to connect lamps to a specific group. You can select groups numbered from 0 to 15 and name the groups.
 Click to enlarge and open in a new tab.
*from January 2024, the Smart Home Manager software is no longer being developed. It is recommended to use it only in substantiated instances.
In order to enable control of the DALI lamps via the Ampio mobile application, an installer needs to add specific objects in the Smart Home Manager.
The first step is to open the Ampio Smart Home Manager with M-CON-DL-s connected to the local network and log in.
Then, enter Objects from the side menu on the left and Add a new object.
 Click to enlarge and open in a new tab.
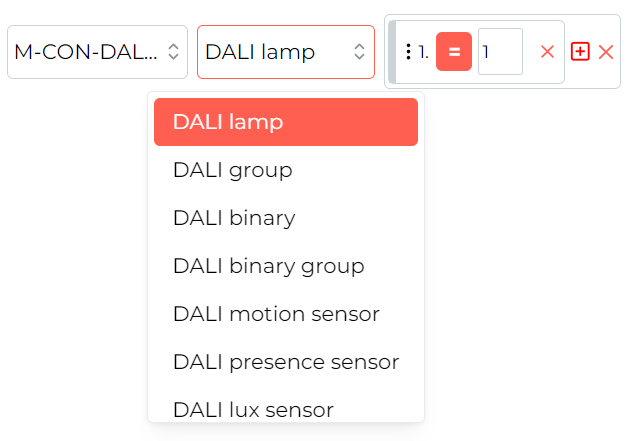
Select the DALI module from the list in the Device column, add a Description and click on the Settings button.
 Click to enlarge and open in a new tab.
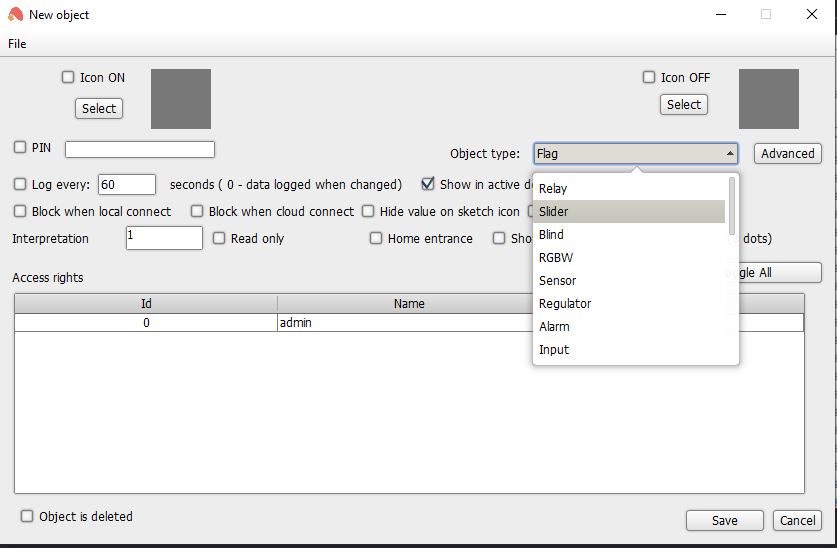
From the Object Type drop-down menu, select the Slider option and click on Advanced.
In order to check the status of a specific group, a user needs to select exactly which lamps will be queried for data. It can be set in the Interpretation field shown in the picture above.
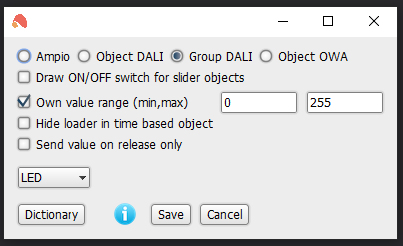
In the Advanced tab, a user can choose if one lamp is controlled or the whole, selected group. Own value range can also be specified.
 Click to enlarge and open in a new tab.
After setting up the parameters, the object needs to be ticked on the list in the Grouping option of the menu on the left, to be visible in the mobile app.
