Integration of devices that support the ZigBee protocol with the Ampio system is possible, for example, by connecting a gateway to the M-SERV-s module. Using Node-RED is a prerequisite to establishing a connection. This guide presents the example of ZBDongle-E from Sonoff with a dedicated antena as a gateway.
In order to connect the gateway, disconnect M-SERV-s from its power supply, connect the gateway device and power up the server again. After a couple of minutes, activate an SSH connection via a www interface (more guidelines available in M-SERV server configuration). Log in onto the root account on the server with the password you have created e.g. through the putty application.
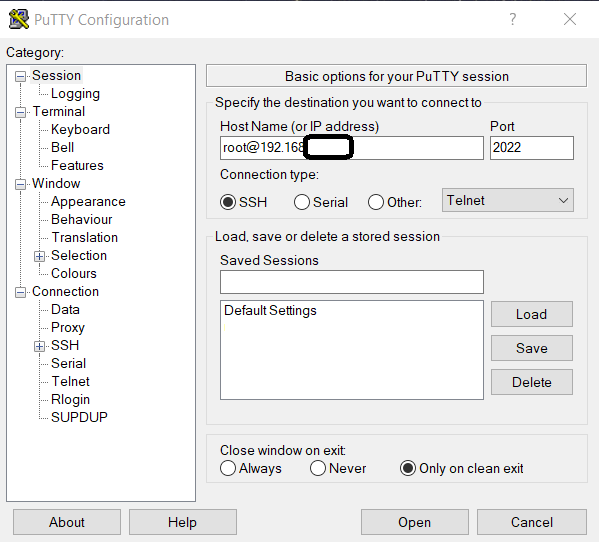 Click to enlarge and open in a new tab.
After entering the password, search for devices with the following command:
dmesg | grep tty
The gateway will most probably be added as ttyACM0.
Enter read and write mode
/opt/ampio/bin/rw
go to the folder where you can make changes
cd /root
update the list of available packages
sudo apt-get update
install the pnpm package
npm install -g pnpm@10.4.1
install git
sudo apt install git
create a folder
sudo mkdir /root/zigbee2mqtt
change folder permissions
sudo chown -R root:root /root/zigbee2mqtt
clone the zigbee2mqtt repository
git clone --depth 1 https://github.com/Koenkk/zigbee2mqtt.git /root/zigbee2mqtt
go to the folder
cd /root/zigbee2mqtt
install dedicated dependencies
pnpm i --frozen-lockfile
start building the package
pnpm run build
copy the contents of the example into your configuration file
cp /root/zigbee2mqtt/data/configuration.example.yaml /root/zigbee2mqtt/data/configuration.yaml
Open the file for editing
nano /root/zigbee2mqtt/data/configuration.yaml
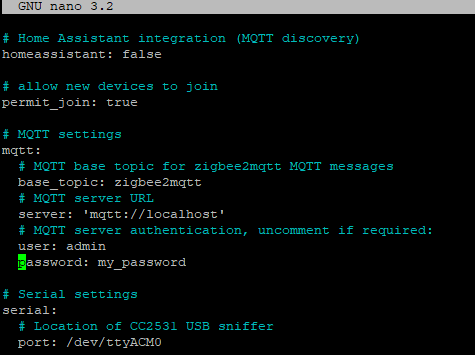
Set the server field to mqtt://localhost.
MQTT connection fields according to your server settings, user is usually admin and the relevant password (login details as for the mqtt blocks in Node-RED). Remember to remove the # character indicating a line comment.
 Click to enlarge and open in a new tab.
After the change, save and close the configuration file. In putty this is done via Ctrl+x, then y and Enter.
Type the command
pnpm start
Create a folder:
sudo mkdir /ampio/rw/zigbee2mqtt
Grant permissions:
sudo chown -R ${USER}: /ampio/rw/zigbee2mqtt
git clone --depth 1 https://github.com/Koenkk/zigbee2mqtt.git /ampio/rw/zigbee2mqtt
Change the current folder:
cd /ampio/rw/zigbee2mqtt
and install:
npm ci
Open the file to be edited
nano /ampio/rw/zigbee2mqtt/data/configuration.yaml
Set the server field to mqtt://localhost.
The port field should be completed with information obtained in the previous step e.g., /dev/ttyACM0.
MQTT connection field should be filled with your server settings, user set to admin and the correct password should be provided (login details are the same as for the mqtt blocks in Node-RED).
Click to enlarge and open in a new tab.
Once the changes are introduced, close the configuration file. You can do that in putty by clicking Ctrl+x, then y and Enter at the end.
Enter the following command:
npm start
The device added in this guide is the SNZB-02 temperature and humidity sensor from Sonoff. Instructions for the devices are available on the respective manufacturers' websites. For the sensor described, the button on its case must be held down for 5 seconds to add it.
The Zigbee interface is available in the browser at IP_SERVER:8080 (e.g. 192.168.1.6:8080). Once in the interface, you can manually add further devices via the Permit join option.
 Click to enlarge and open in a new tab.
Once correctly added, the slave device will appear in the list.
 Click to enlarge and open in a new tab.
At the end of the set-up, the addition of everything can still be stopped prematurely.
 Click to enlarge and open in a new tab.
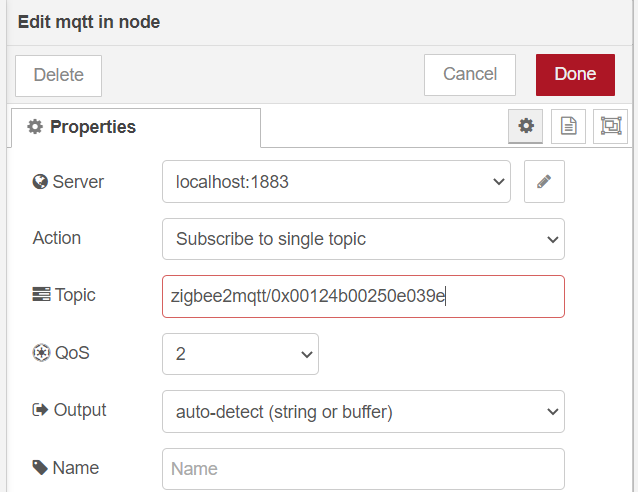
A guide that describes the basics of Node-RED use in the Ampio system is available here: Integration of the Ampio system with Node-RED. After adding secondary devices, data from the MQTT Ampio can be received. Topic on which the device is broadcasting can be viewed in a terminal via an SSH connection. In this case, it is the main topic and ID of the added device: zigbee2mqtt/0x00124b00250e039e.
 Click to enlarge and open in a new tab.
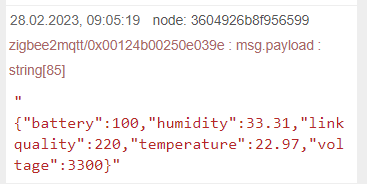
Data can be viewed after adding a debug node.
 Click to enlarge and open in a new tab.
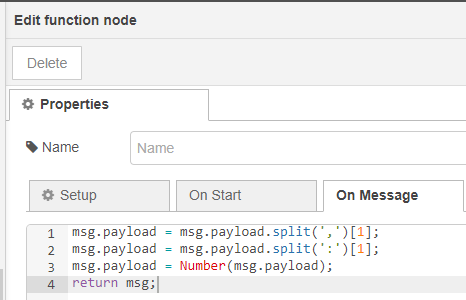
If you want to for example, read the value of humidity from a sensor, you will need to send the following information through the node function:
 Click to enlarge and open in a new tab.
Different end devices can broadcast information in different ways, which is why it is worthwhile to view the data first in the debug window, before creating a function to send the information.
Log in again via SSH, being in the root folder download and run the script with the command:
curl https://dist.ampio.pl/scripts/zigbee2mqtt400.sh | bash -s
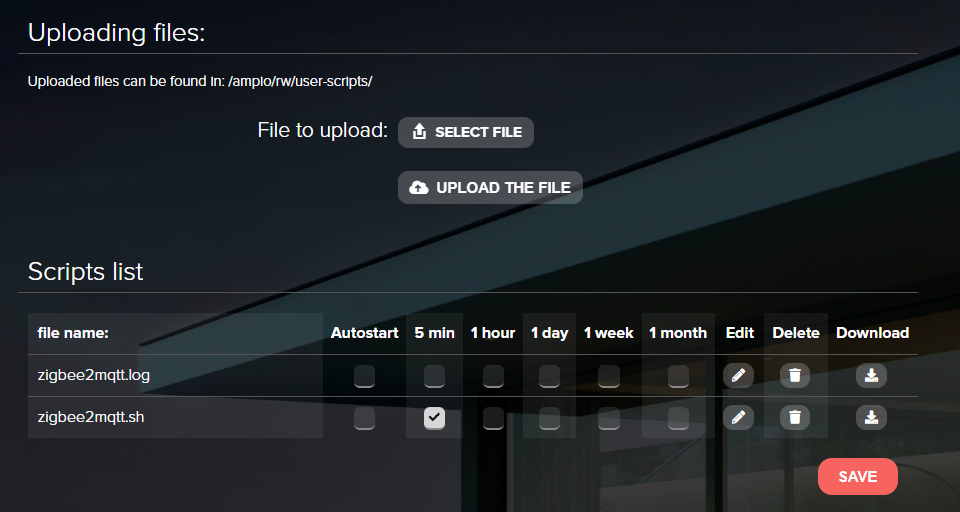
For the application to launch automatically after a power supply reboot, a suitable script must be written. Open the SYSTEM tab in the www interface of M-SERV and go to SCRIPTS. Download the attached file zigbee2mqtt.sh. Upload it by clicking on SELECT FILE, and then UPLOAD THE FILE. Then, tick the 5 min box next to the correct script and click SAVE.
 Click to enlarge and open in a new tab.
In order to confirm the correctness of configuration, reboot the server’s power supply and, after a couple of minutes, check whether everything is working as intended in Node-RED, in the debug window, for instance.
If you went into rw mode during the configuration, at the end you should put the server back into read-only mode during the SSH connection:
/opt/ampio/bin/ro
Download file: