With the Ampio system, it is possible to control multiple heating zones in a building using a single touch panel. Such a function is called Multizone. The following tutorial will describe its configuration.
A full configuration must be carried out to enable the aforementioned functionality. A minimum of 2 modules (1 controlling heating zones and 1 touch panel) are also required.
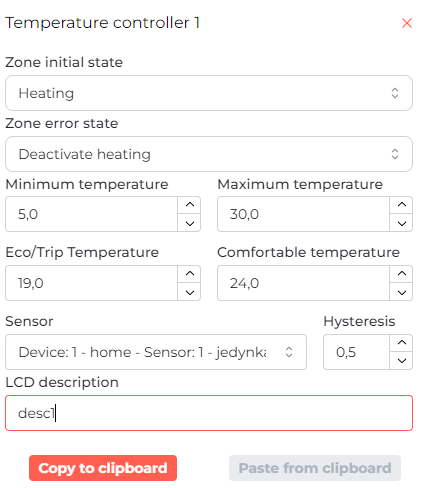
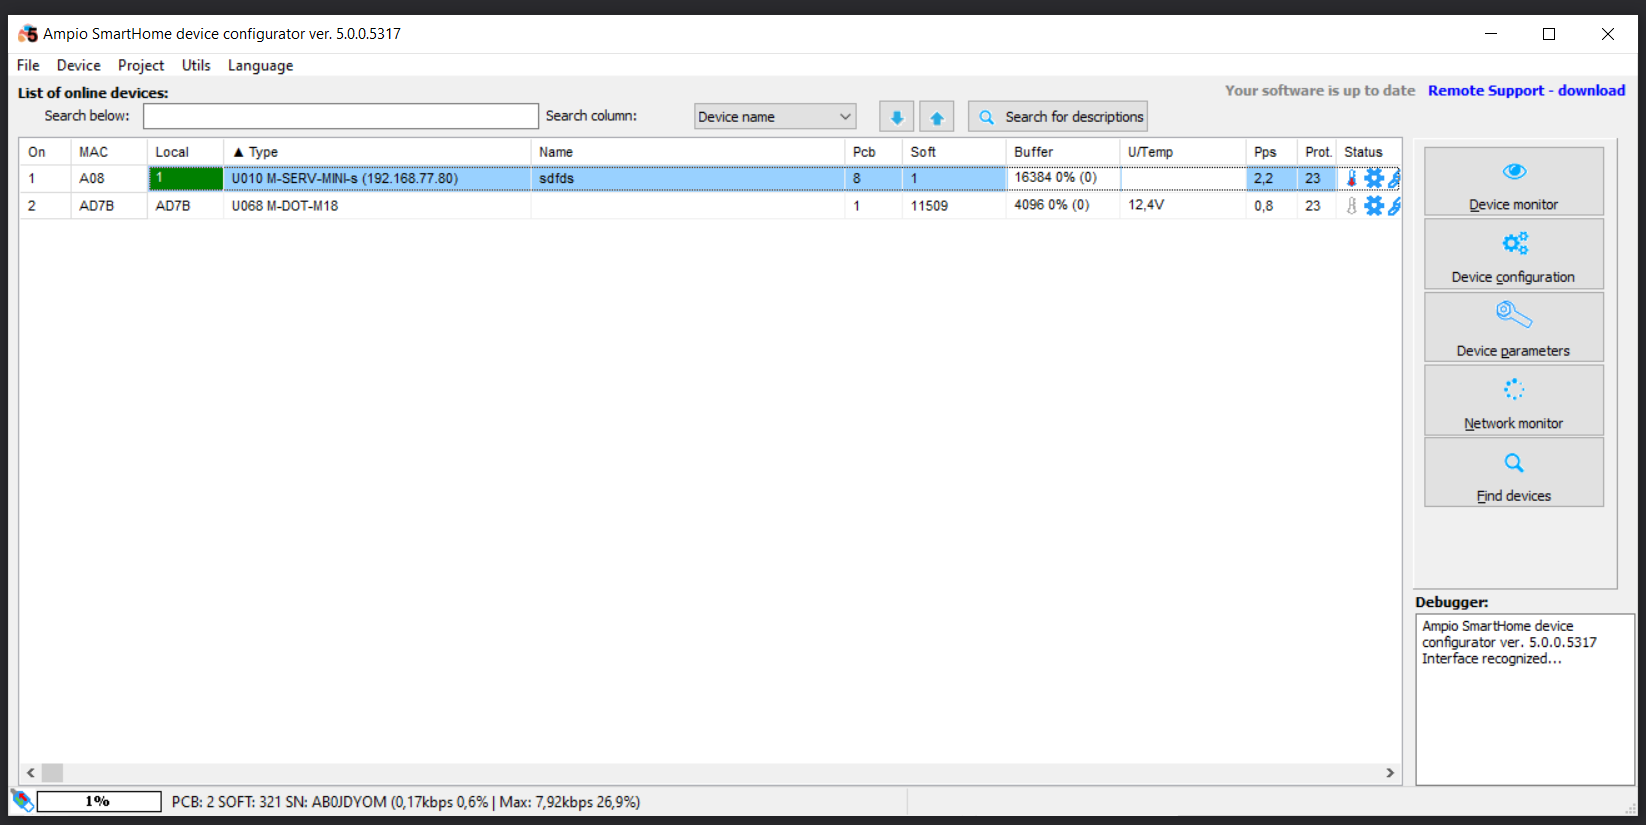
Select the zone control module (M-RT-s or M-SERV-s in the correct configuration). To set the heating zones, enter the control module’s SETTINGS.
 Click to enlarge and open in a new tab.
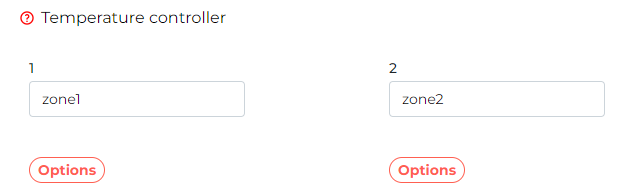
Then, in the Parameters sub-tab, select Temperature controller in the second column.
 Click to enlarge and open in a new tab.
For a few more zones, you will enter the appropriate settings to make the zones active.
 Click to enlarge and open in a new tab.
After all changes have been made, press Save in the top right corner of the interface, and Send parameters to the module to save the new settings.
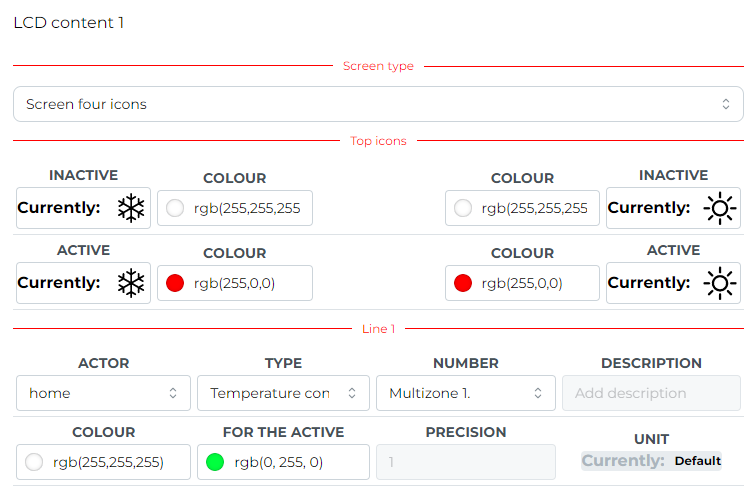
In the next step, the Parameters for the M-DOT touch panel are set up. Navigate to the LCD option in the second column, open the tab LCD content and click on “Settings” for the selected screen. Select “Screen four icons” as the screen type and then set: as ACTOR the module in which the heating zones were configured, in the column TYPE option “Temperature controller,” and for NUMBER, e.g. “Multizone 1”, if the changes on the panel are to start from zone number 1.
 Click to enlarge and open in a new tab.
Then confirm at the bottom of the page by Confirm changes. After the window closes, send the new settings via Send parameters to the module.
4 conditions will be created, 2 of which are used to change the zone number and another 2 to change the temperature settings in the respective zones. The conditions can be created in the LOGIC tab or in the Conditions sub-tab in the settings of the respective touch panel.
In the following screenshot, in the first condition pressing button number 2 increases the number of the zone to be set. The numbers of the zones to be modified can be added in the OUTPUT NUMBERS column.
 Click to enlarge and open in a new tab.
The next condition from another button will decrease the zone number. A third condition will increase the temperature for the currently set zone when the subsequent button is pressed.
 Click to enlarge and open in a new tab.
The last condition will reduce the temperature in the zone using the fourth button. In the advanced condition settings, you can also modify the maximum and minimum temperatures respectively, which can be changed from the buttons of the M-DOT panel.
 Click to enlarge and open in a new tab.
All four conditions created are sent to the device. Once the four conditions have been created, confirm them with the Confirm button and send them to the device’s memory via the Save button.
From now on, the number of the controlled zone and the set temperature for the zones can be changed from one M-DOT display.
*from January 2024, the Smart Home Configurator software is no longer being developed. It is recommended to use it only in substantiated instances.
In order to enable the Multizone functionality, a full configuration needs to be performed. 2 modules are required to achieve this - one that controls heating zones and one touch panel.
First, select the module that controls the heating zones (M-RT-s or M-SERV-s in the right configuration).
 Click to enlarge and open in a new tab.
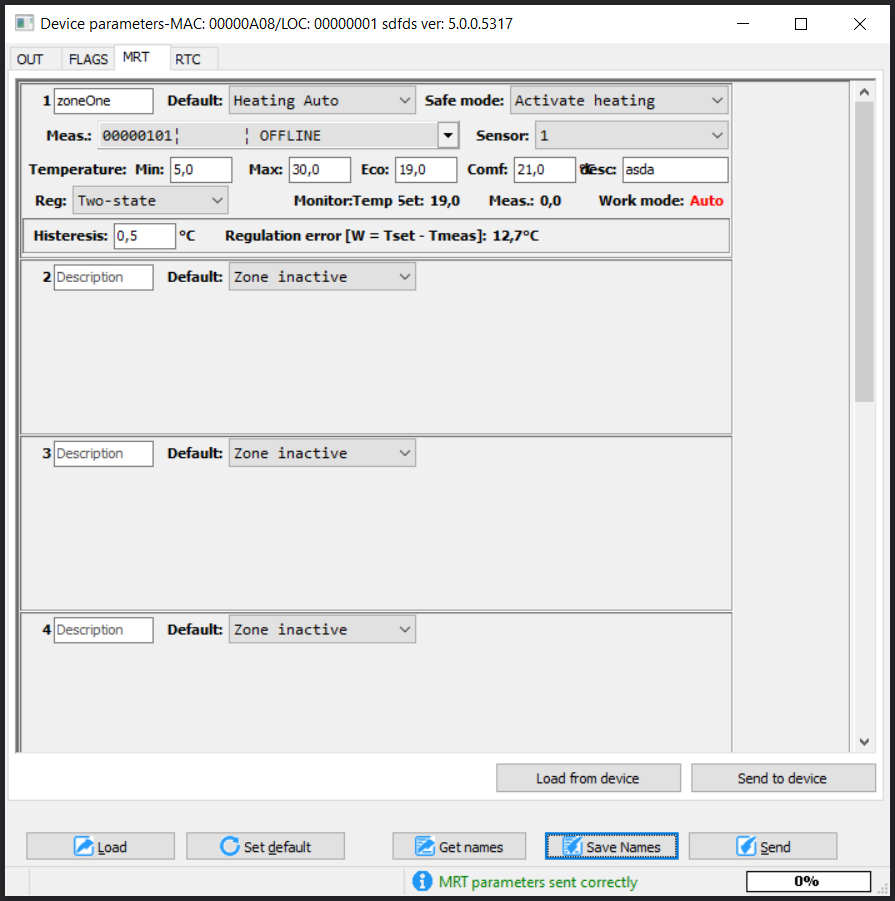
The heating zone parameters are now to be set in the Device parameters tab. If you wish to control the heating zones through touch panels. it is also advisable to add zone names in the Description field. At the end, send the settings to the device.
 Click to enlarge and open in a new tab.
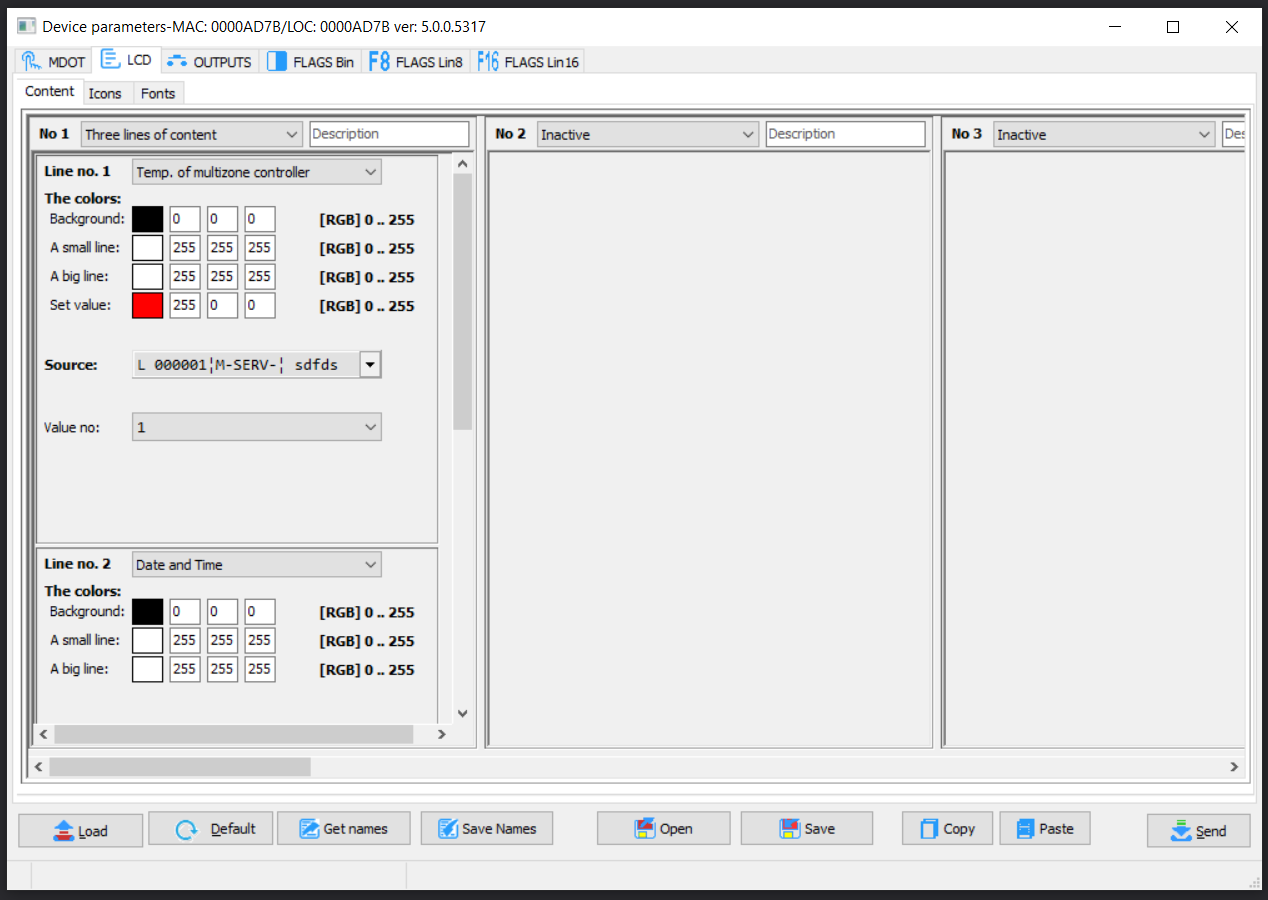
Next, go to M-DOT’s Device parameters.
As one of the displayed elements, set the chosen option related to the Multizone, e.g. Temp. of Multizone controller. The source should be set to the Ampio module, in which zone controls have been established. The value number is a default zone number.
 Click to enlarge and open in a new tab.
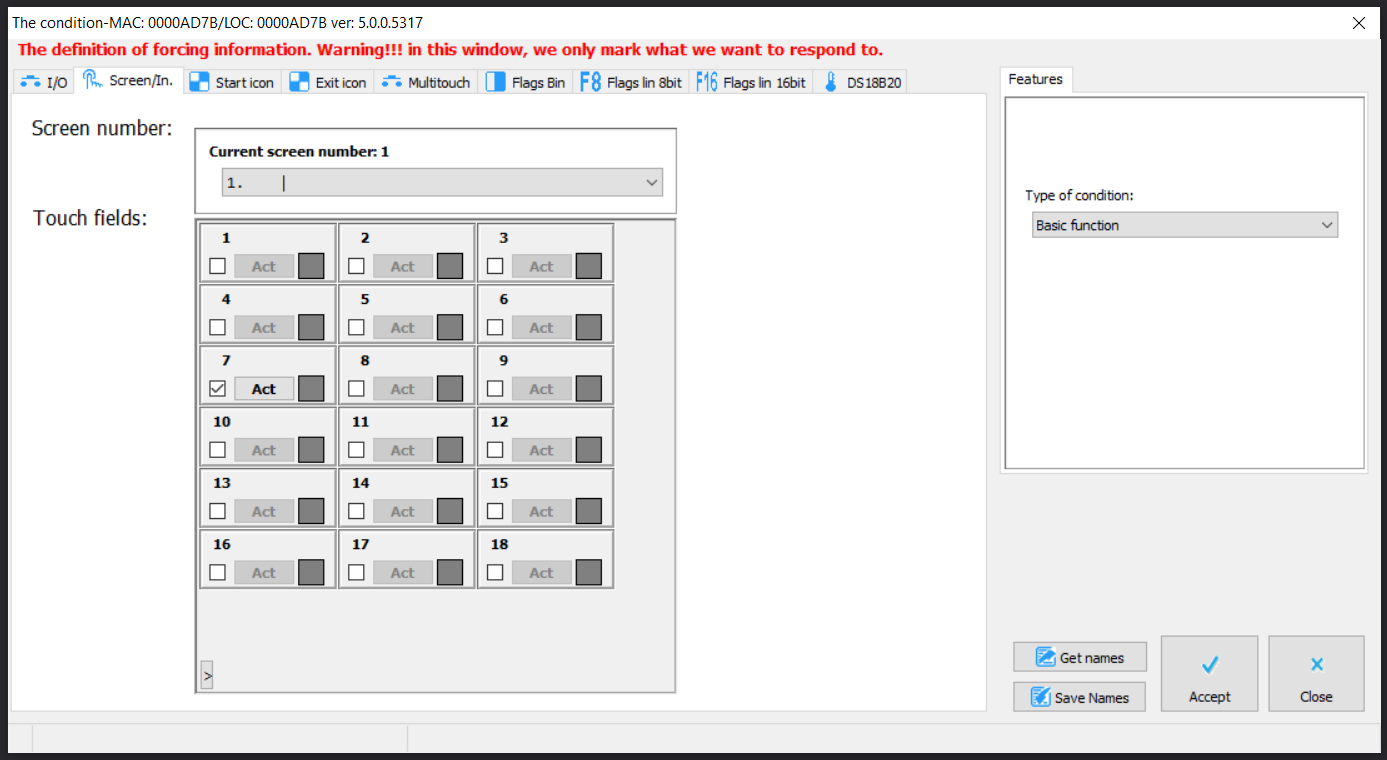
The next step is to open the M-DOT’s Device configurator.
Set up a condition linked to a selected button, which will be used to increment the zone’s number (increase the current zone number).
 Click to enlarge and open in a new tab.
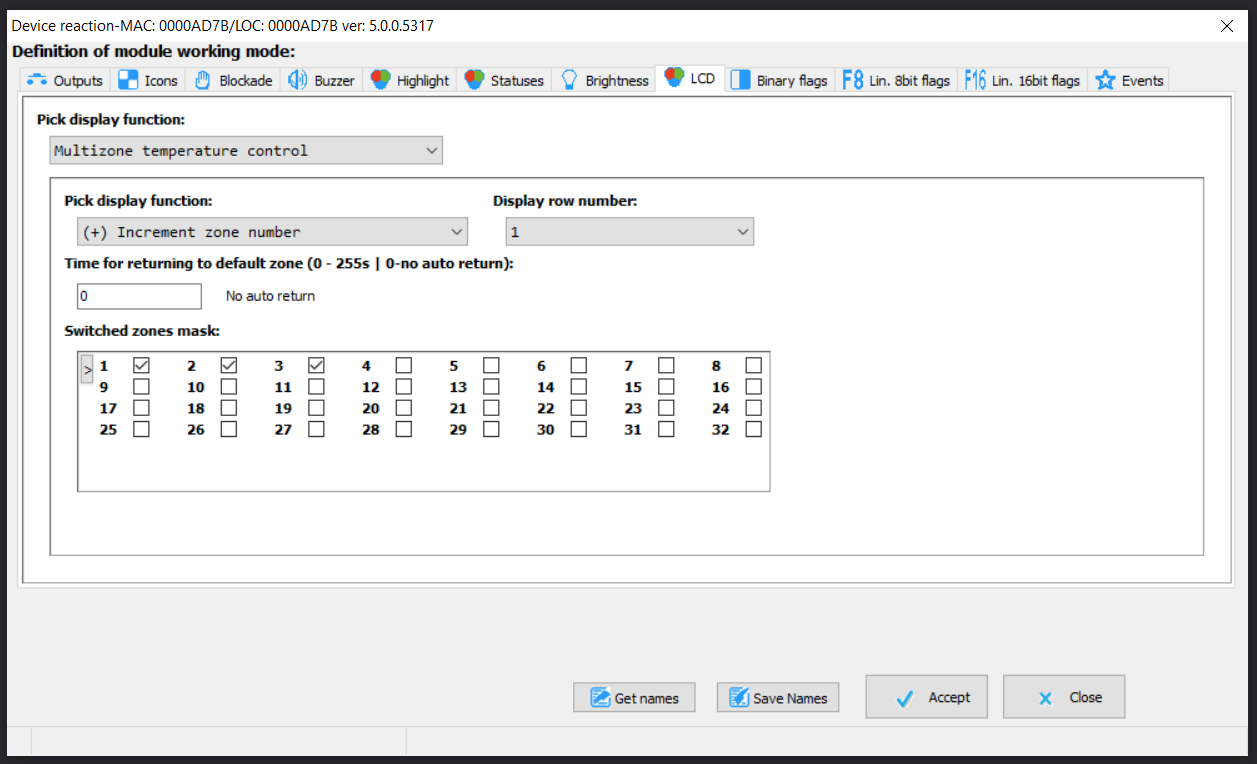
The condition’s function will be changing the zone’s number (Increment zone number). It is necessary to provide the number of the display row, in which the Multizone has been set (see: Device parameters). You can choose the zones between which you want to switch over (the Switched zones mask table) and set the time for returning to the default zone.
 Click to enlarge and open in a new tab.
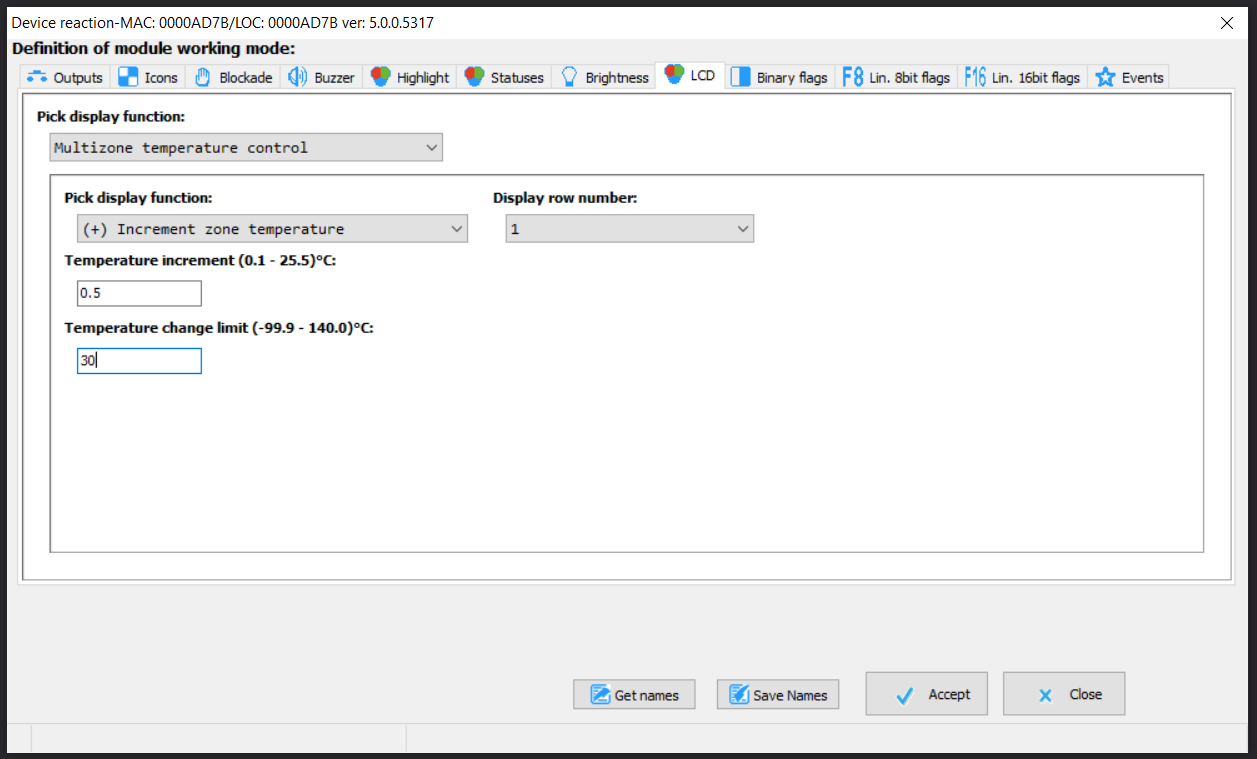
Then, create another condition to a different M-DOT button and set its reaction to Decrement zone number. This setting will change the set temperature in the current zone. In the condition’s function, select Increment zone temperature, set the limit and increment value.
 Click to enlarge and open in a new tab.
The last condition assigned to the fourth button will be Decrement zone temperature. All four created conditions can now be sent to the device.
After all the steps described above are completed, you will be able to change the controlled zone number and the set temperature for heating zones in one place - on the M-DOT’s screen.