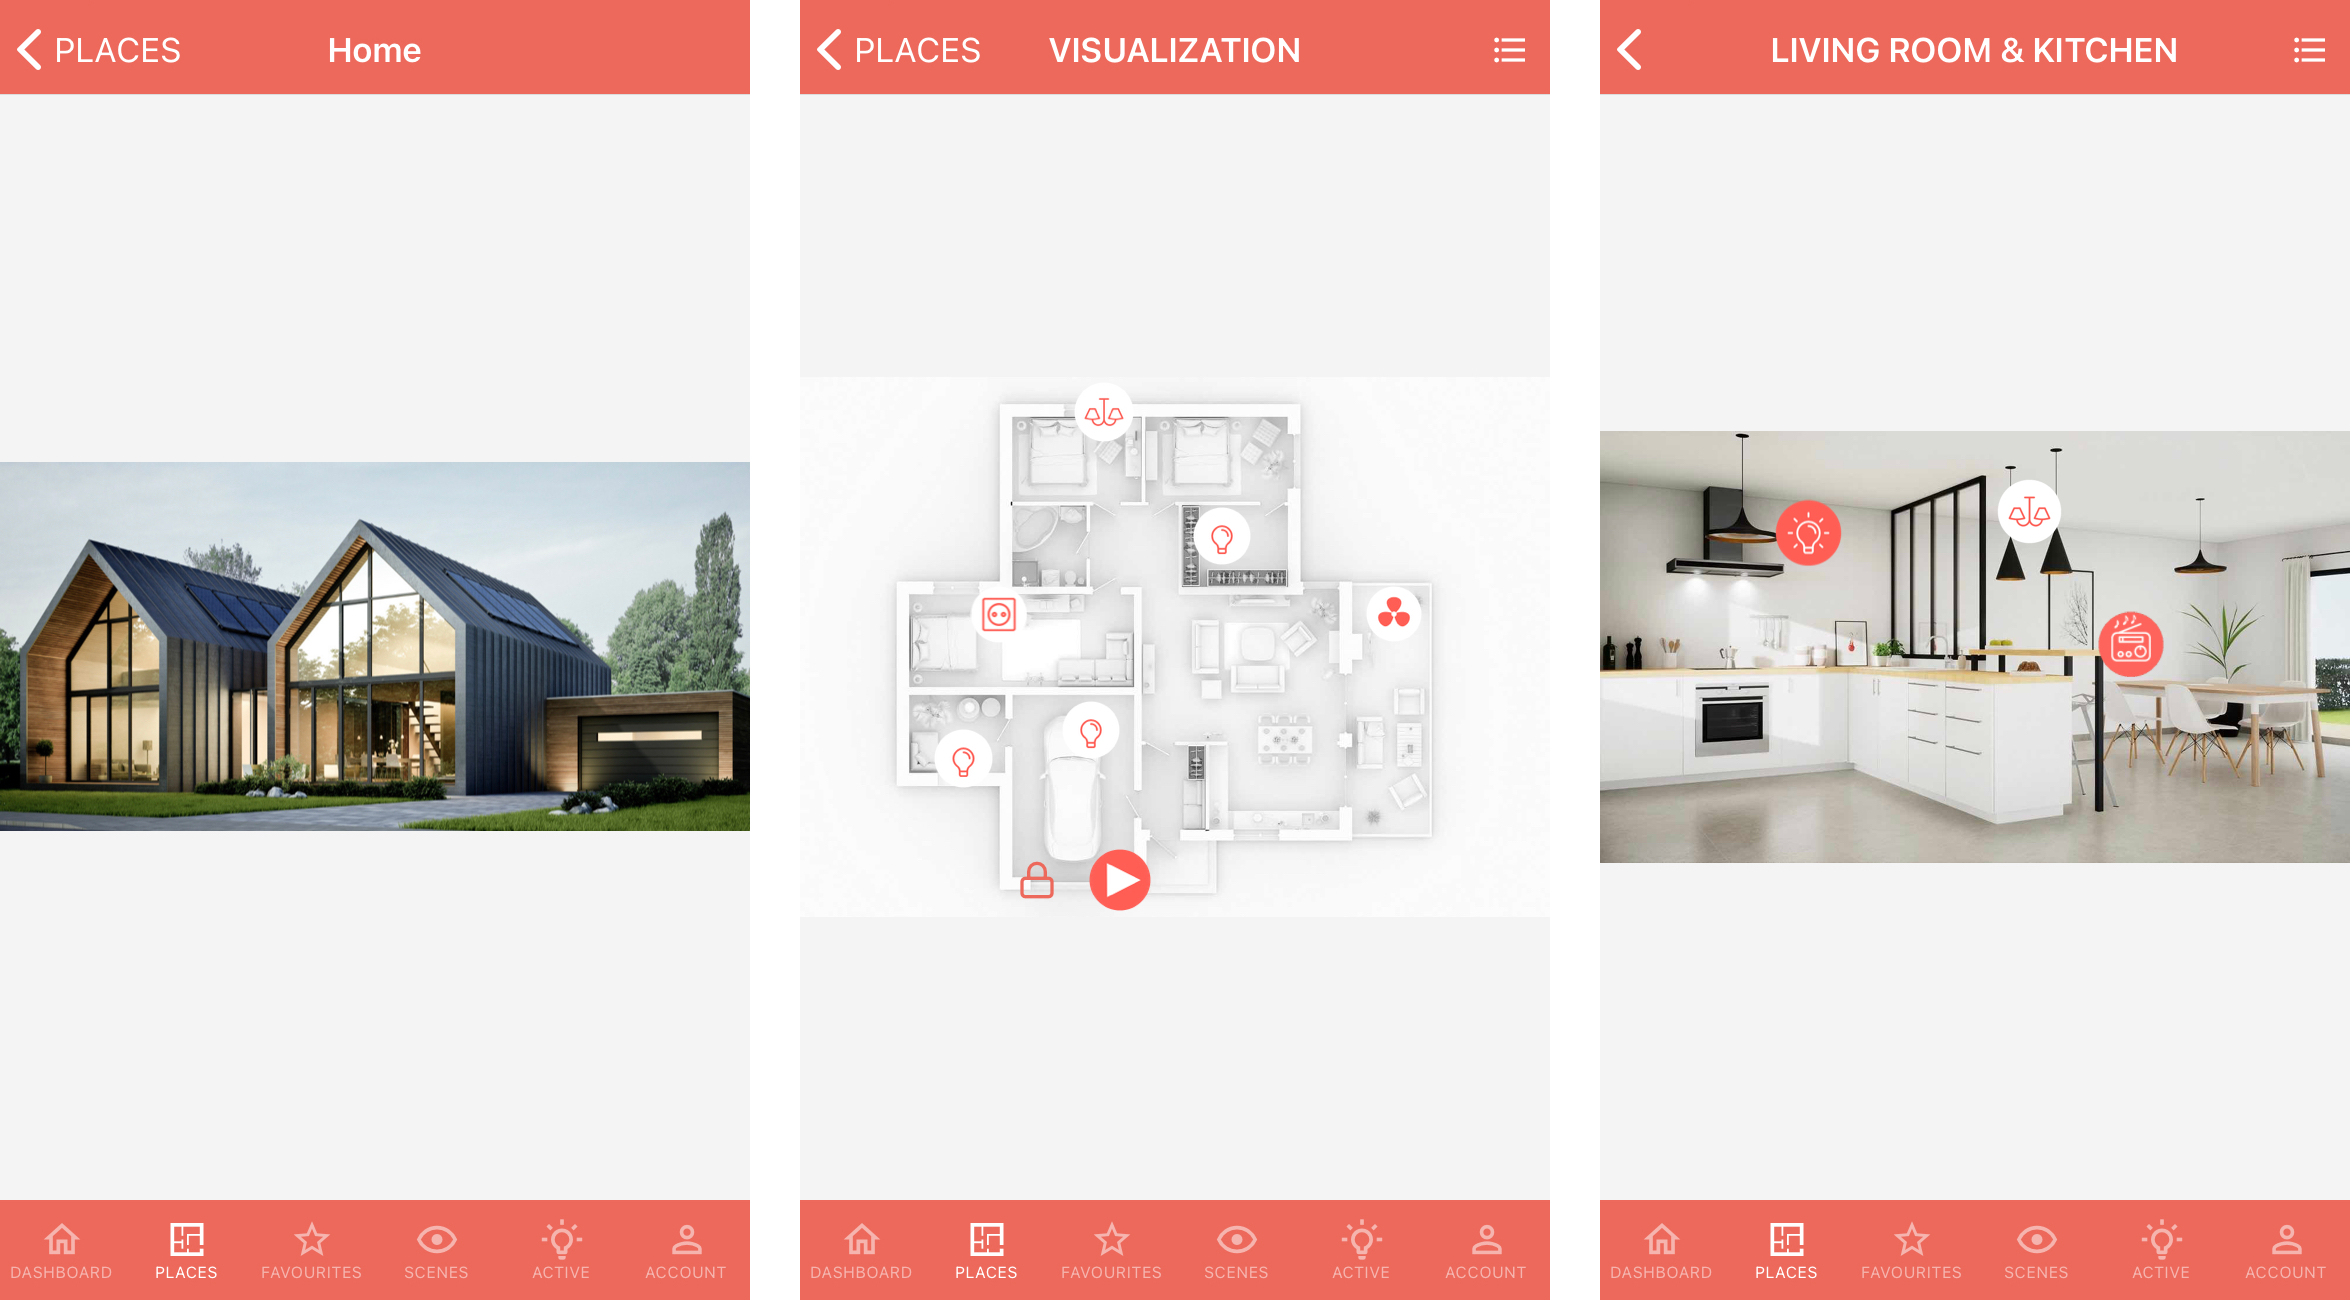
In the Ampio UNI app, in the PLACES tab, you can group elements not only in a list form, but also place them on a picture (e.g. a floor plan, illustration, photo, etc). You can control objects from the picture and move between different groups as well. The whole configuration process is conducted in the Smart Home Manager.
In order to add new graphics, log into the Smart Home Manager application. A prerequisite here is knowing the admin password to the server, as well as providing the IP address. If you do not know, how to log into the Smart Home Manager application, follow the steps in: M-SERV server configuration
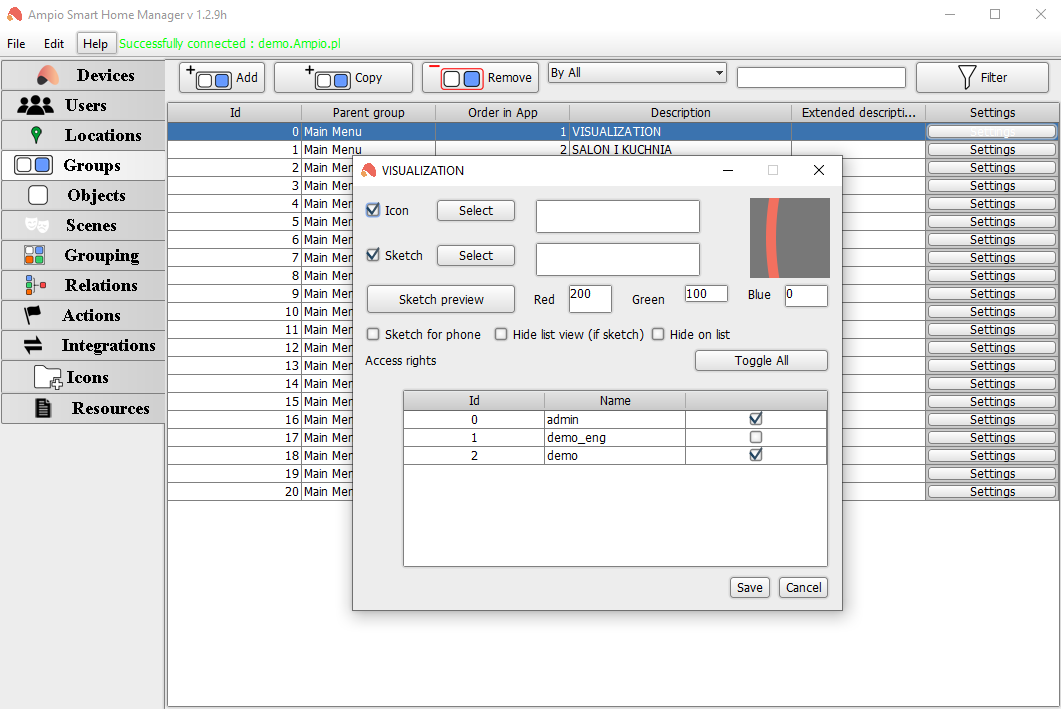
After logging in, go to the Groups tab, find the group to which you would like to add a picture on the list, and go to the group’s settings.
 Click to enlarge and open in a new tab.
Tick the box next to Sketch (this is the name for various graphic representations of rooms in the Smart Home Manager app) for the selected group and choose a picture from your computer that will serve as a visualisation for the given group. After saving the changes, remember to save the configuration on the server, e.g. by using the shortcut Ctrl+S, or in the top menu bar.
 Click to enlarge and open in a new tab.
What can serve as room graphics are: floor plans, photos, interior design visualisations, or any other chosen picture. You can add icons on the graphics and select an area on the picture, where a given functionality will be active. You can manage the value of your objects, or move to a different part of the building e.g., bathroom, bedroom, etc.
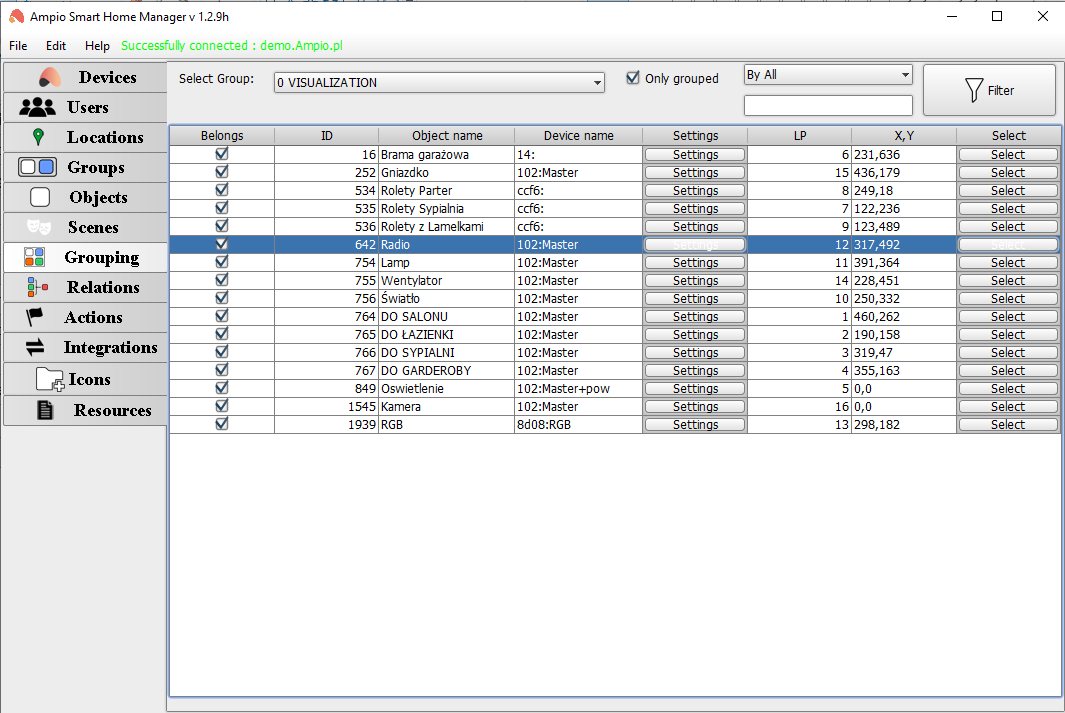
To find out more about objects and their configuration, please visit our guide: Objects - configuration in the Smart Home Manager. Adding an object to a picture starts with opening the Grouping tab in the Smart Home Manager, and selecting the group to which a picture was added earlier. In order for an object to appear on the graphics, it must belong to the selected group.
 Click to enlarge and open in a new tab.
As you can see, there is a column with coordinates for the location of a given object on the picture. If you want to choose the location og the object in a more visual way, select the last option Select in the last column.
 Click to enlarge and open in a new tab.
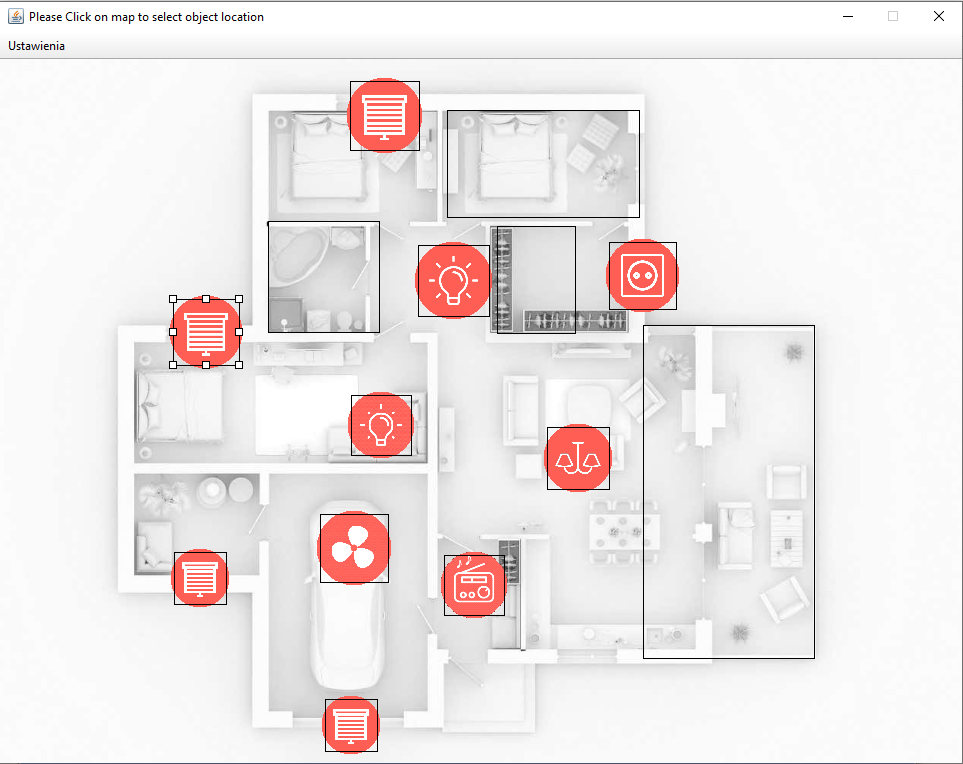
You will see a preview of the uploaded picture. Here, you can place the object in an appropriate place, and also change its size. Setting up the size of the icon is tantamount to determining the area in which you will be able to control the selected object by clicking on it. Once you select the final position of the object, you can close the window.
What, if you would want an object to show only on the picture and not on the group’s list? In such a case, you should go to the same tab as before, and open the Settings window for the object. Here, you will see a couple of options, including Show object only on sketch. Ticking the box and saving the settings will let you achieve that goal.
Remember that for all changes to be visible in Ampio UNI, you must save the configuration on the server.
In order to use such a configuration, you will have to manually create a group-type object. You can do that in the Objects tab by clicking on Add and choosing Group in the Object Type. Now, for the object to act as a hyperlink to a selected group, you have to assign a group ID to it in the interpretation. Which means that you first have to go to the group’s tab and check its ID. For example, a group Kitchen has ID no. 13 - memorise it and go back to the Objects tab. Then, in the number field of the chosen object, enter the memorised number, which in this case was 13. The rest of the process of adding an object to a picture is the same as described in the previous section of this document. This way, by clicking on the selected area, you will be redirected to the assigned group.
 Click to enlarge and open in a new tab.
All done! Save the configuration on the server and enjoy the possibility of managing your building from added pictures.