Virtual devices help to extend the functionalities of the Ampio system by transmitting messages from other types of devices (eg. ZigBee modules).
To add a virtual device to the project, select the + icon shown in the right-hand side of the DEVICES table.
 Click to enlarge and open in a new tab.
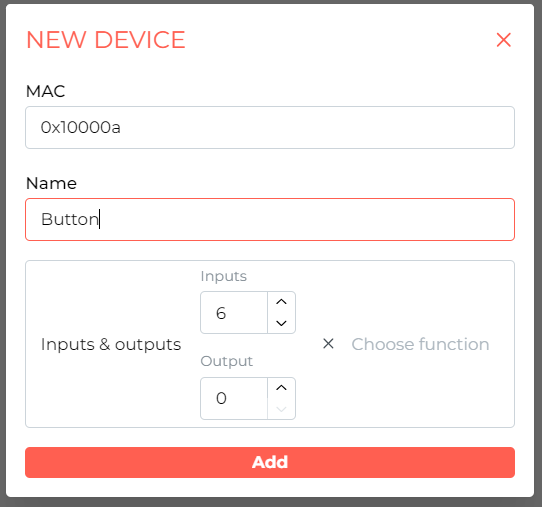
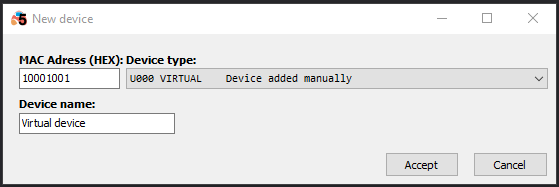
Assign the MAC address according to the device you wish to support. Select the functionalities and their number one by one, then press Add.
 Click to enlarge and open in a new tab.
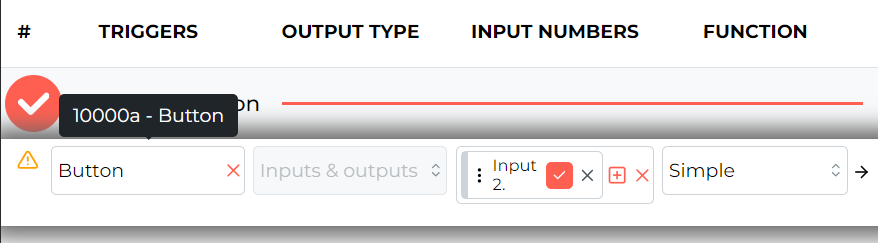
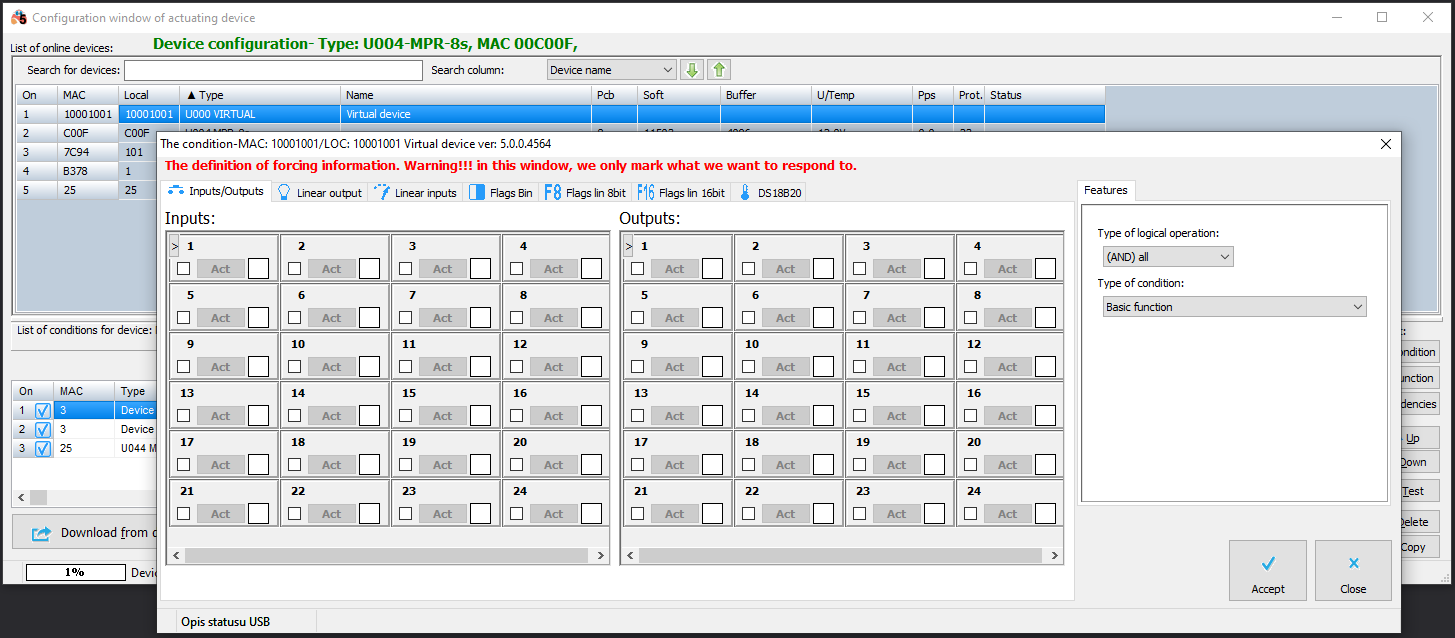
Conditions are created in the LOGIC tab. From the list of devices in the TRIGGERS column, select the device created in the previous step and create a condition as for traditional modules.
 Click to enlarge and open in a new tab.
Adding a virtual device makes it possible, for example, to integrate with external temperature sensors using Node-RED.
In this section of the guide, you will learn how to send the temperature from an external sensor to the Ampio system’s CAN network using Node-RED and a virtual device created in Ampio Designer.
Launch Node-RED and log into the interface.
Add a sensor reading:
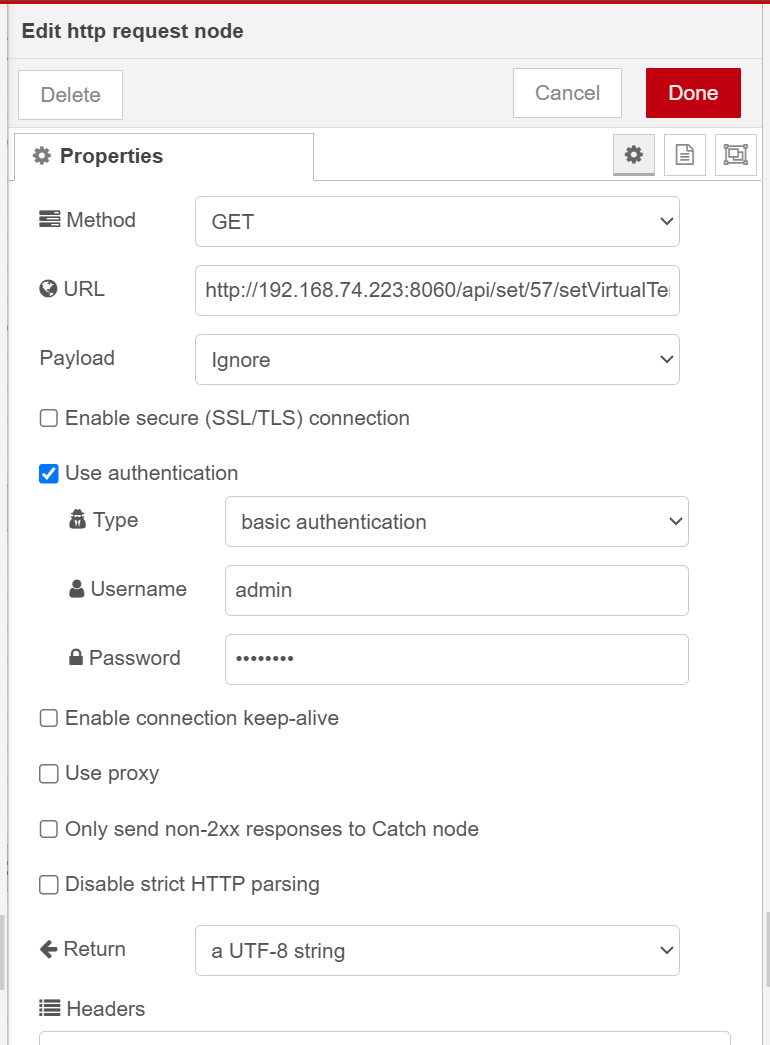
27°C).Add an HTTP request block and a temperature source.:
 Click to enlarge and open in a new tab.
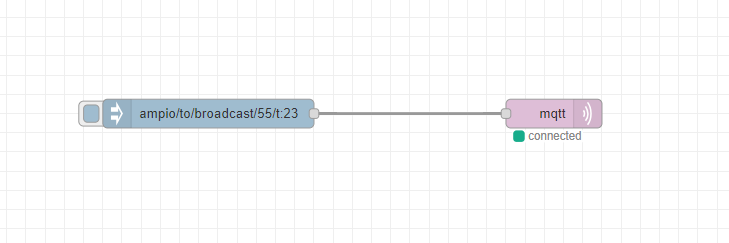
An example of a configured block is shown below.
 Click to enlarge and open in a new tab.
Now that the sensor data is available in the system, you can use it in a variety of ways:
Sensor readings will not be visible in the Ampio Designer, but if configured correctly, the readings will be on the CAN network, meaning they will work for the conditions created and will be visible in the Ampio UNI application.
*from January 2024, the Smart Home Configurator software is no longer being developed. It is recommended to use it only in substantiated instances.
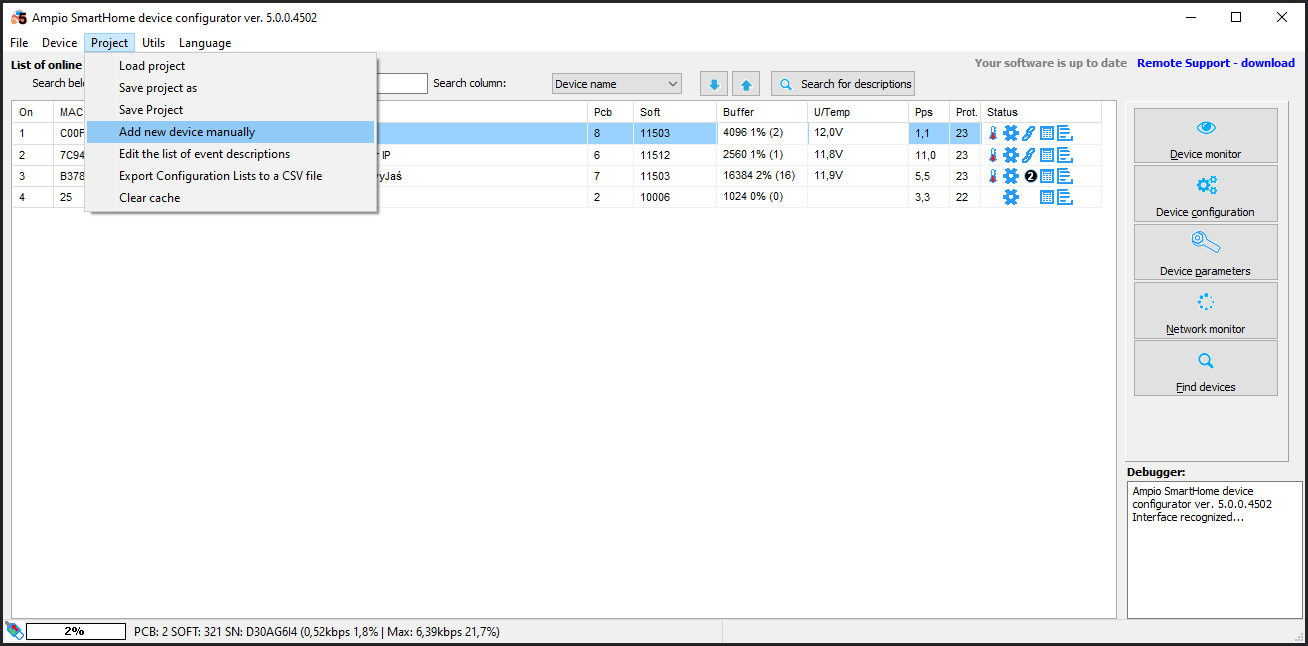
To add a new virtual device, you have to start by running the Ampio Smart Home configurator.
 Click to enlarge and open in a new tab.
 Click to enlarge and open in a new tab.
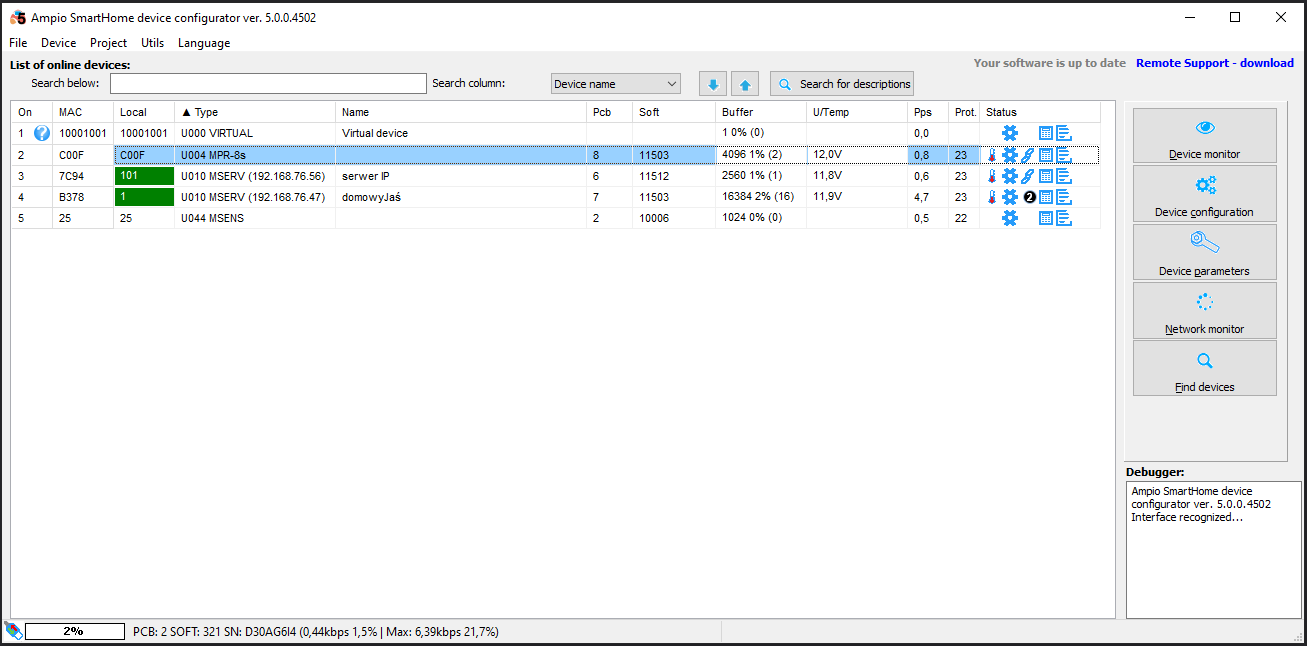
After accepting, you can see the new device on the list.
 Click to enlarge and open in a new tab.
A virtual device is on the list of devices only until the first closing of the Ampio Smart Home configurator. Remember to save the project, otherwise you will have to add it from scratch at the next launch.
You can create condition from the virtual device but not to the virtual device.
 Click to enlarge and open in a new tab.
For example, in the case of Z-Wave you can create a condition from slave inputs using the virtual device, but controlling outputs is done through the function tab of the M-CON-ZWAVE-s module.