Applies to image version 406 or higher
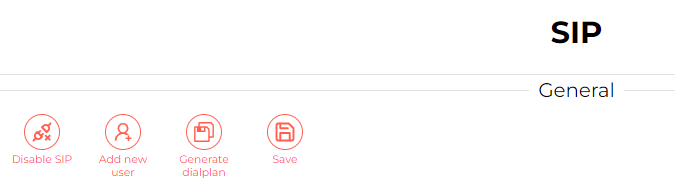
The first step is to log into the Ampio Designer tool by entering the server’s IP address in your browser. Then go to the SETTINGS -> SIP tab. If SIP has not been activated before, press Enable SIP. If it is activated, you will see the Menu as below.
 Click to enlarge and open in a new tab.
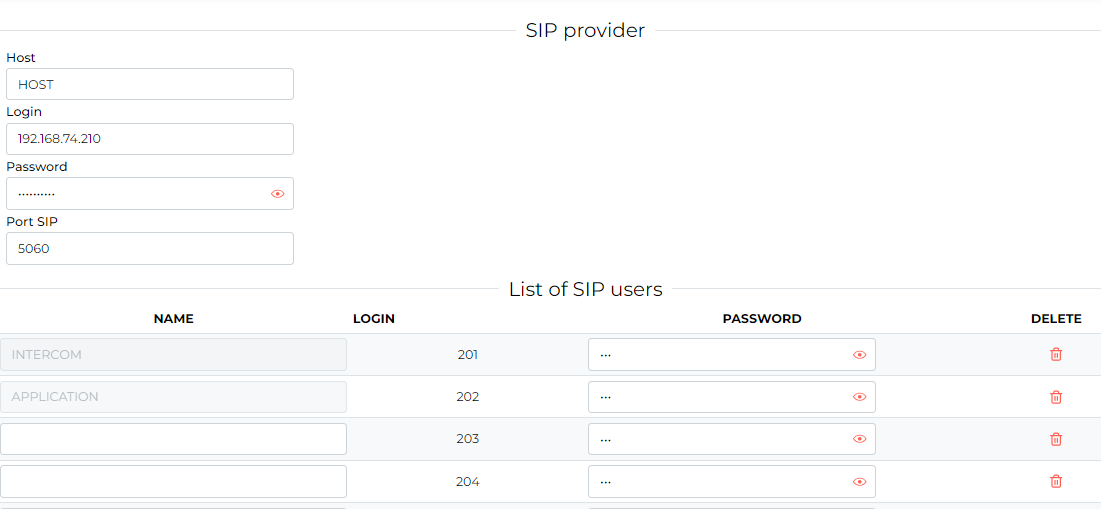
Below you can see the settings for the SIP operator and default users. In the current solution 201 and 202 are reserved for the intercom and the application.
 Click to enlarge and open in a new tab.
Default passwords are set according to the following pattern:
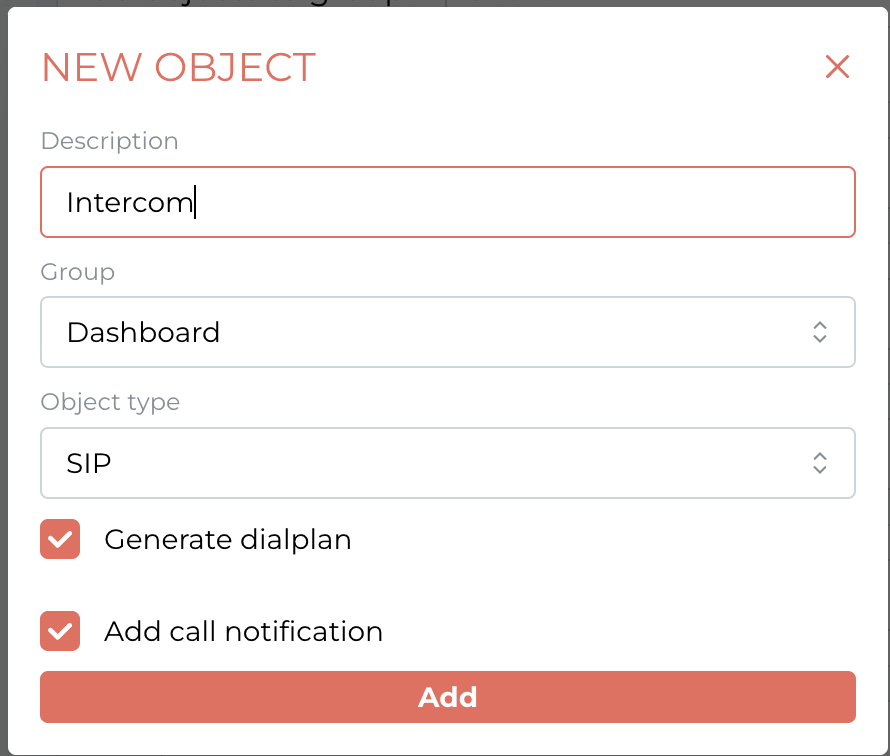
Next, in order to add the intercom to the mobile application, we go to the APPLICATION tab. Add a new empty object of type SIP to the selected location and check Generate dialplan and Add call notification if you want the intercom’s call making function to be enabled on the phone.
 Click to enlarge and open in a new tab.
After creating a new object, we can modify or immediately save the default object settings using the Save button in the top right corner.
In order to see the video in the mobile app, the relevant link must be entered together with the administrator password and IP in the Camera field. Information on what the RTSP link should look like for a particular intercom model can be found in the manufacturer’s documentation, or on dedicated websites.
 Click to enlarge and open in a new tab.
To enable voice calls, the Ampio UNI application must be allowed access to the microphone in the phone settings.
To set up the intercom, you need its IP address (for the R20A you can hold down the call button for 5 seconds and listen to the message) and the password of the admin account. Enter the IP address of the intercom in your browser and log in as admin.
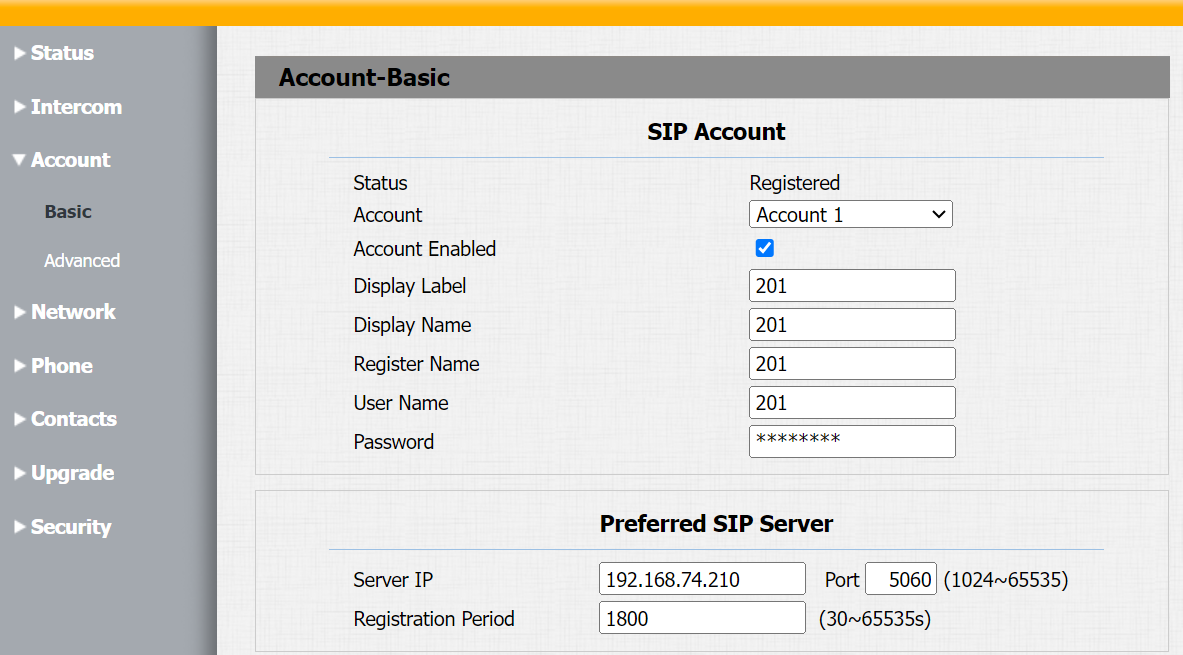
We start with the SIP account settings under Account -> Basic to log in as a user on the Ampio system.
 Click to enlarge and open in a new tab.
Then, under Intercom -> Basic, set the number you want the intercom to call for the Ampio UNI application.
 Click to enlarge and open in a new tab.
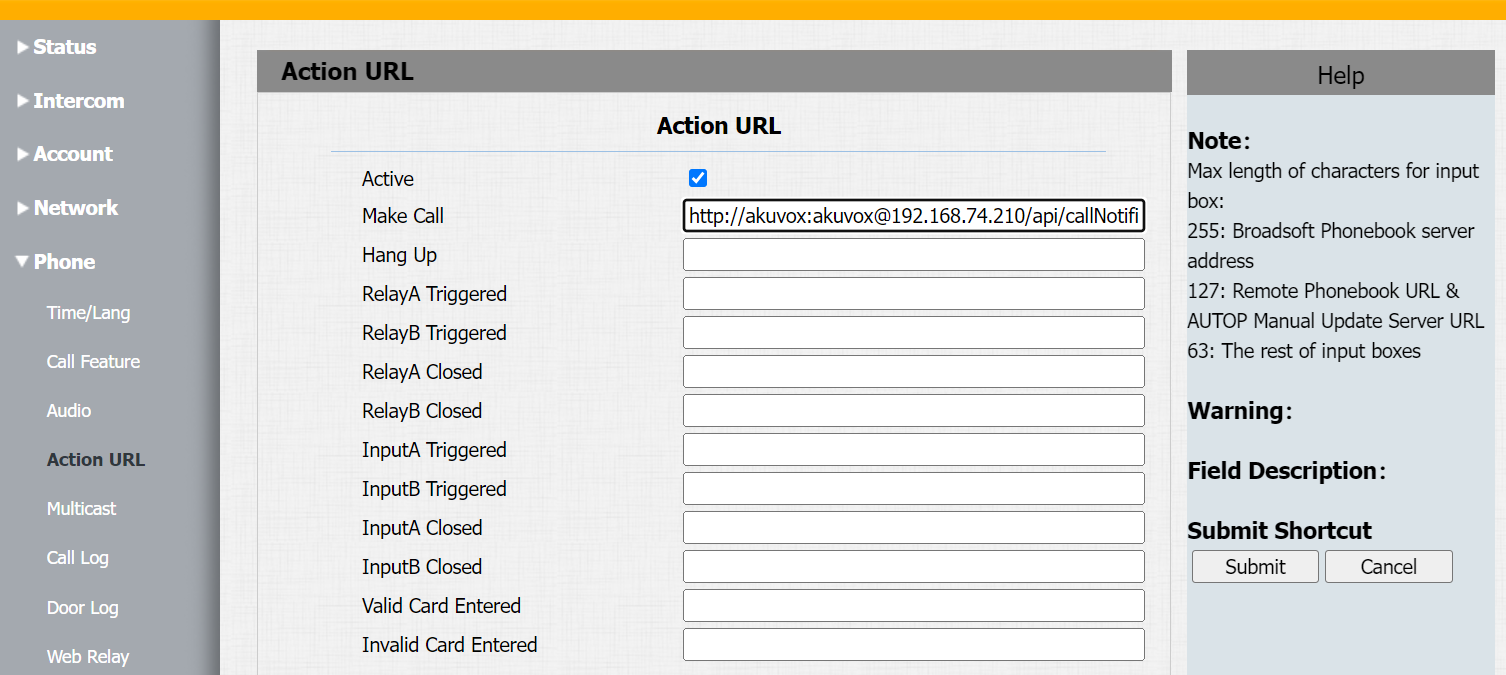
Under Phone -> Action URL enter which URL is to be called when the intercom button is pressed, in the screenshot you can see the call being invoked, optionally you can set up PUSH notifications.
 Click to enlarge and open in a new tab.
For the DoorBird intercom we will do this from the dedicated mobile app and the Administration tab.
After logging into the Administration section, we enter SIP Settings.
 Click to enlarge and open in a new tab.
We specify the IP of our server as the SIP Proxy, followed by the SIP user login details matching those of the object in Ampio Designer, in our case 201.
Save and enter the Allowed SIP Users tab.
 Click to enlarge and open in a new tab.
Here you add your Ampio UNI SIP user, whose details you have entered in the object, in our case 202.
Save the settings and proceed to Ampio UNI.
 Click to enlarge and open in a new tab.
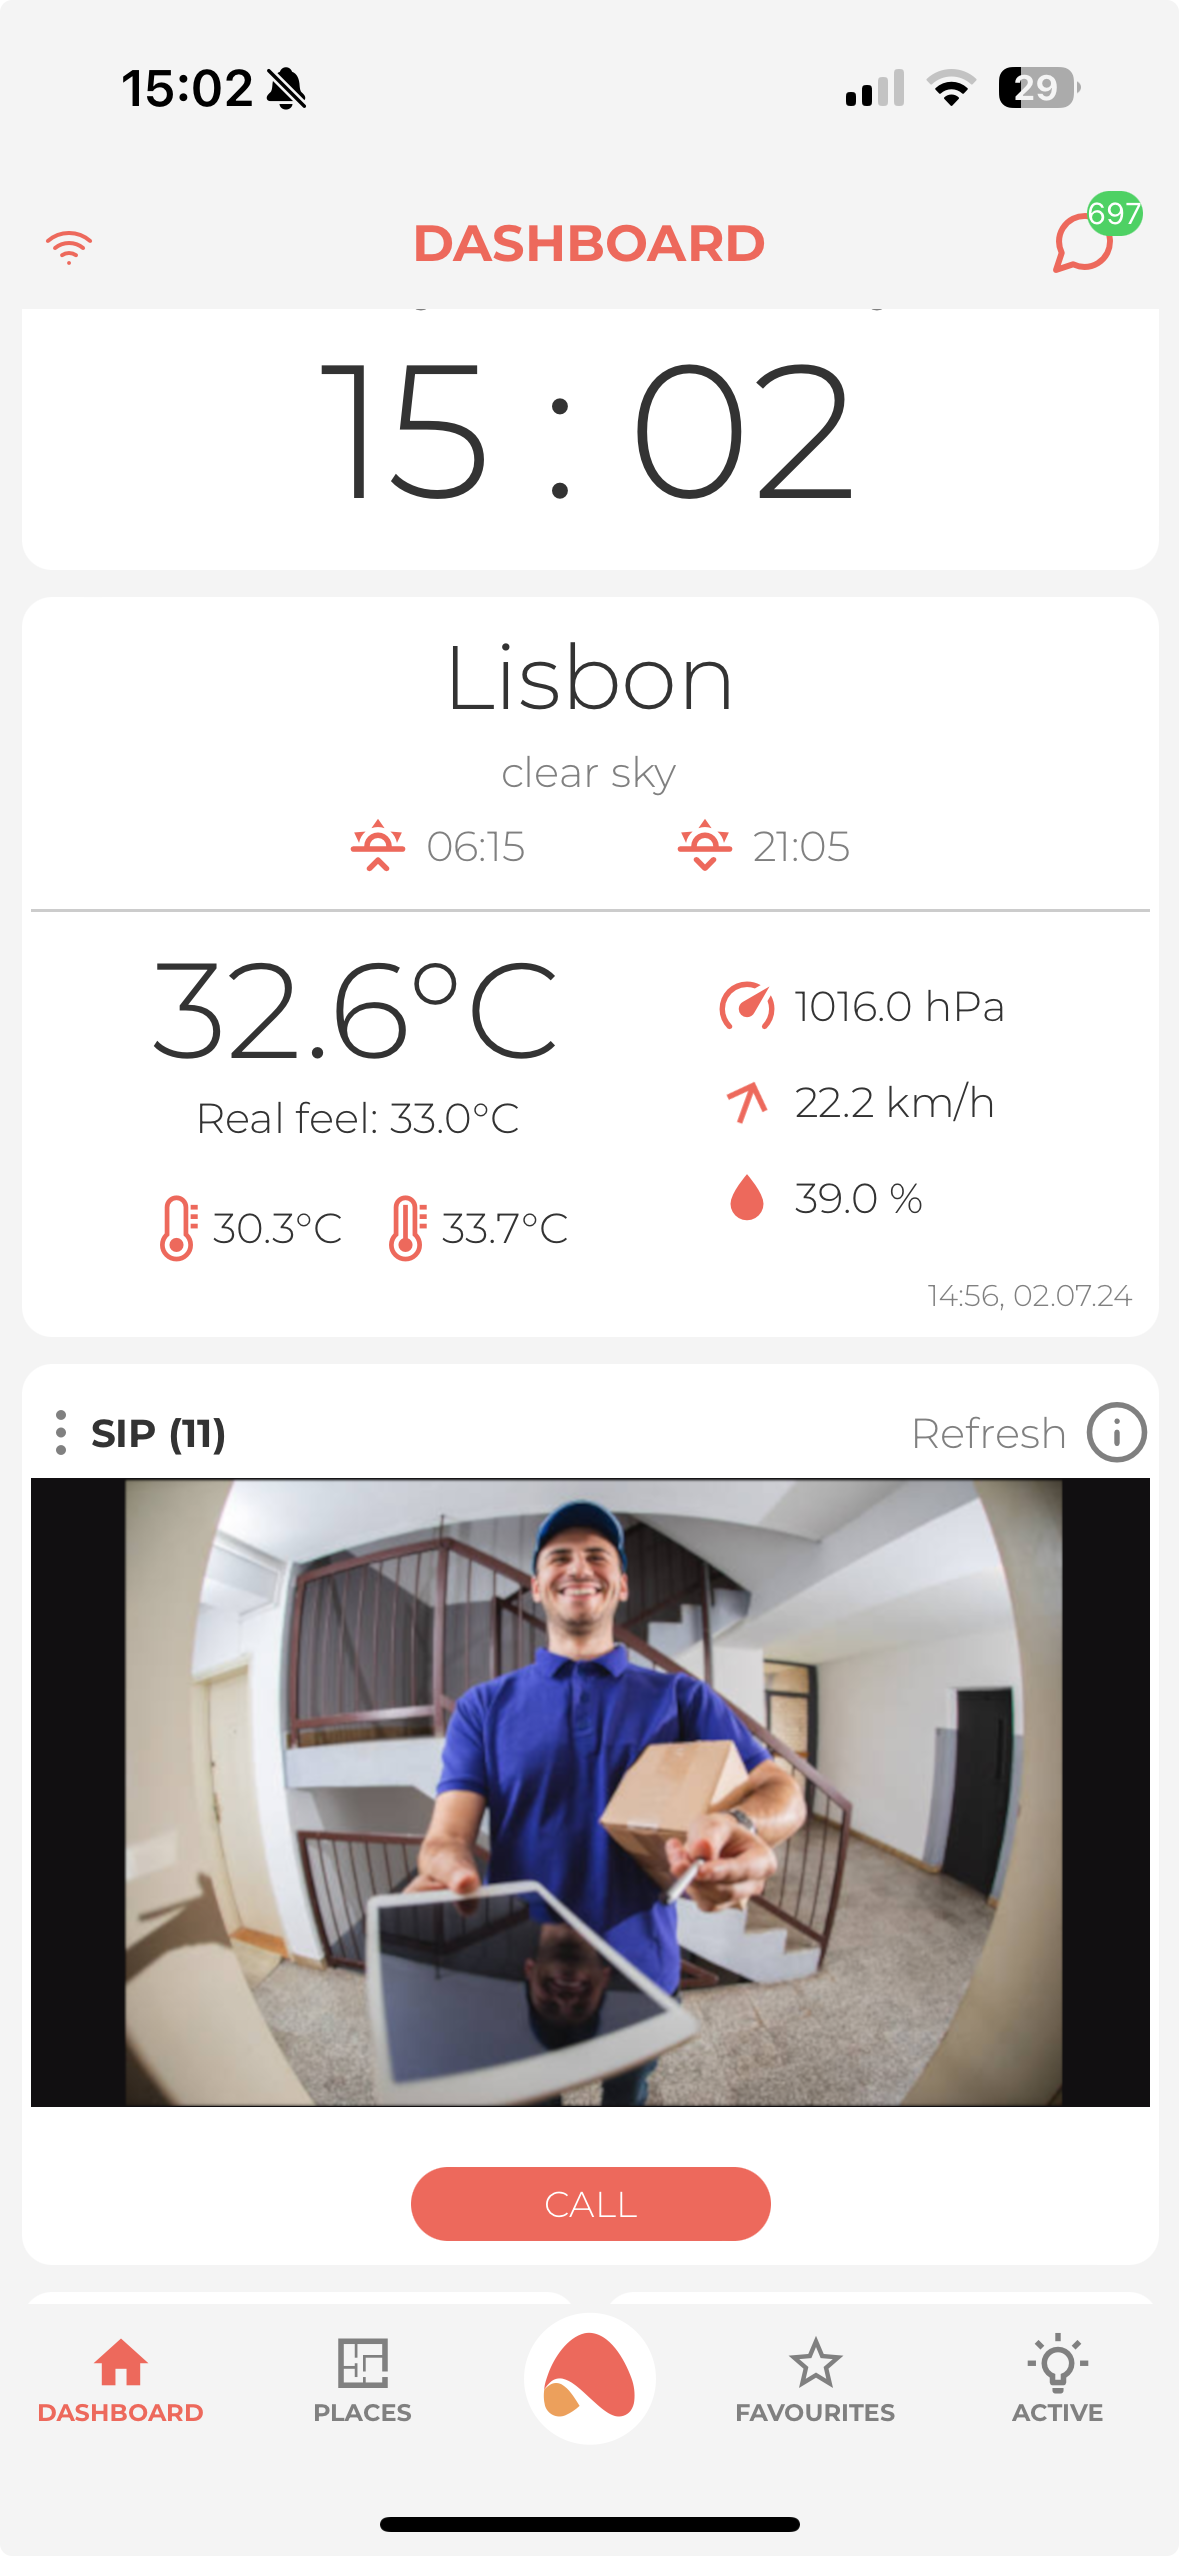
This is how our object is presented in the Ampio app - by clicking CALL we will connect to our intercom.
Ideally, it is best to first add an additional user for the intercom in the Ampio Designer software, set a strong password for them and make sure that the option “Allow events to be sent over the CAN network “ is checked in the user settings.
The next step is to set the intercom to generate, via API-HTTP, an Ampio system system an event.
To do this, enter a link of the design shown below in the browser window:
http://{DOORBIRD_API_USER}:{DOORBIRD_API_PASSWORD}@{DOORBIRD_IP}
    /bha-api/notification.cgi?
    url=http://{AMPIO_SERVER_IP}:8060/api/setEvent/255&
    event=doorbell&
    subscribe=1&
    user={USER_NAME_AMPIO_DOORBIRD}&
    password={USER_PASSWORD_AMPIO_DOORBIRD}
In the above address, replace the individual symbols with the following values:
DOORBIRD_API_USER - is the name of the DoorBird intercom user, this is found on the digital passport sheet attached to the intercom by the manufacturer, or a user specifically created to generate event 255,DOORBIRD_API_PASSWORD - is the password of the DoorBird intercom user, it is found on the digital passport sheet attached to the intercom by the manufacturer, or generated for a special user,DOORBIRD_IP - the IP address of the intercom in the local network, it can be read, e.g. on the router configuration page, through the use of IP network scanners, or on the online DoorBird website after logging in: https://www.doorbird.com/checkonlineAMPIO_SERVER_IP - Ampio server address,USER_NAME_AMPIO_DOORBIRD - the user name of the intercom on the Ampio system, created specifically for the intercom,USER_PASSWORD_AMPIO_DOORBIRD - the password set for the intercom user in the Ampio system.An example address based on the above scheme:
http://dwerex001:56fdsxXD3se@192.168.111.45
    /bha-api/notification.cgi?
    url=http://192.168.111.22:8060/api/setEvent/255&
    event=doorbell&
    subscribe=1&
    user=domofon&
    password=SDSEW#@#@#DEWKLDLKFD
A structure like the one below, where the password and user are given in the link, is also possible:
http://dwerex001:56fdsxXD3se@192.168.111.45
    /bha-api/notification.cgi?
    url=http://domofon:SDSEW#@#@#DEWKLDLKFD@192.168.111.22:8060/api/setEvent/255&
    event=doorbell&
    subscribe=1
Paste the link created in this way into the address input field of the browser and confirm, e.g. with enter. When the intercom accepts the configuration correctly, it will return a message about the successful entry of the configuration, which will be similar to the following:
{
    "BHA": {
        "RETURNCODE": "1",
        "NOTIFICATIONS": [
            {
                "event": "doorbell1",
                "subscribe": "1",
                "url": "http://192.168.111.22:8060/api/setEvent/255",
                "user": "domofon",
                "password": "SDSEW#@#@#DEWKLDLKFD",
                "relaxation": "10"
            }
        ]
    }
}
Adding a link is also possible via the mobile app and the Administration tab. After selecting the intercom to be set up, there is an item “HTTP(s) Calls” in the list of options. Go into it and add a link similar in form to the following:
http://domofon:SDSEW#@#@#DEWKLDLKFD@192.168.111.22:8060/api/setEvent/255&event=doorbell&subscribe=1
When these operations are performed, pressing the intercom button on the system will generate event no. 255 and we can use it, for example, to trigger the buzzer or flash the lights.
Note, however, that this event, like all events generated by the Ampio API, will not be seen by the server. Conditions cannot therefore be created from it.
 Click to enlarge and open in a new tab.
The steps described here do not need to be performed if the intercom was configured from the beginning in Ampio Designer according to the procedure described in SIP settings in the Ampio Designer. However, they are necessary to be performed for previously configured intercoms if you want to add support for call making functionality to them.
To enable the intercom to make calls to your phone (via the Ampio UNI application), go to the SETTINGS tab in the Ampio Designer and then to INTEGRATIONS. The next step is to add a new integration, which will look as follows:
 Click to enlarge and open in a new tab.
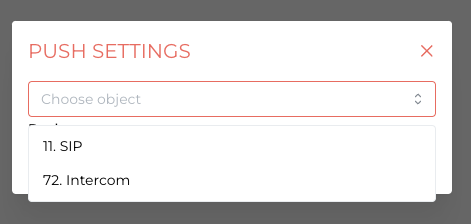
Then go to the cog icon and, in the settings, select the “SIP” object created earlier and, if necessary, select the users if you do not want to activate the intercom ringing function on the telephone for all users of the installation.
 Click to enlarge and open in a new tab.
To enable voice calls, you must allow the Ampio UNI application to access the microphone in the phone settings.