In this guide you will learn how to create scenes, add objects and create schedules in the Ampio UNI application.
Creating scenes allows you to quickly prepare your house for a specific situation, for example, a meeting with friends, a movie night, romantic dinner, etc. Do not waste your time configuring the lights, music, blinds and other smart devices every time from scratch. Do it once, change the settings of the whole house with only one click, and enjoy the time you saved.
To create a new scene, in the Ampio UNI application, click on the button with the Ampio logo in the middle of the bottom menu and select the SCENES tile.
 Click to enlarge and open in a new tab.
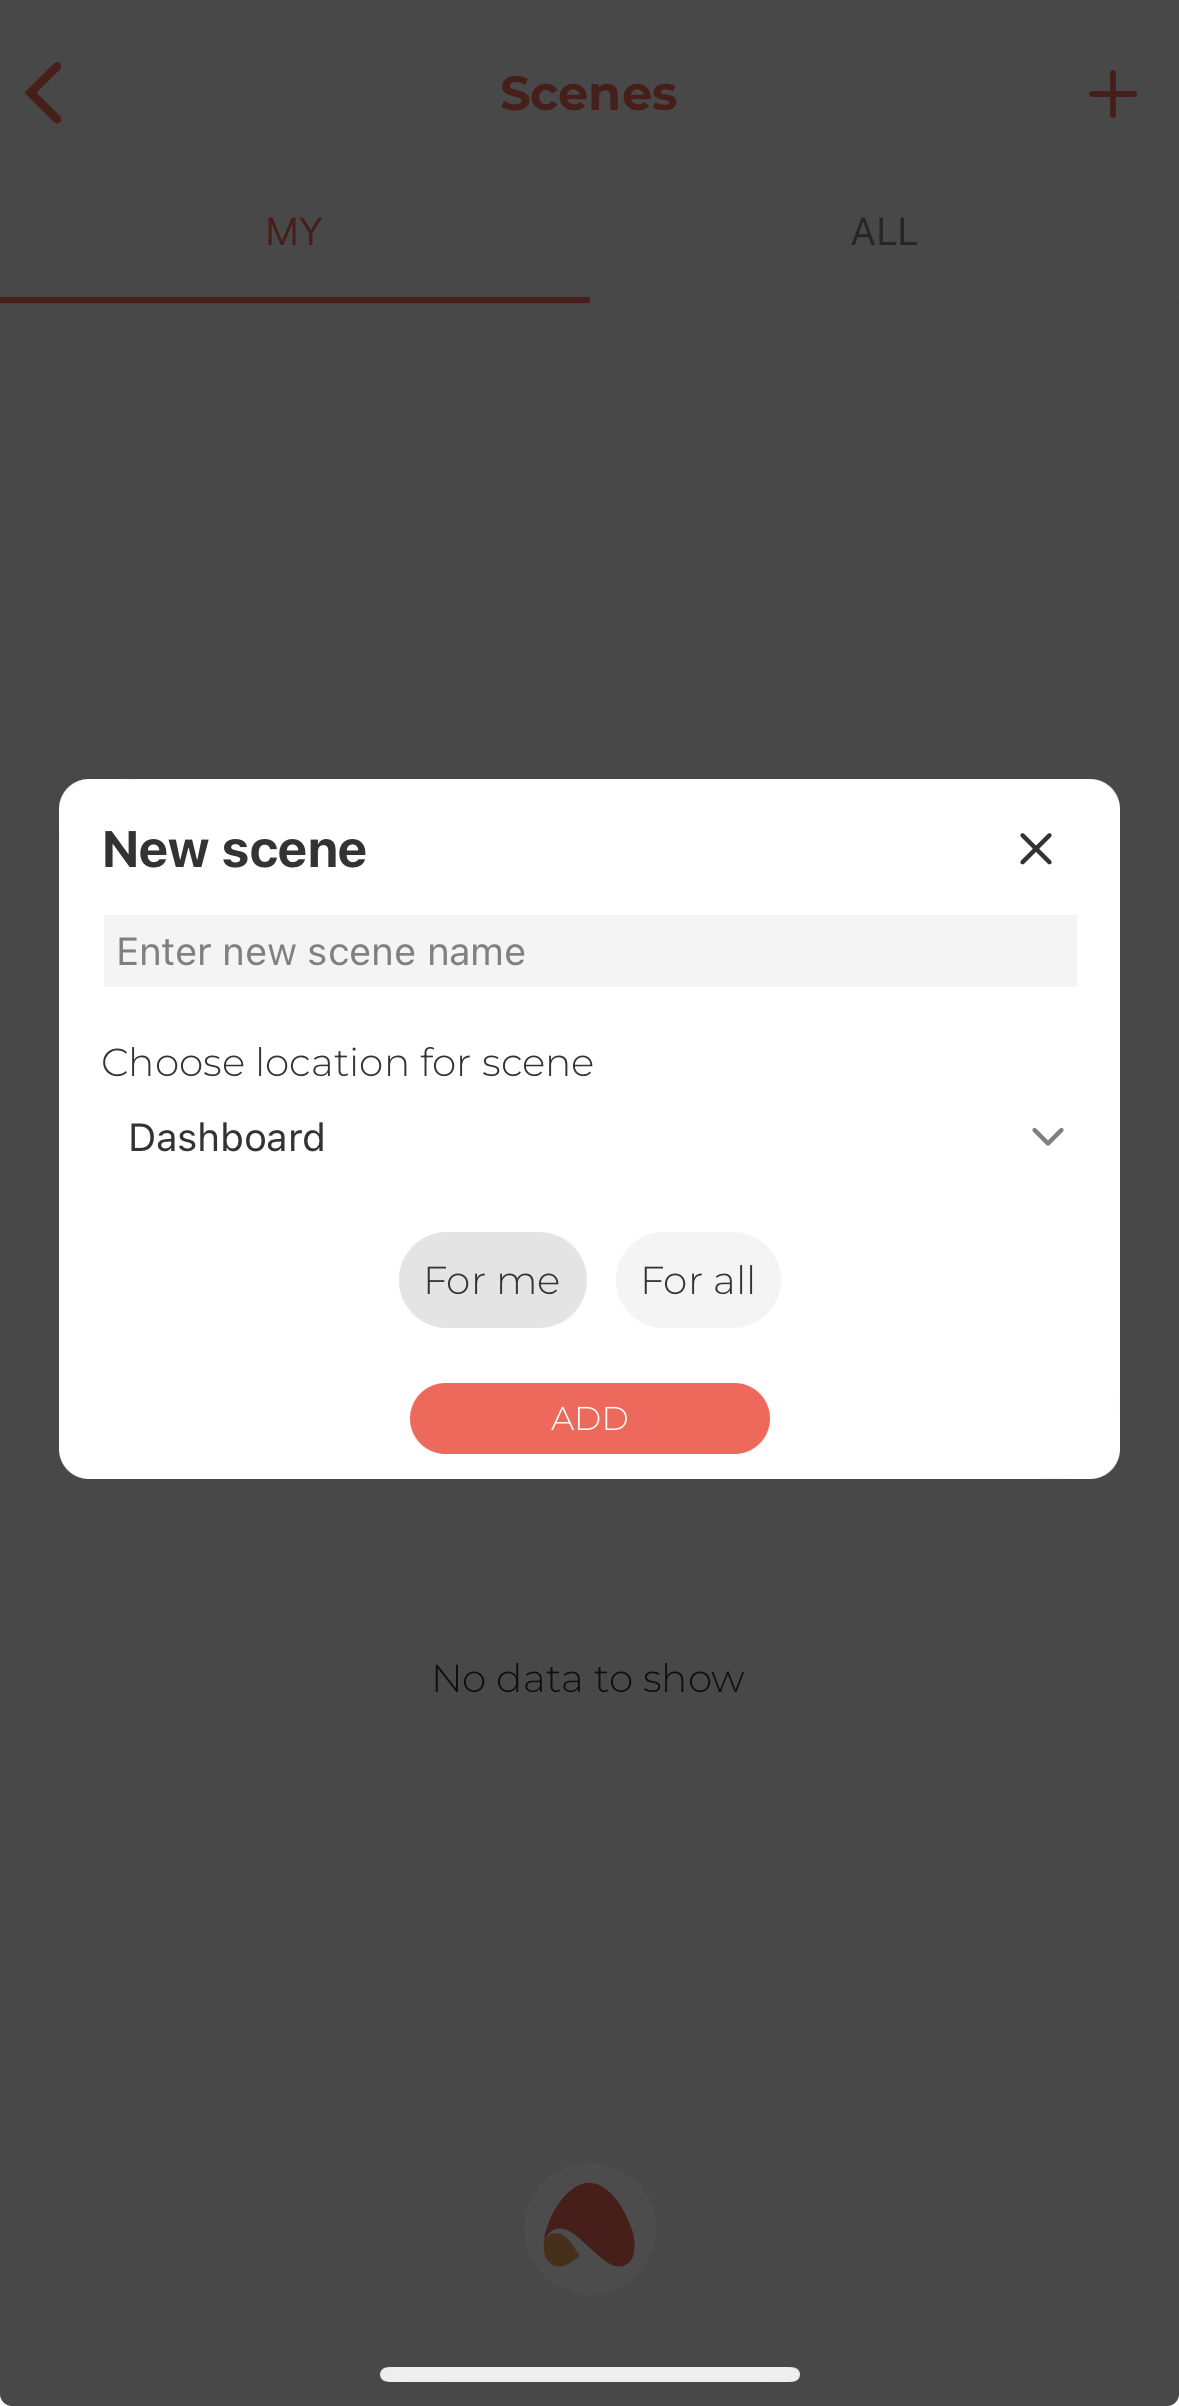
Then click on the plus icon in the top right corner. The following window will appear:
 Click to enlarge and open in a new tab.
In the first line we can give a name to our scene, while in the second line we choose where we want it to be displayed in the application. Depending on whether we are creating a scene just for a particular room or for the whole building, we can place it in a tab of our choice from the PLACE list or on the DASHBOARD. We also have the option of displaying the created scene only in the SCENES section, here all the scenes that we have created will be visible.
Once all the selections have been made, we click the Add button.
Due to the implemented geolocation solutions, it is possible to create scenes for me in the Ampio UNI application. These scenes are visible to other users of the installation, but other users cannot edit them. This ensures that scenes that depend on the location of the user in question and his or her phone cannot be accidentally rewritten to another user, which could cause them to work incorrectly.
In addition, at the stage of creating installation users, the installer can define the rights of individual users so that, for example, they have/do not have access to the view of all scenes, or they can/cannot add scenes in the application.
After creating a new scene, a window with its contents will be displayed. There are two tabs available in the window: devices and schedule. Let’s focus on the first one to begin with. You can add any number of devices that you want to control in a given scene to the devices tab. Before adding a new device, please note the option Control the state of the device during scene creation. If you do not want the devices at home to change their state during the scene creation, just click on the toggle button.
In order to add a new device, click the plus icon visible in the top bar. A window with two editable fields will pop out, similarly to the previous step of creating a scene. In the first field, you will choose a place where the devices that you want to control are located. The second field will let you choose devices that are to participate in the scene. After clicking ADD, the devices will be shown in a list form. If you want to add devices from different locations at home to the scene, you just have to go through the same steps for each place when adding devices. When creating a scene, you will have an option to set the time, after which a given device should respond, which allows you to create, for example, a stair effect when switching on lights, and many other possibilities.
Please remember to set, which device should be on and which off, when a given scene is active. All newly added devices are OFF by default, which means that activating the scene will switch them off. In order to change it, click on the icon of the device that you wish to switch on.
That is it! Your first scene will be saved after clicking on the arrow with a floppy disk icon icon in the top right corner.
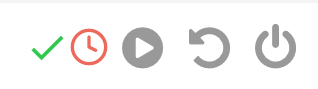
Each of the created scenes will be displayed with the following 3 icons:
 Click to enlarge and open in a new tab.
Turn the scene on
By clicking on the first icon on your left, you will activate the scene, If the scene is active, a green tick will appear to inform you about it.
Reverse the scene
This curved arrow allows you to reverse the state of all devices in the scene to their state from before activating the scene.
Turn the scene off
This icon allows you to switch all devices linked to the scene off.
Let’s go back to the second tab mentioned in the beginning of this article - SCHEDULE. Each scene can have a schedule added to it, in order to activate it automatically. It does not mean that you will not be able to manually activate or disable the scene. You can add a new schedule by going to the schedule tab in the scene view and clicking on the plus sign in the top right corner. The scene can be triggered by various events, not only time schedule. The following functions will be displayed after adding a schedule:
Option
Here, the functions that you are already familiar with will be available, i.e.:
Time
Activating selected functions can be related to a specific hour, sunset or sun rise. If you decide to create a schedule based on sun rise and sunset, instead of a specific hour, you will have to set how many minutes before or after the selected time of day will the scene be activated.
Day
Here, you can choose on which days of the week the selected scene will be active. If you want to use a different schedule for different days, you only have to add another schedule and select the right days.
If your scene has an associated schedule, a clock icon will be displayed in each of the scenes' view.
 Click to enlarge and open in a new tab.
You are all set! Now you can invite your friends and show them how you get your house ready for their visit with only one click.