In this guide, you will learn how to create automation functions in the Ampio UNI application and how to form conditions and assign actions to them.
During the everyday use of a building, one often gets new ideas on how to enhance the installation with new functions. Setting up automation functions allows the smart building to work independently. You could, for example, initiate a certain action based on the time of day, status of blinds, lights, and many other factors. You will not have to worry about leaving the lights on when you are not at home, if you create an automation that will switch off all the lights when you leave home. Do you ever forget to close the garage door for the night? Creating an automation function of closing the garage door at a specified hour will forever solve that issue.
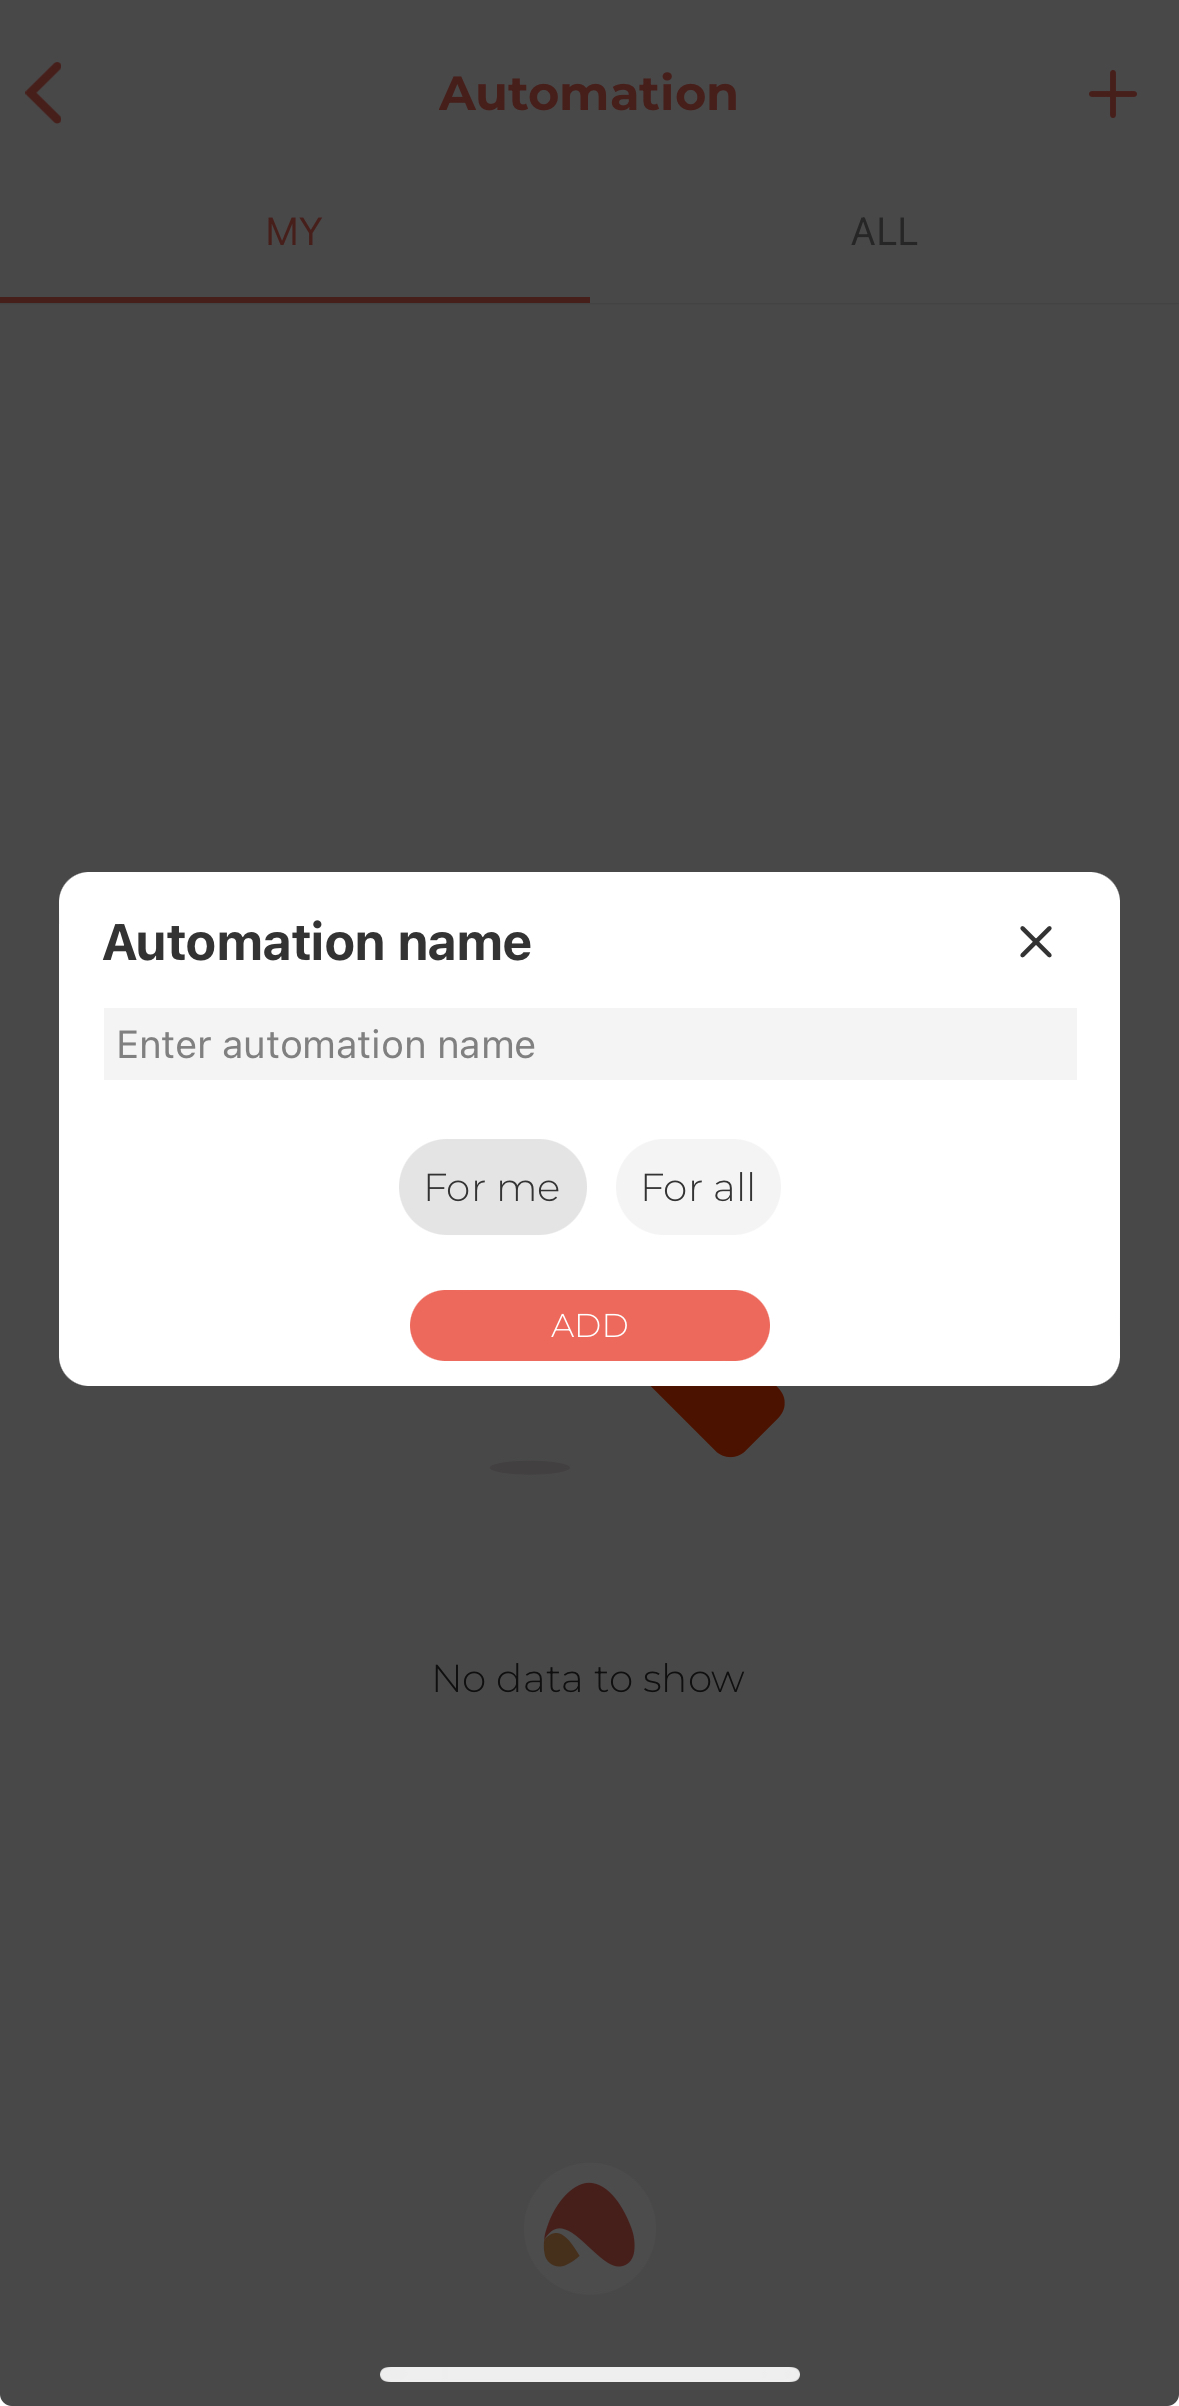
To create a new automation function in the Ampio UNI application, click on the Ampio logo in the middle of the bottom menu and select AUTOMATION from the list, then click on the plus icon in the top right corner. A window will pop up, where you can add a name for the automation function. Once you have done that, click OK to confirm.
 Click to enlarge and open in a new tab.
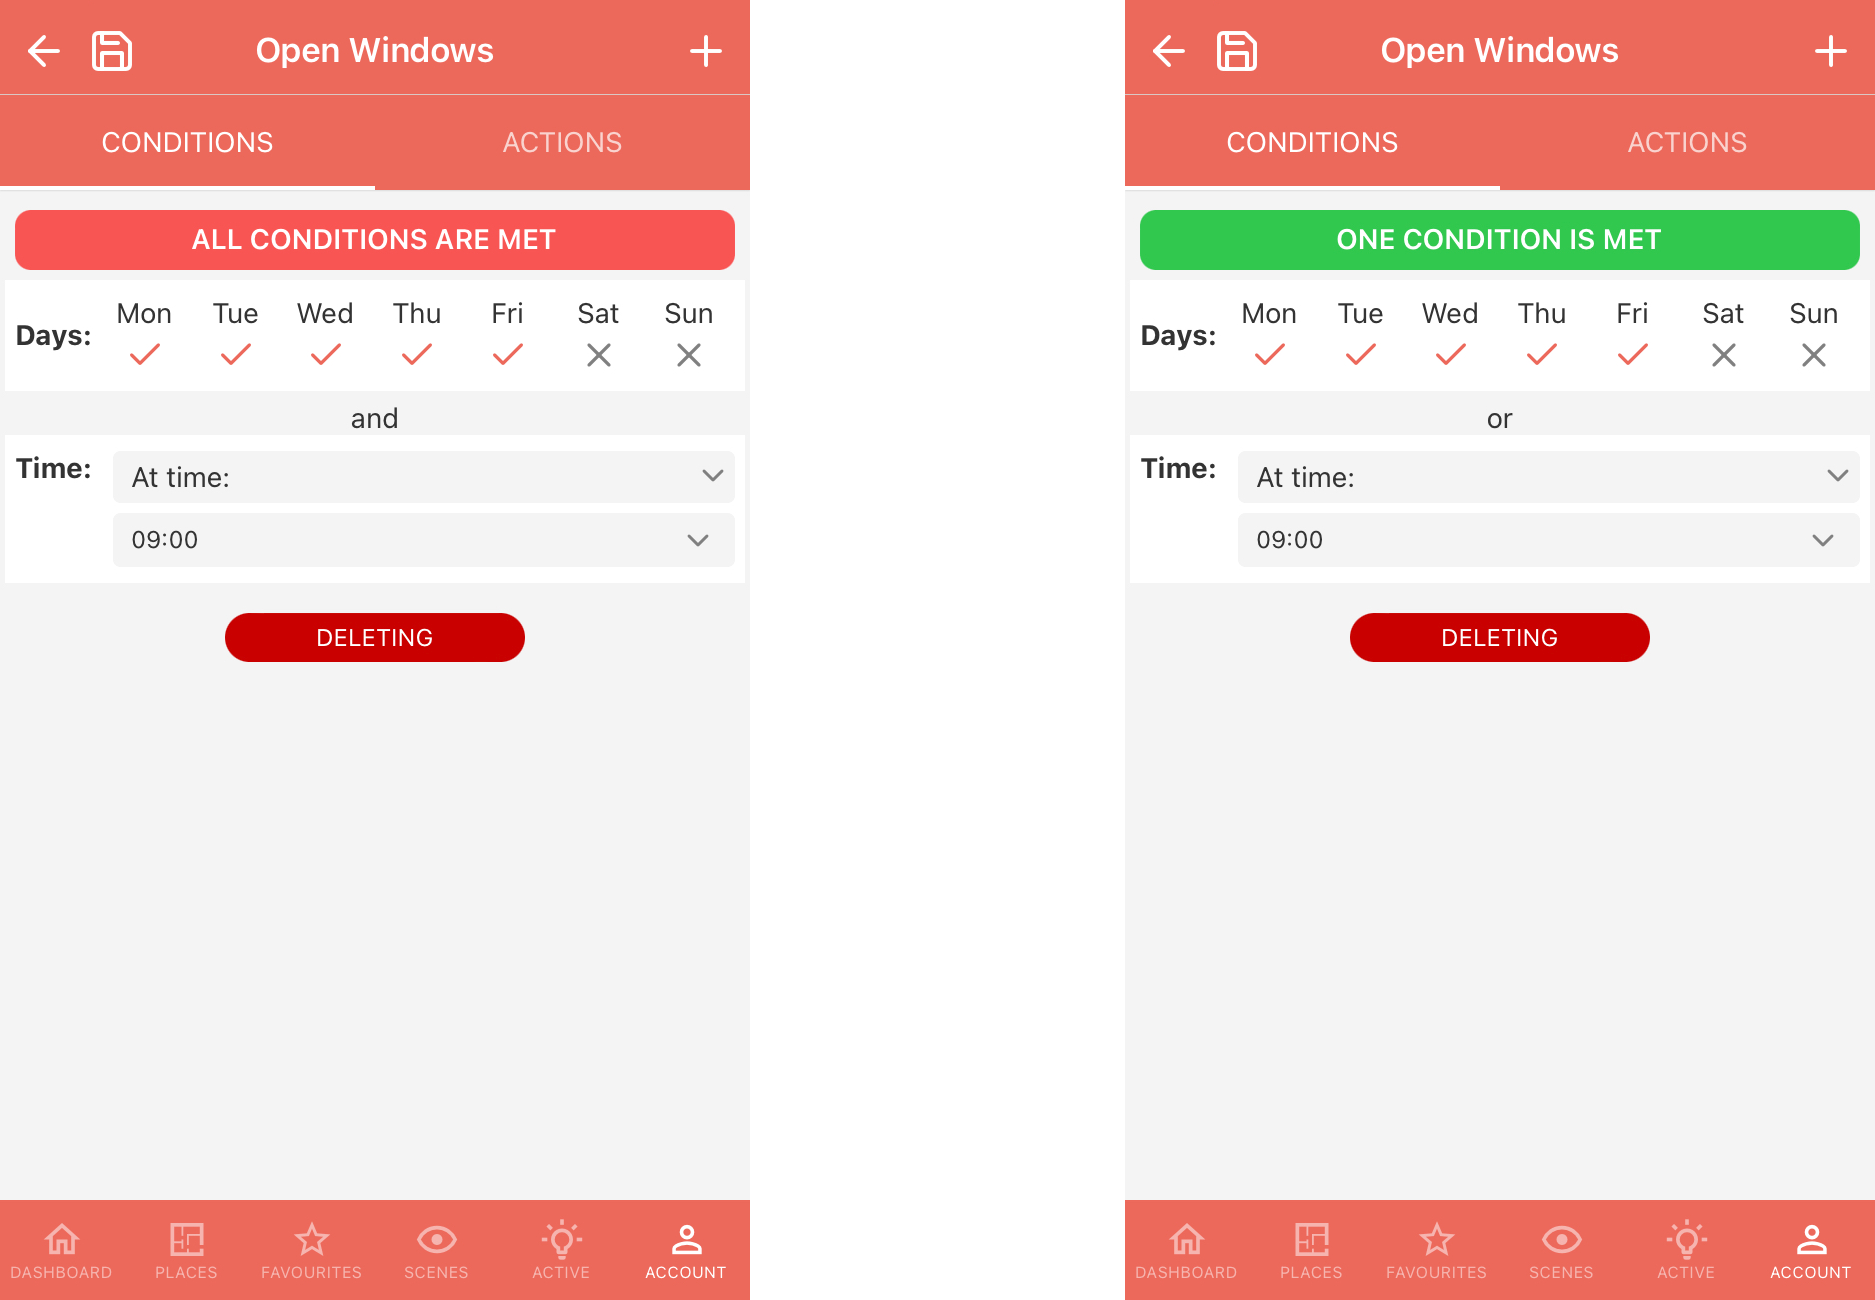
Once an automation function is created, a window with its contents will pop up. There you will see two tabs: conditions and actions. Conditions of the automation function determine when a defined action should be performed. To add a condition, click on the plus symbol in the top right corner. This will display the following pop-up:
 Click to enlarge and open in a new tab.
The available conditions types are as follows:
Days
Adding a condition to Days will let you choose the days of the week in which a certain actions must be initiated.
Time
Adding a condition to Time will provide you with the following options:
Object
When adding a condition to an Object, you have to select a place, in which the object is located, from the list, as well as its name. After adding the object, you can choose if the condition must be met when the device is active, or inactive.
Event
It is also possible to add a condition to an Event by selecting the desired event from the available list.
Location inside
An applicable automation function will be performed when you are in a specific location. You can set the location by dropping a pin on the map and defining the distance from the centre of the pin in which the automation should start working.
In order for location-based automation (geofencing) to work correctly, it is required to grant the application access to your location always and enable motion detection.
Location outside
Similarly to the type described above, this automation function will be activated when you leave the defined area marked with a pin on the map.
Once you have created a condition, you can move to selecting actions, or adding more conditions, if your automation should be dependent on a couple of conditions. On the created list you will see a new button appearing that will enable you to activate the action when all conditions are met, or when only one of them is met.
 Click to enlarge and open in a new tab.
If you want to delete any of the conditions on the list, all you have to do is click the button DELETING and select the condition(s) that you want remove.
Let’s move on to the tab, where you can assign actions to the automation function. Adding actions works in the same fashion as adding conditions. There are, however, different choices in terms of the action types that can be selected:
Scene
Here, a scene can be selected that will be activated, if particular conditions are met. You can learn more about scenes in Scenes in the Ampio UNI application.
Object
In the same way that it was the case with creating conditions, when selecting an object that is to be controlled, you will have to specify the place and device.
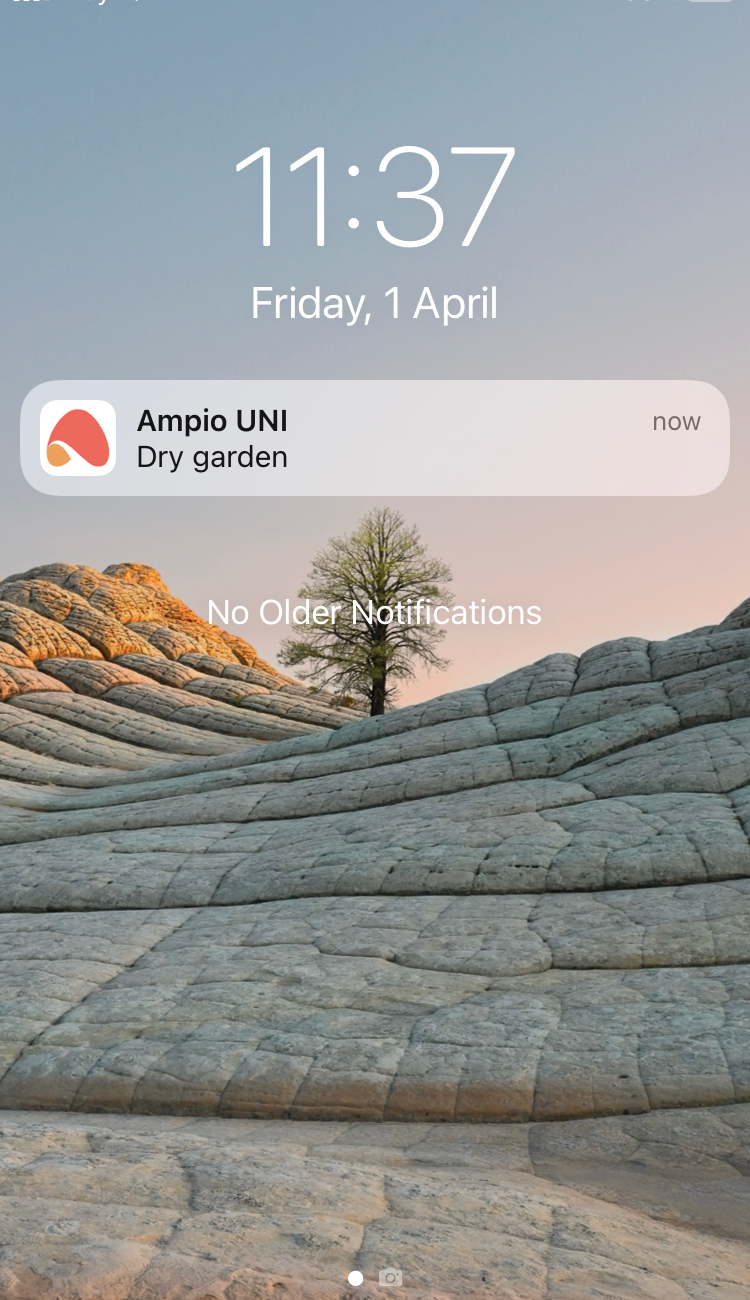
Push
Push notifications allow you to enter a message that will be communicated in a notification, and to choose a user to whom the push notification will be delivered. Push notifications are the notifications displayed on your mobile phone.
 Click to enlarge and open in a new tab.
Push messages can also be accessed in the Messages list available in the ACCOUNT tab, or can be accessed directly from the Ampio UNI dashboard under the speech bubble icon in the top right corner.
Event
An even can be initiated when all specified conditions are met, when you select a certain event from the available list.
Message
If you do not want to receive push notifications, but you wish to receive a message when a certain condition is met, this can be achieved with this action type. The message will be available in the main list of messages, together with all the push notifications.
Audio
By selecting an audio type action, we can specify the audio device to be affected by the automation and one of the following actions that this device will perform:
Multiple actions can be added to a single automation function. As soon as everything is set up, you can save the automation function by clicking on the arrow with a floppy disk in the top left corner.
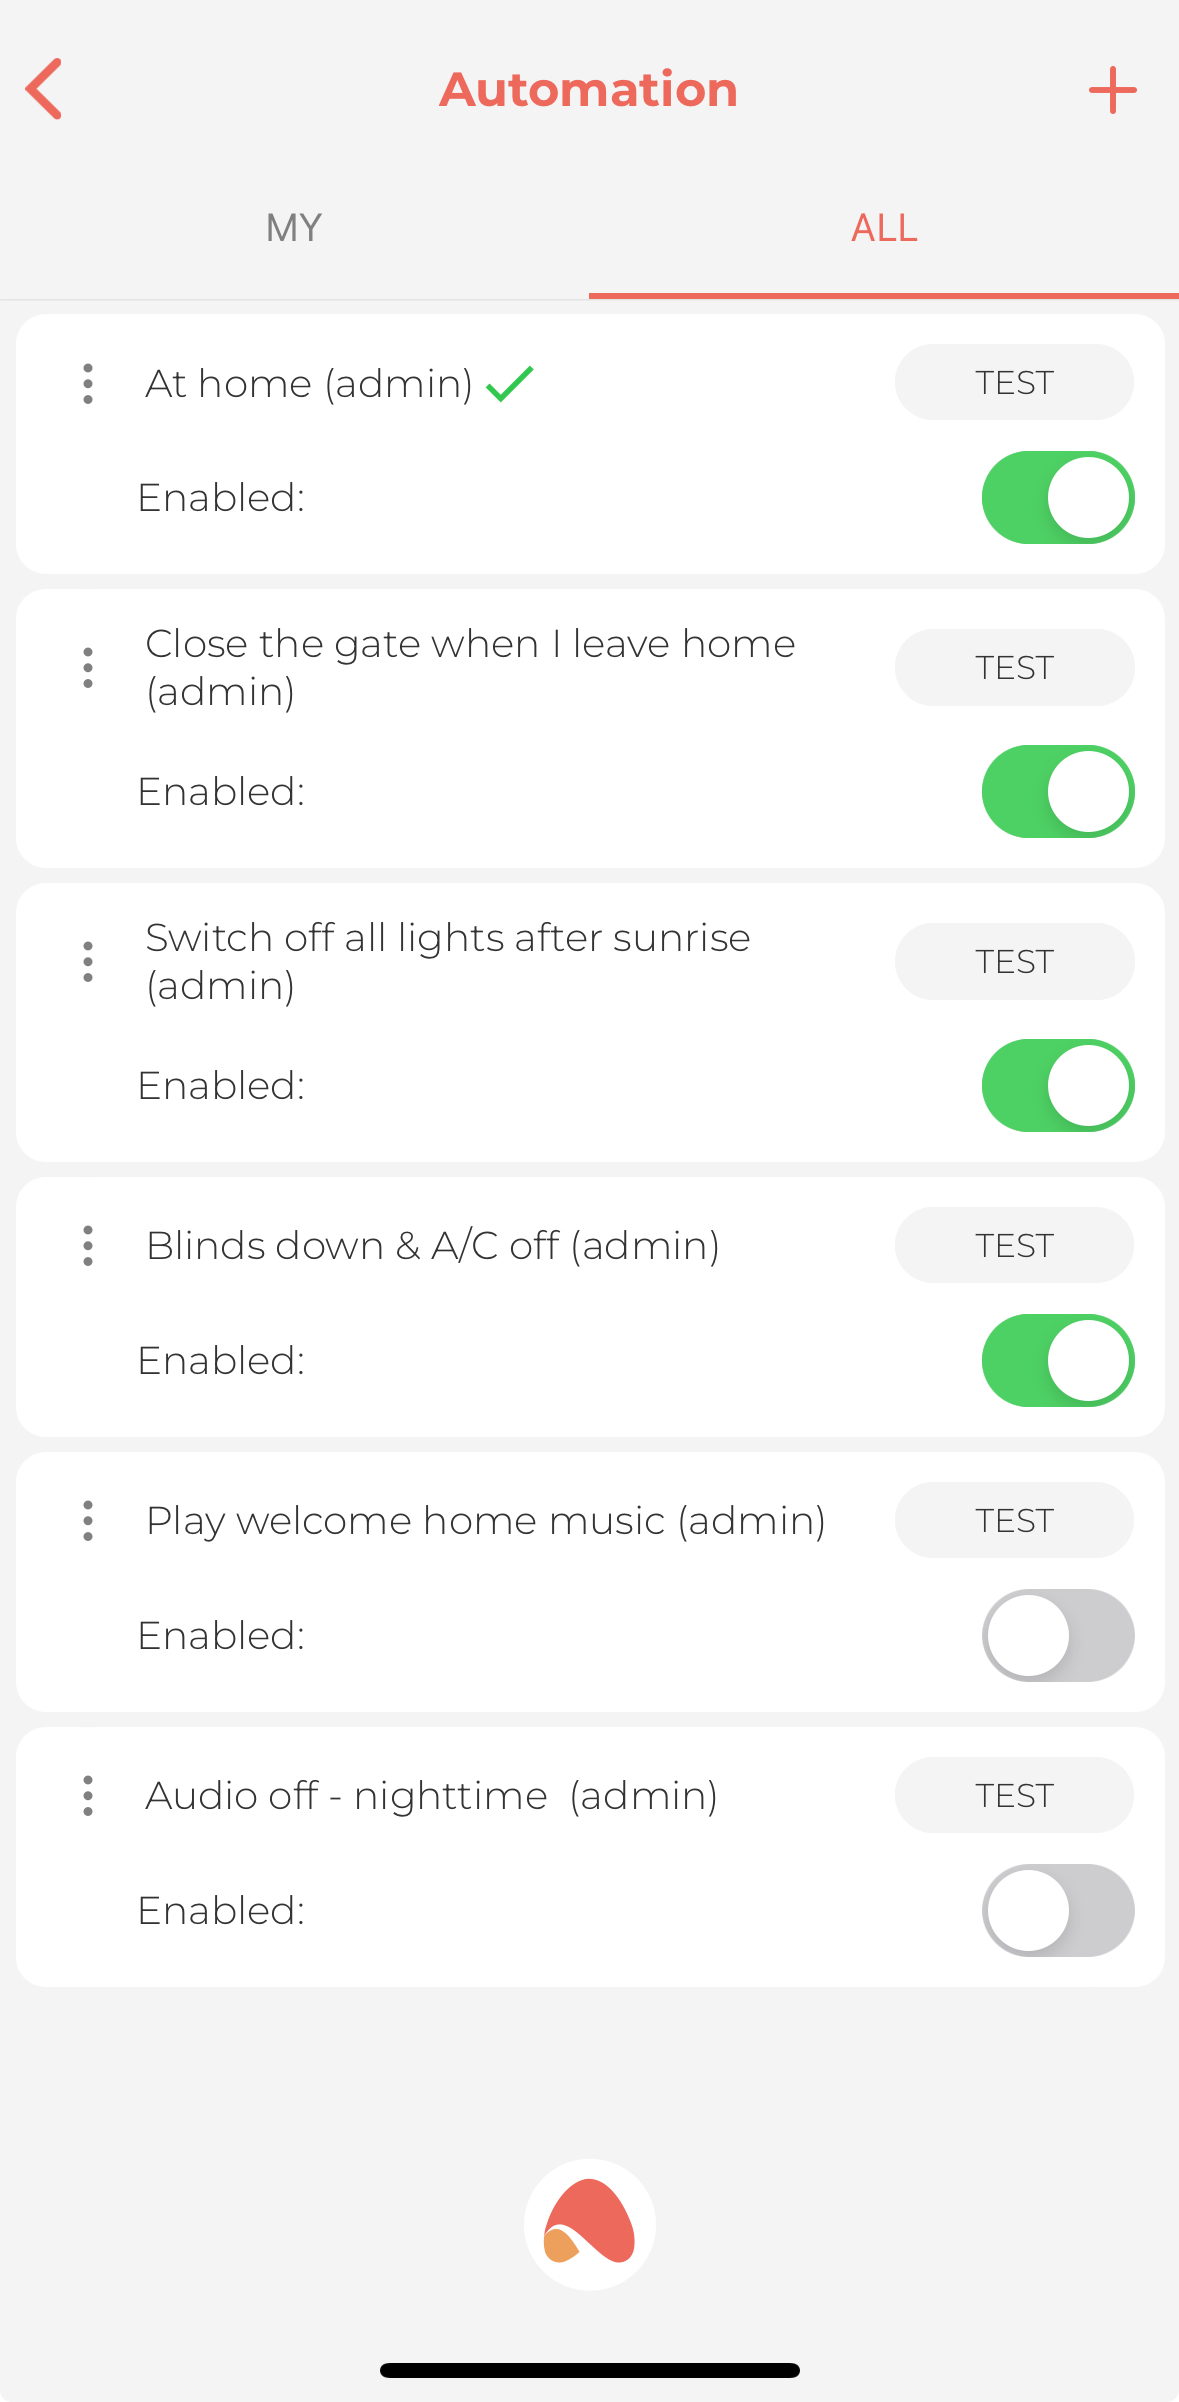
The automation function that you configured will now work independently, if only the set conditions are met. Plenty of automation functions can be created for a smart building installation. Each automation will be displayed with the following icons:
 Click to enlarge and open in a new tab.
If you want to permanently remove any of the automations from the list, simply click on the three dots to the left of the name of the automation in question and select the “Remove automation” option. The other options available from this level are to change the name of the automation and to set the “cooldown time". The cooldown time is the time during which the automation is temporarily idle. For example, if we have a PUSH notification set as an action every time the intercom bell is pressed, then if someone presses the bell 10 times, one after the other, we would get 10 messages on the phone. To avoid such a flood of messages, we can set a cooldown time of, for example, 20 seconds, so that even if we press the bell continuously, we will get one message that someone is ringing the intercom, and another only in 20 seconds, which can give us enough time to answer the intercom.